There is something truly magical about a softly glowing candle filling a room with warmth and a beautiful scent. Now imagine that candle was made entirely by you!
DIY candle-making is one of those crafts that feel fancy and complicated but are actually super fun and beginner-friendly.
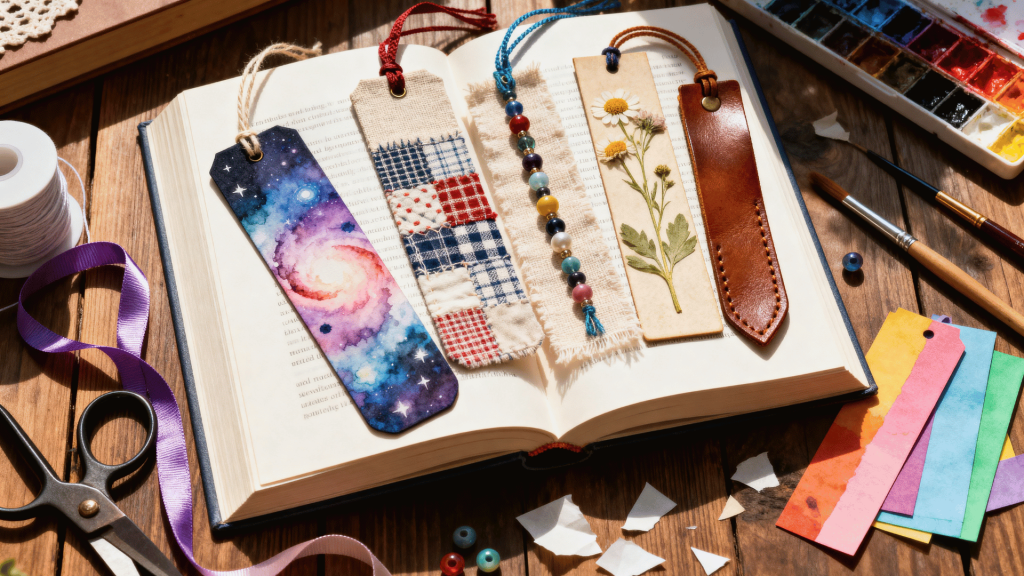
You get to choose your own scents, colors, and containers, making every candle completely one-of-a-kind, just like other diy home decor crafts that add a personal touch to your space.
If you want cozy vanilla vibes or fresh floral feels, the possibilities are endless. So light up your creative spirit, because you are about to find your new favorite hobby!
What is DIY Candle Making?
DIY candle making is the process of creating candles at home using wax, wicks, and fragrance oils. By melting wax and pouring it into containers or molds, you can design candles in different shapes, colors, and scents.
It’s a beginner-friendly craft that combines creativity with functionality, allowing you to make decor pieces that are both beautiful and useful.
If you enjoy hands-on hobbies, learning easy diy projects can introduce you to many more fun ideas like this.
Making candles at home comes with several advantages:
- Cost-effective: Save money compared to store-bought candles
- Customizable: Choose your own scents, colors, and styles
- Eco-friendly: Use natural wax like soy or beeswax
- Perfect for gifting: Handmade candles make thoughtful gifts
Types of Candles You Can Make at Home
Before you start making candles, it helps to understand the different types you can create at home, as each style offers a unique look and purpose.
| Type of Candle | Description | Best For |
|---|---|---|
| Container Candles | Poured into jars or cups | Beginners, home decor |
| Pillar Candles | Freestanding candles without containers | Decorative use |
| Taper Candles | Long, thin candles for holders | Dining and events |
| Wax Melts | Scented wax without a wick | Aroma use |
| Decorative Candles | Artistic or themed designs | Gifts and decoration |
How to Make a Candle at Home
Learn how to make candles at home with this easy and beginner-friendly process that requires only a few basic materials and simple steps.
Material Needed
To start making candles at home, you’ll need a few basic materials that are easy to find and simple to use for beginners.
- Wax (soy, paraffin, or beeswax)
- Candle wicks
- Containers or molds
- Fragrance oils (optional)
- Candle dyes or color blocks (optional)
- Double boiler or melting pot
- Thermometer
- Stirring sticks or spoons
- Wick holder or clips
- Glue dots or adhesive for wick placement
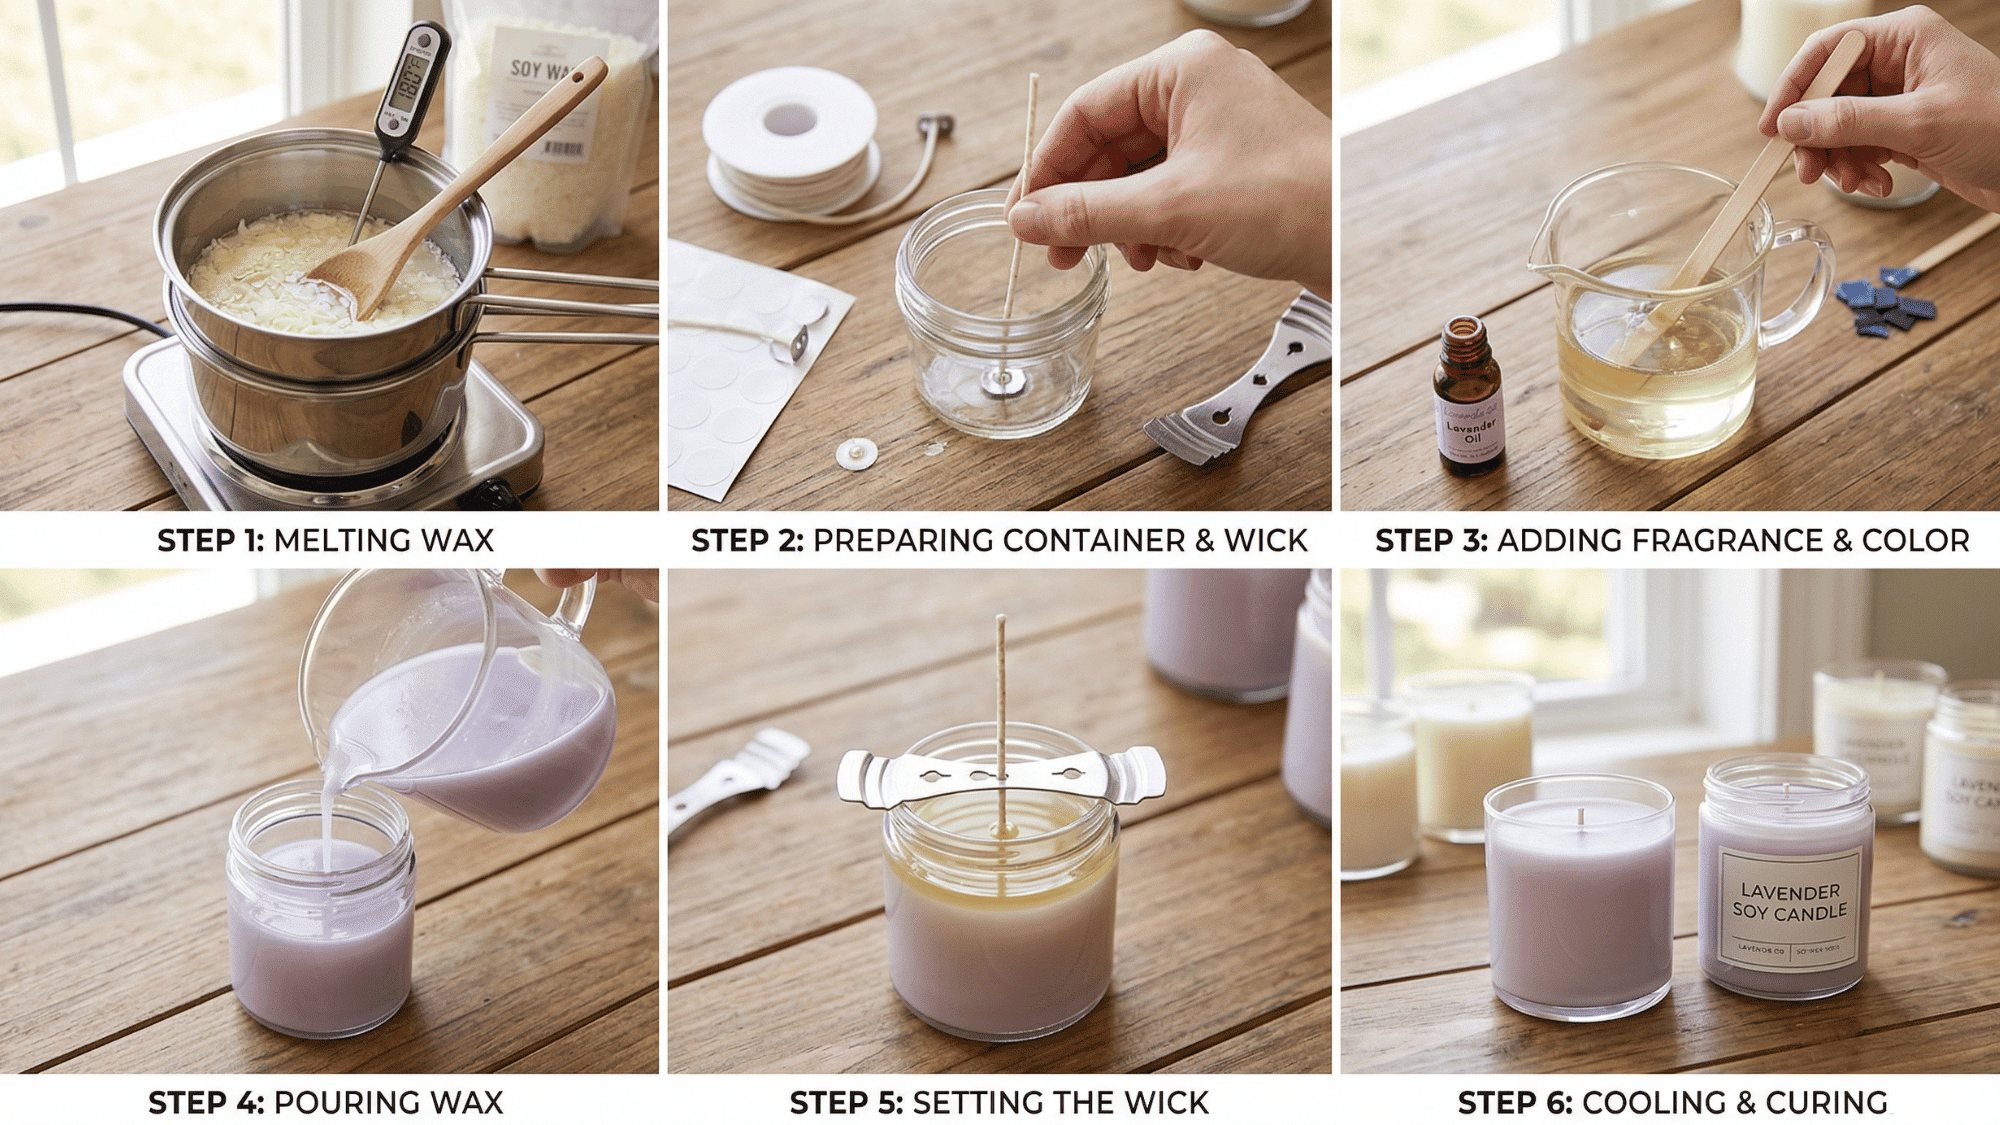
Step 1: Melt the Wax
Start by melting your wax in a double boiler to avoid direct heat. Place the wax in a heat-safe container and let it melt slowly. Stir occasionally to ensure even melting and prevent burning. Use a thermometer to monitor the temperature for best results.
Step 2: Prepare the Container
While the wax is melting, prepare your container or mold. Fix the wick at the center using glue dots or adhesive. Make sure the wick stands straight and stays in place. You can use a pencil or a stick across the top to hold it upright.
Step 3: Add Fragrance and Color
Once the wax has melted and cooled slightly, add the fragrance oil and, if desired, the dye. Stir gently to mix everything evenly. Avoid adding fragrance when the wax is too hot, as it can reduce scent strength. Follow recommended ratios for best results.
Step 4: Pour the Wax
Carefully pour the melted wax into your prepared container. Pour slowly to avoid air bubbles and spills. Leave a little space at the top for a clean finish. Make sure the wick remains centered while pouring.
Step 5: Secure the Wick
After pouring, adjust the wick if needed to keep it centered. Use a wick holder or stick to hold it in place as the wax begins to set. This step ensures even burning later. Avoid moving the container once the wax starts cooling.
Step 6: Let It Cool and Cure
Allow the candle to cool at room temperature without disturbance. This usually takes several hours to fully harden. For best results, let the candle cure for 24–48 hours before using. Proper curing improves scent throw and overall performance.
Creative DIY Candle Ideas to Try
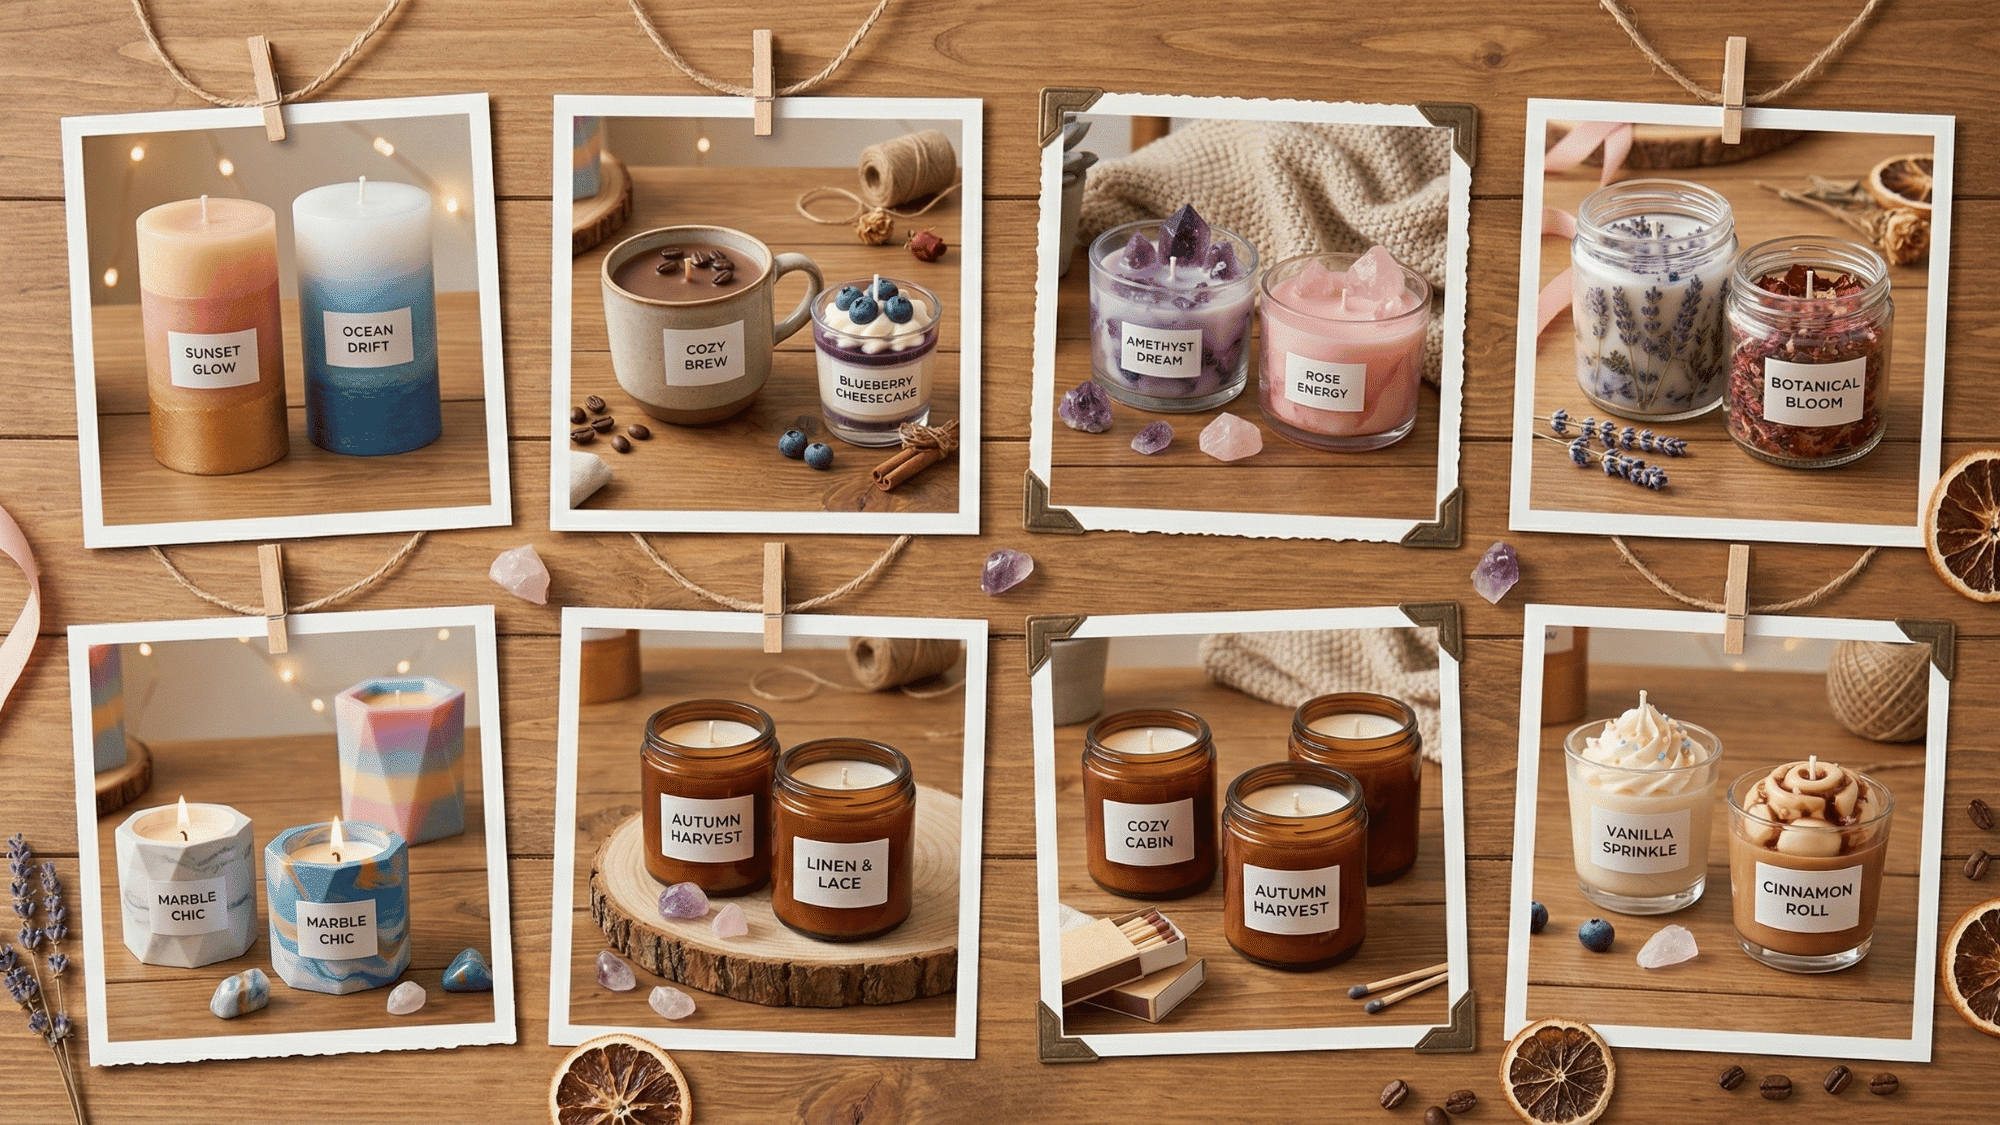
Once you’ve learned the basics, experimenting with creative candle designs can help you enhance your skills and make unique, eye-catching pieces.
- Layered Color Candles – Create visually appealing candles by pouring layers of different colors.
- Ombre Candles – Blend shades gradually for a smooth color transition effect.
- Dried Flower Candles – Add pressed flowers for a delicate and natural look.
- Coffee Candles – Use coffee beans or coffee scent for a rich, cozy vibe.
- Dessert Candles – Design candles that look like cakes, cupcakes, or whipped cream.
- Marble Effect Candles – Swirl colors together to create a marble-like pattern.
- Crystal-Inspired Candles – Shape wax to mimic natural crystals or geodes.
- Scented Jar Candles with Themes – Customize scents and colors based on seasons or moods.
Wrapping It Up
Who knew that a little wax, a wick, and a splash of fragrance could bring so much joy?
Candle making is more than just a craft; it is a creative escape that fills your home with warmth, beauty, and scents that tell your own story.
As you grow more confident with every pour, you will find yourself experimenting with new combinations and falling more in love with the process.
If you make them for yourself or share them with others, each candle carries a little piece of your heart. So keep melting, keep mixing, and never stop creating your perfect glow!