Got a cardboard box at home? Instead of tossing it out, you can turn it into something kids will love – a cardboard car.
This project is simple, enjoyable, and budget-friendly. Kids enjoy climbing inside, decorating their own ride, and using their imagination to create a unique experience.
As a parent or teacher, you will really like how it doubles as both playtime and a learning activity.
In this guide, I’ll show you, step by step, how to make a cardboard car using basic supplies. I’ll also share some creative variations and tips to keep your DIY cardboard box car strong and safe.
Why Kids Love Making a Cardboard Car
Building a cardboard car isn’t just about creating a toy. It’s also a valuable activity for children.
- Encourages imagination: Kids can role-play as drivers, mechanics, or racers.
- Builds problem-solving skills: They learn to cut, shape, and assemble pieces.
- Strengthens family bonding: Parents and kids work together to create quality time.
This mix of fun and learning is why making a cardboard car remains a favorite DIY project for families and classrooms.
Materials You Need for a Cardboard Box Car
Before starting, gather all the necessary supplies to ensure the project runs smoothly. Most are simple items you may already have at home.
- Cardboard Sheets: Strong sheets form the base, sides, roof, and details. Thick cardboard works best for durability.
- Fevicol or Glue Gun: These adhesives hold the panels, wheels, and features together. A glue gun dries faster, while Fevicol works well for larger parts.
- Small Pipes and Wooden Sticks: The pipes hold the sticks, creating axles for the wheels. This setup makes the wheels roll smoothly.
- Colored Paper: Bright paper covers the car, adding a touch of style. Use contrasting shades for windows, stripes, and number plates.
- Glue Stick and Scissors: A glue stick is handy for paper decorations, while scissors or a cutter are used to shape the cardboard and colored pieces.
By gathering these materials ahead of time, you’ll make the process smoother and keep kids engaged from start to finish.
Step-by-Step Guide on How to Make a Cardboard Car
Now let’s move on to the exciting part – building your cardboard car. These steps will guide you through the process, making it simple to follow from start to finish.
Step 1: Prepare the Cardboard Sheets

Begin with large, flat cardboard sheets. Cut out a rectangular piece for the base of the car. Then measure and cut four more pieces to form the two sides, the front, and the back.
Use Fevicol or a glue gun to attach these pieces together, forming a box-like shape. Ensure the edges line up neatly so the car appears balanced.
Step 2: Strengthen the Frame
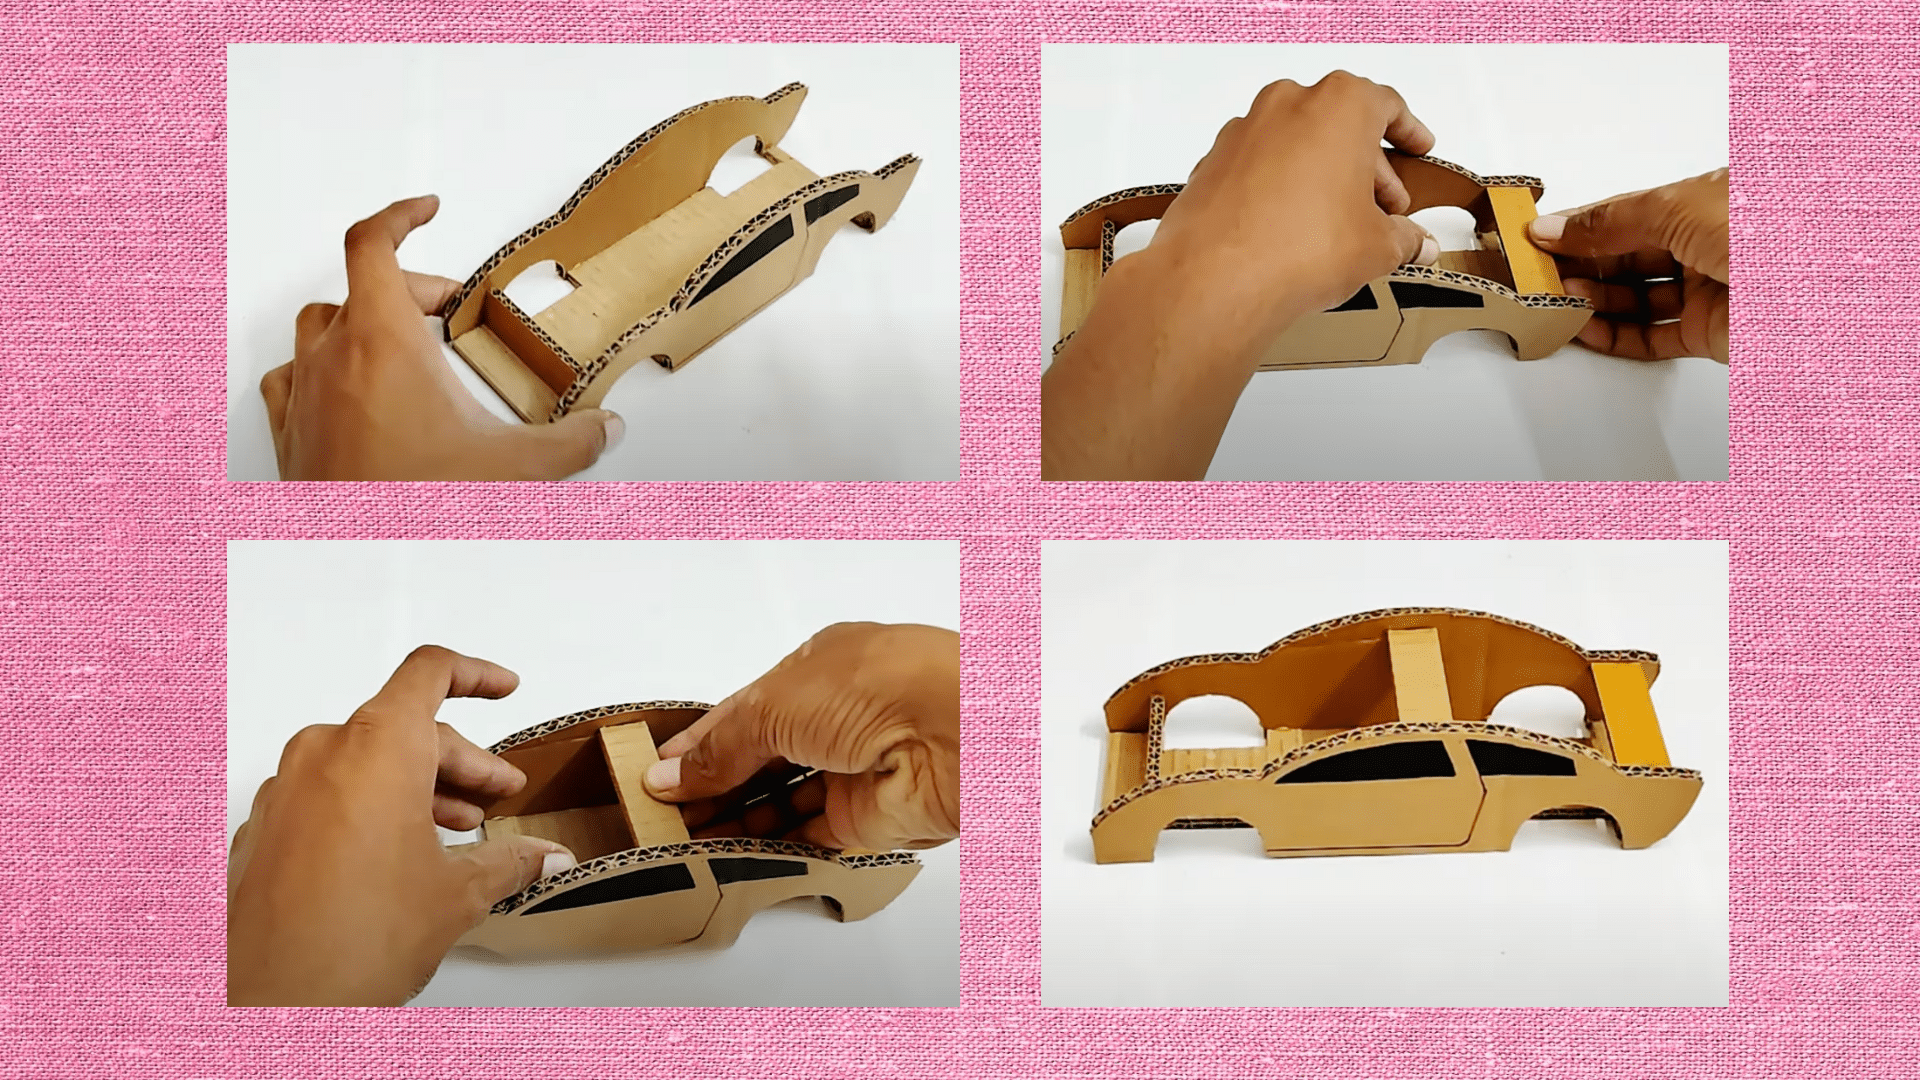
Once the panels are joined, the structure may still feel weak. Cut long strips of cardboard and glue them inside along the corners.
This acts as a support beam and helps the car hold its shape. Press down firmly and allow the glue to dry before handling.
Step 3: Cut and Design the Wheels
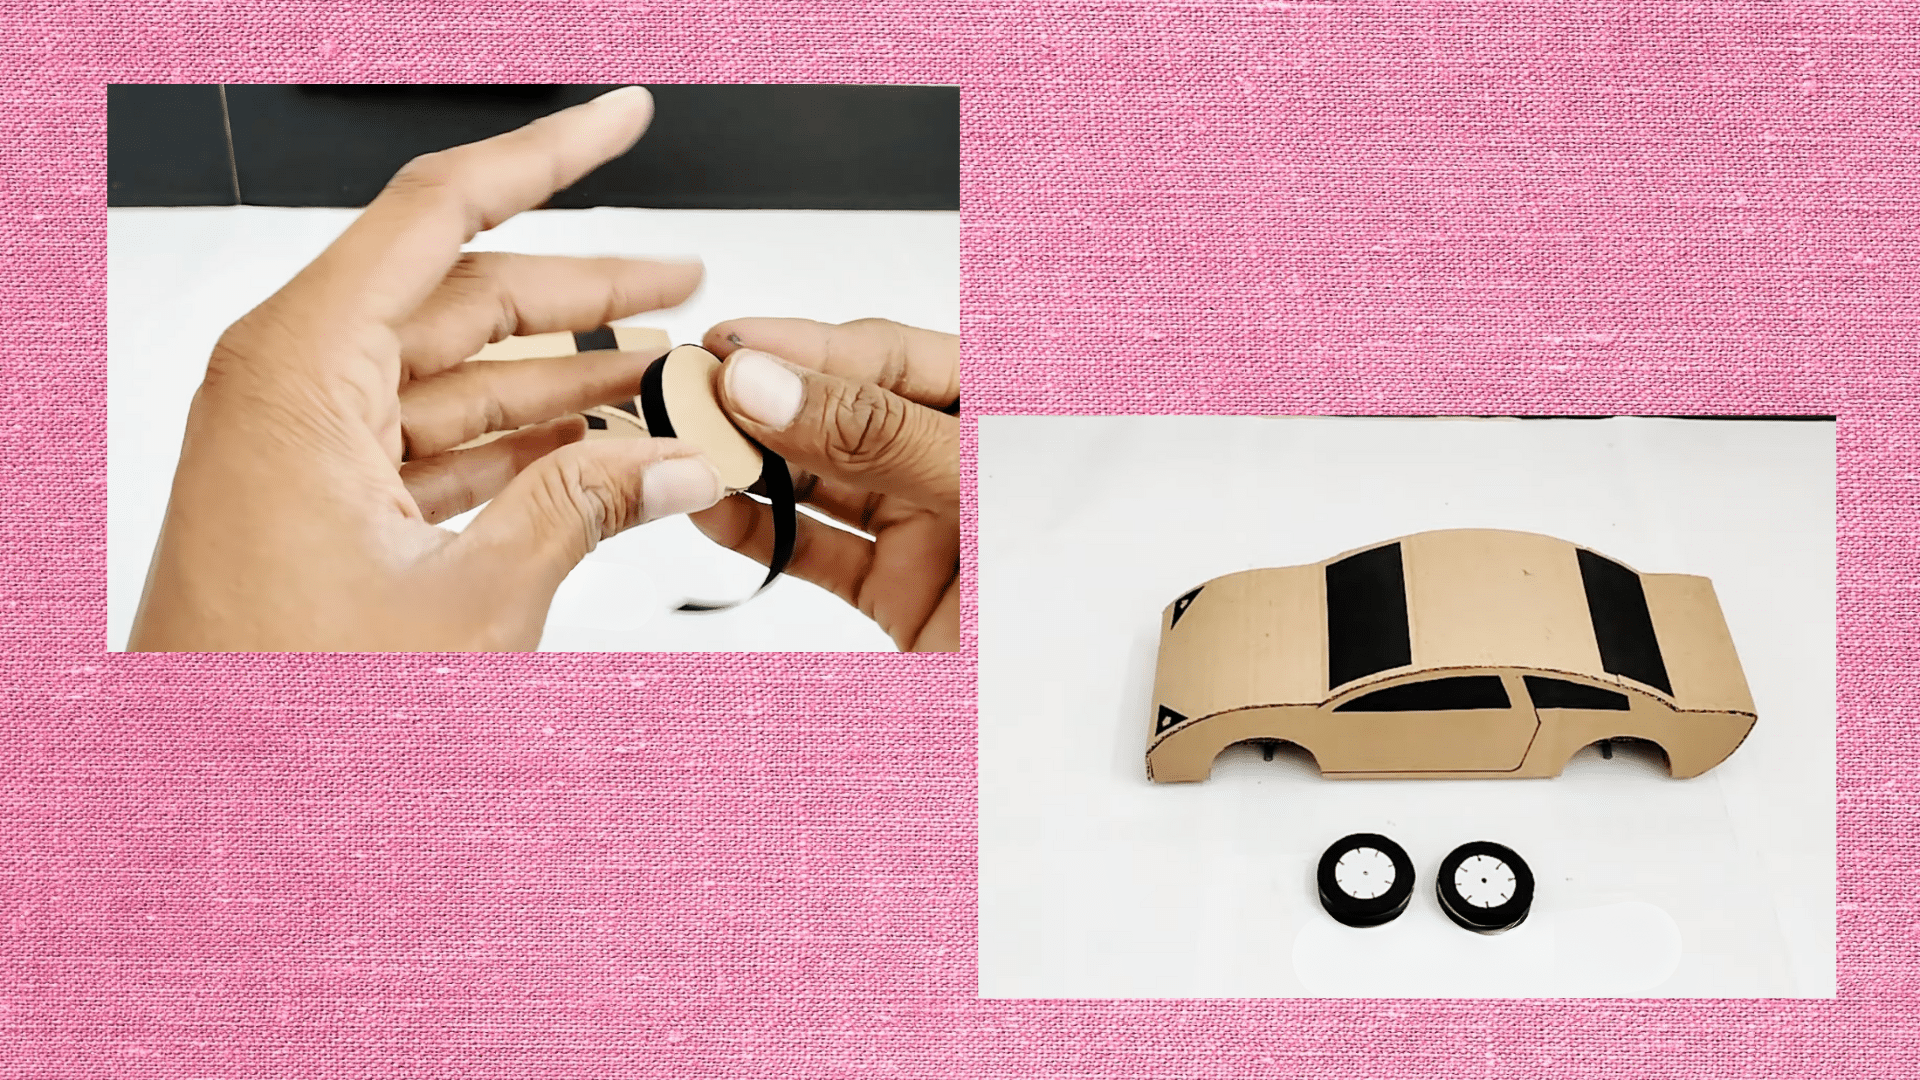
Trace and cut four identical circles from the cardboard sheets. For stronger wheels, glue two circles together to make each one thicker.
Cover the wheels with colored paper to give them a neat finish. You can even use black paper for tires and silver paper for rims to make them look realistic.
Step 4: Make the Axles
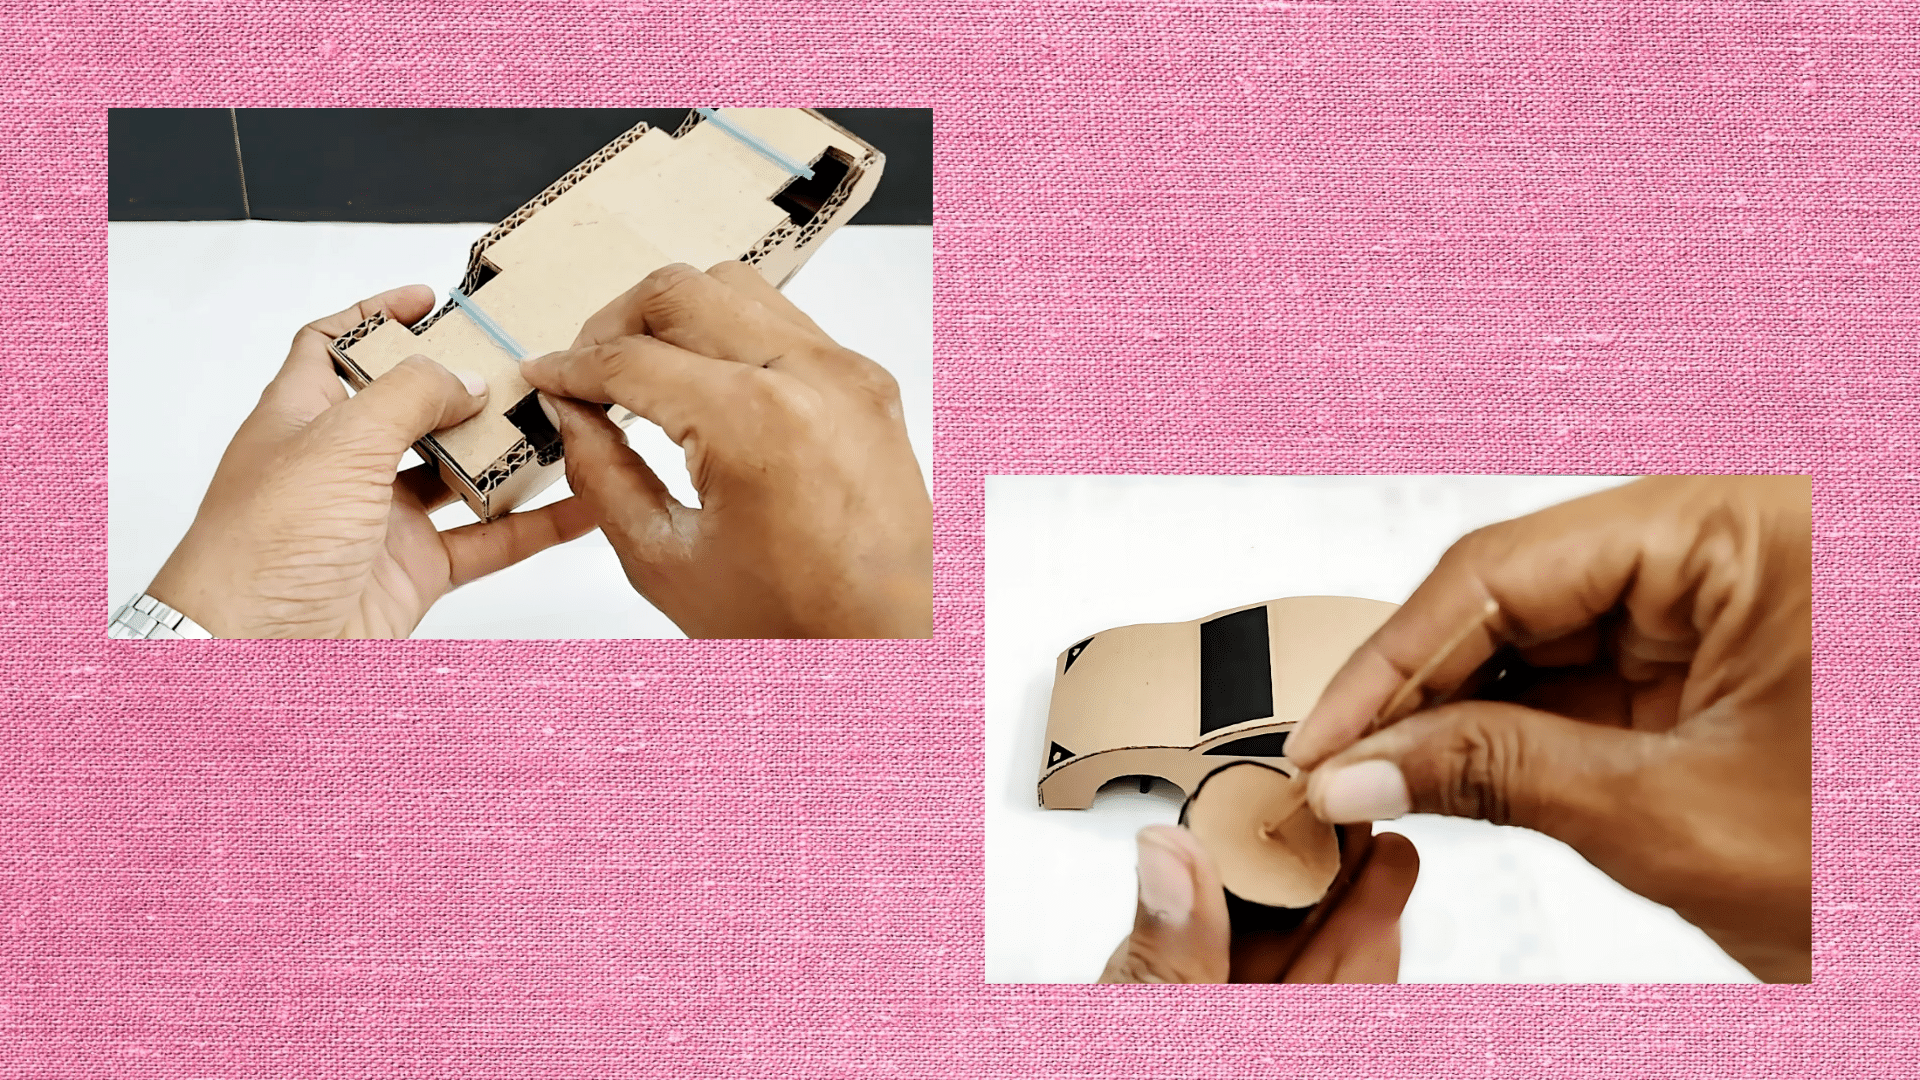
Take two small pipes and cut them slightly wider than the base of the car. Slide a wooden stick through each pipe to act as an axle.
The pipe helps the stick spin freely, allowing the wheels to rotate. Secure the sticks inside the pipes with glue to prevent them from slipping out while rolling.
Step 5: Attach the Wheels to the Axles
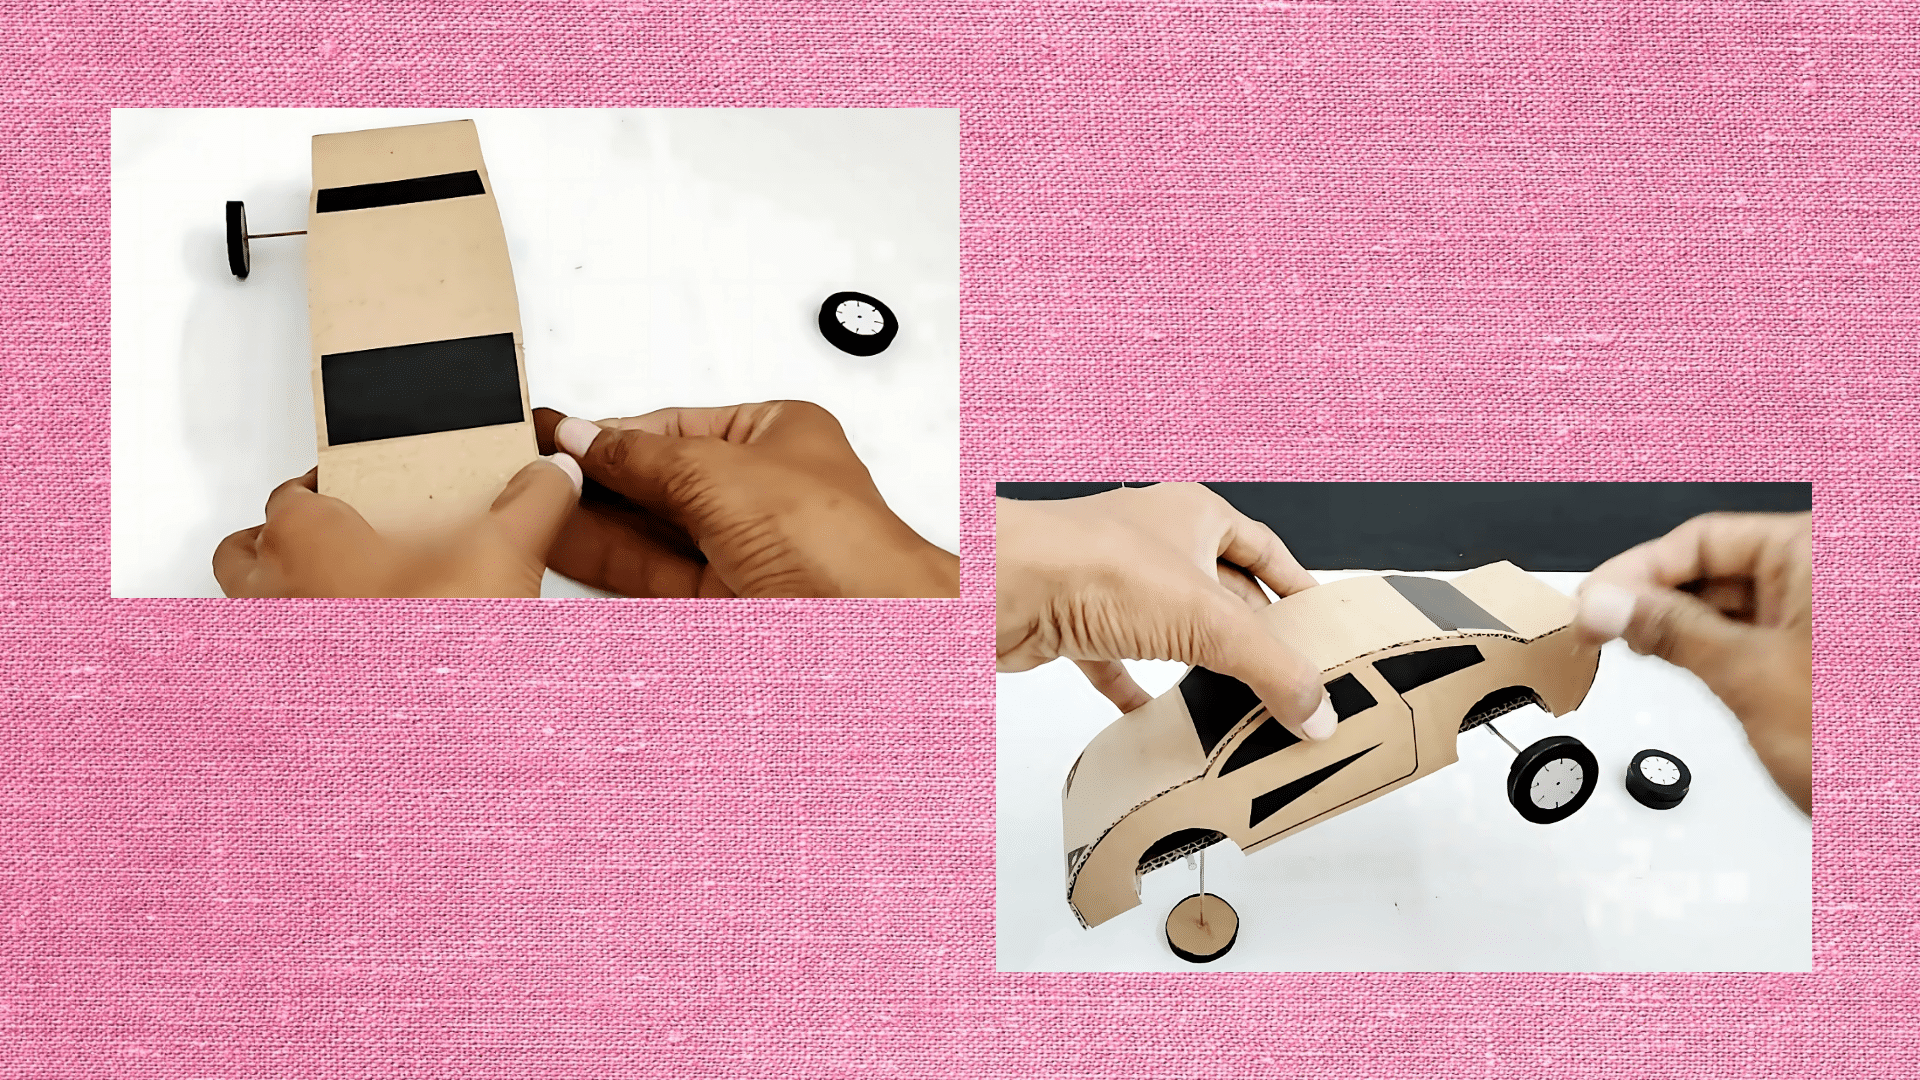
Glue one wheel to each end of the wooden sticks. Hold them in place until the glue sets so they don’t wobble.
Place the two pipe-and-wheel sets under the base of the car, one near the front and one near the back. Glue the pipes firmly to the underside of the base. This creates a stable wheel system that lets the car roll smoothly.
Step 6: Build the Top and Features
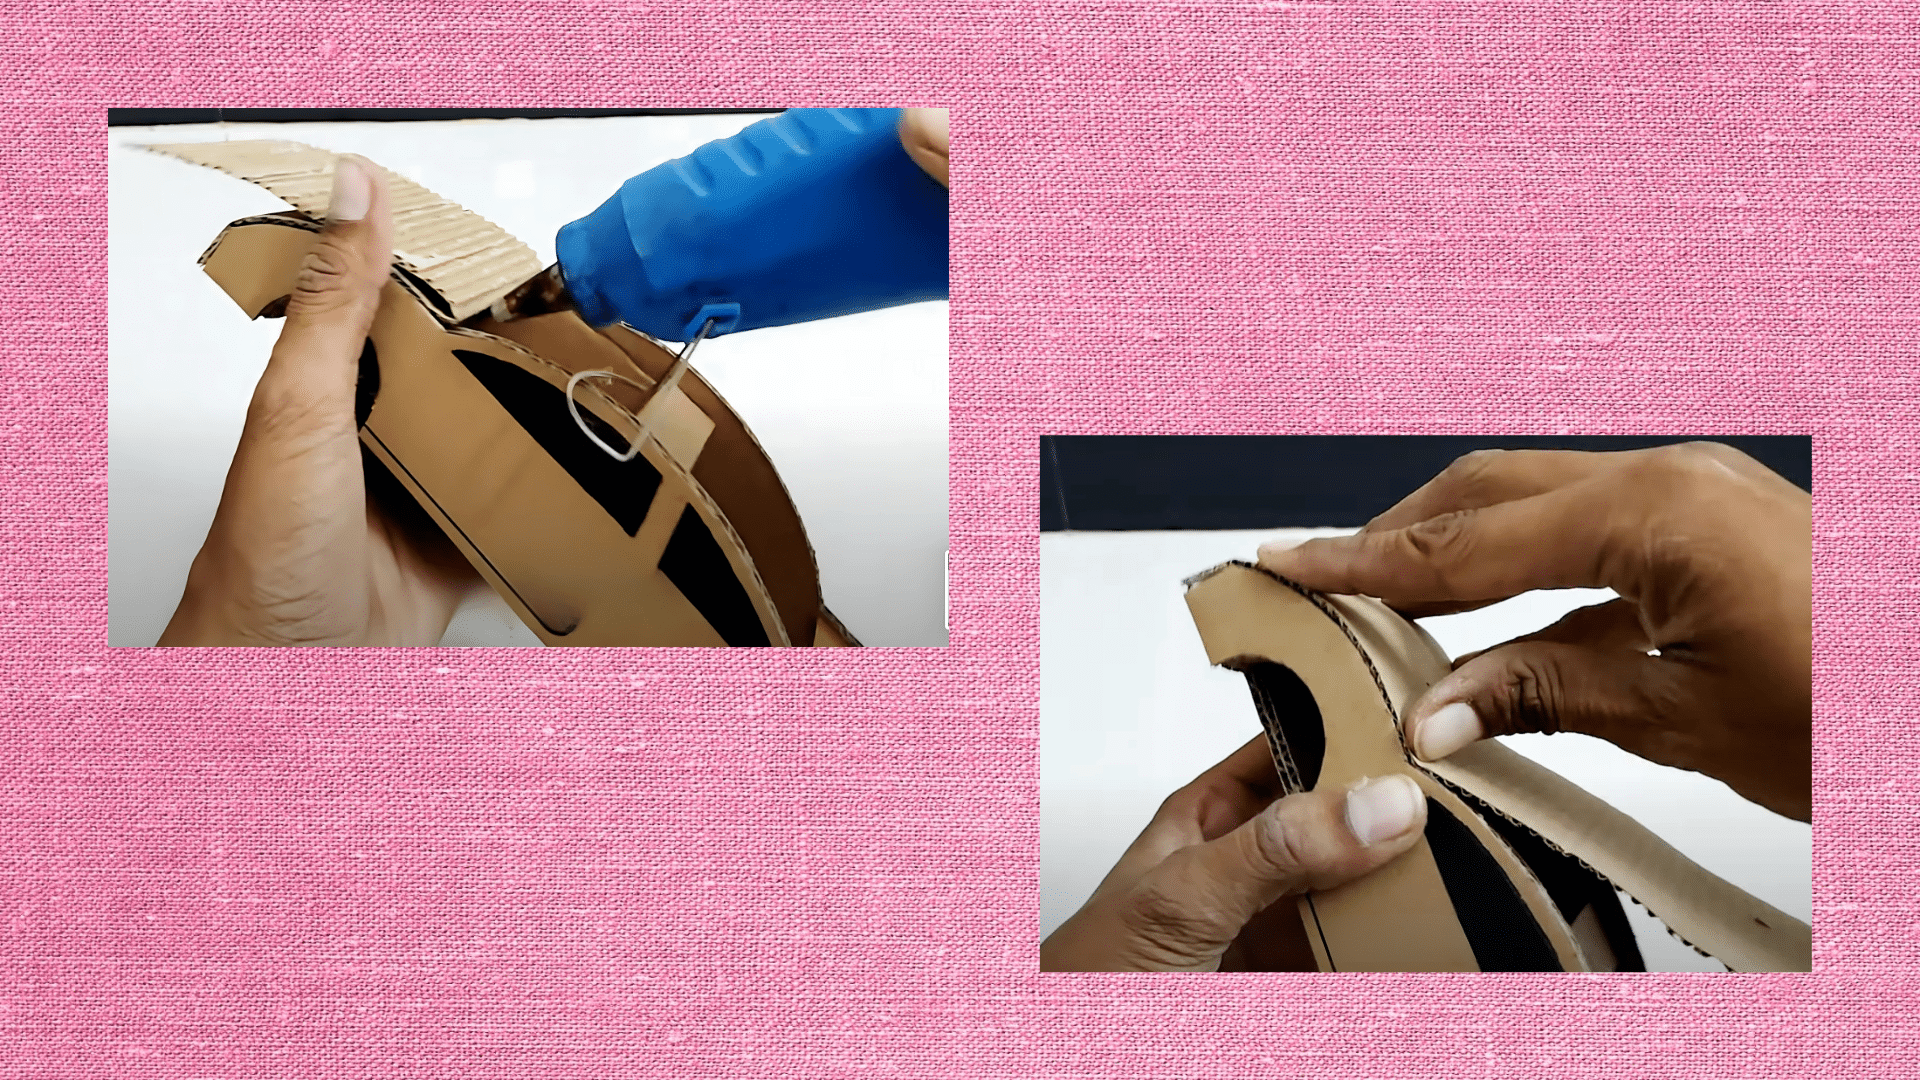
Cut another cardboard sheet to serve as the car’s roof. Glue it onto the top of the frame, leaving open spaces for windows.
Add smaller cardboard pieces to shape details, such as headlights, a hood, or even doors. You can also roll a thin strip into a circle to create a steering wheel and fix it inside for extra decoration.
Step 7: Decorate with Color Paper
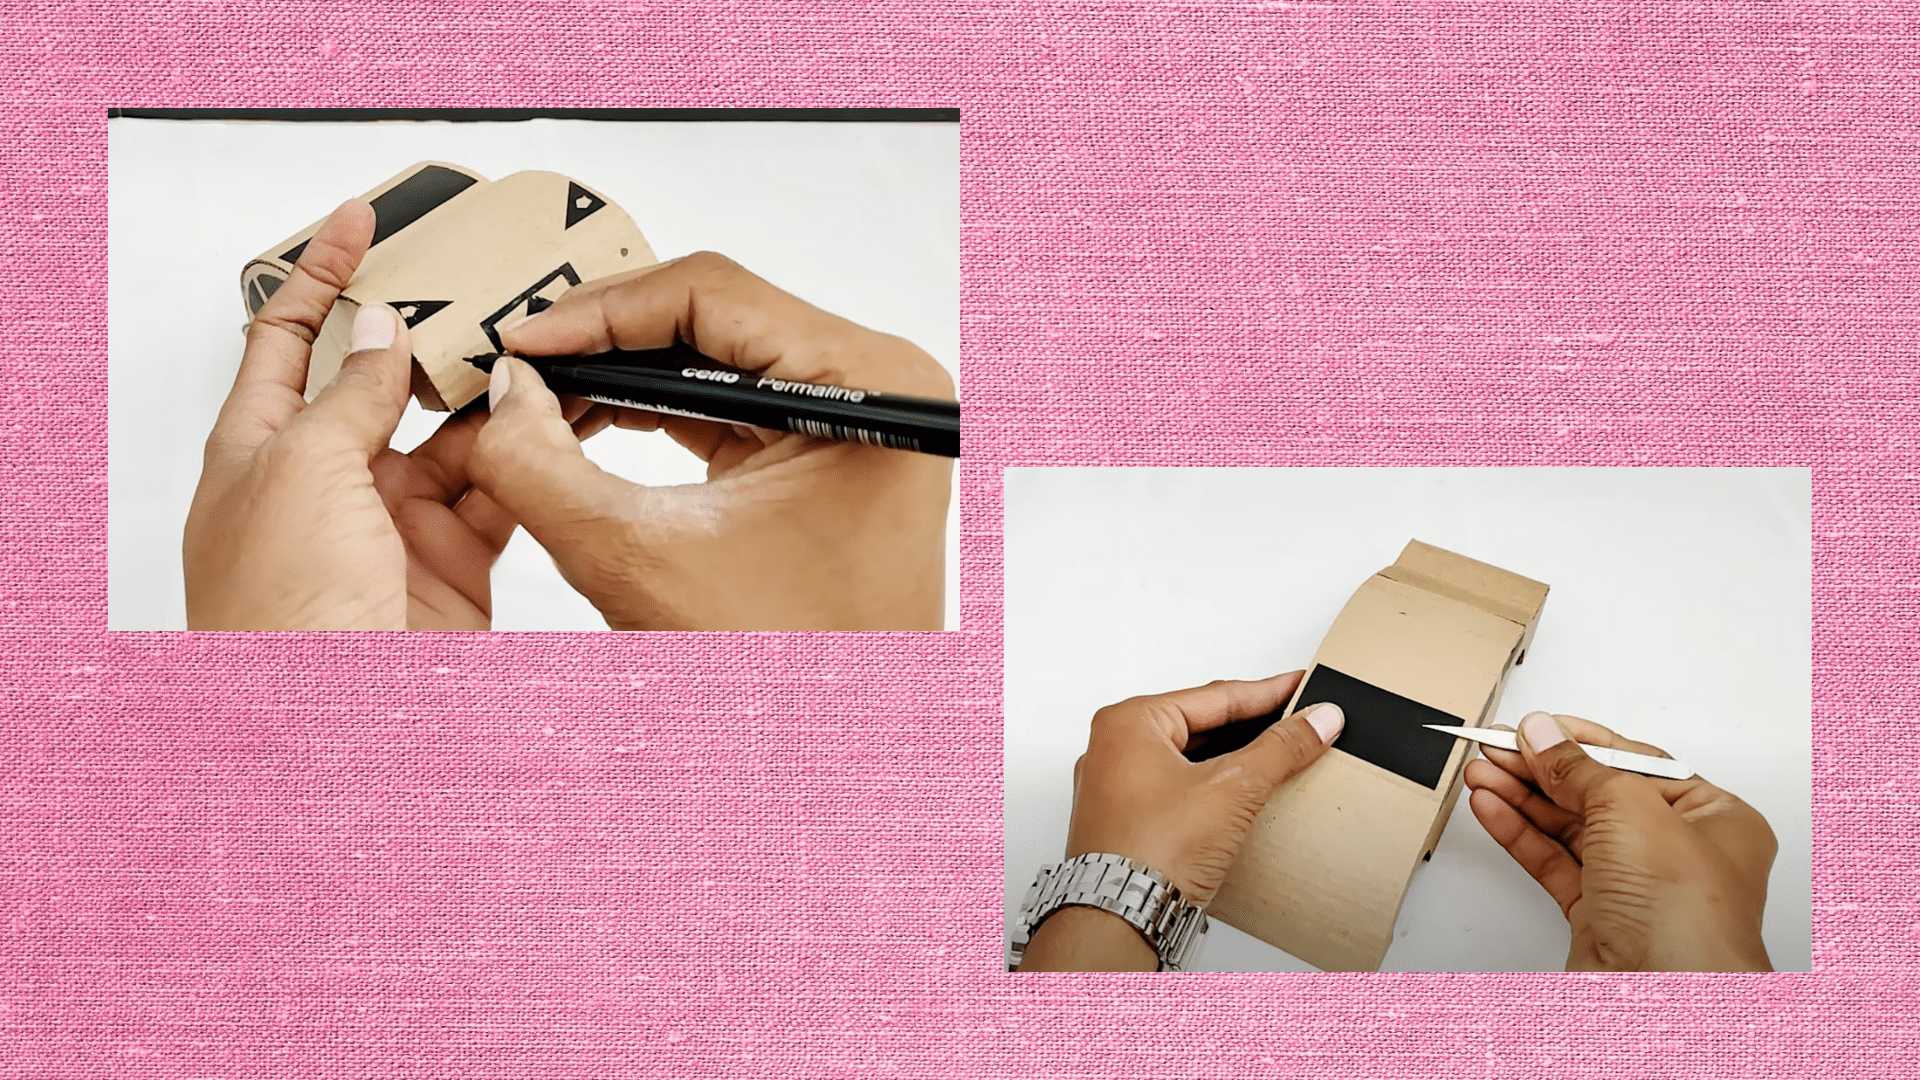
Cover the outside of the car with bright colored paper to give it a polished look. Use a single color for the body and a contrasting color for the roof to make it stand out.
Add window shapes using black paper and cut smaller pieces for doors, handles, or number plates. For a more stylish look, consider adding racing stripes or creative designs with contrasting colors.
Step 8: Add Final Touches and Test

Once all decorations are complete, check every joint and edge to make sure they are firmly glued. Test the wheels by rolling the car forward and backward. If they feel loose, add extra glue at the connection points. Smooth any rough edges with paper or tape so the car looks neat and safe to handle.
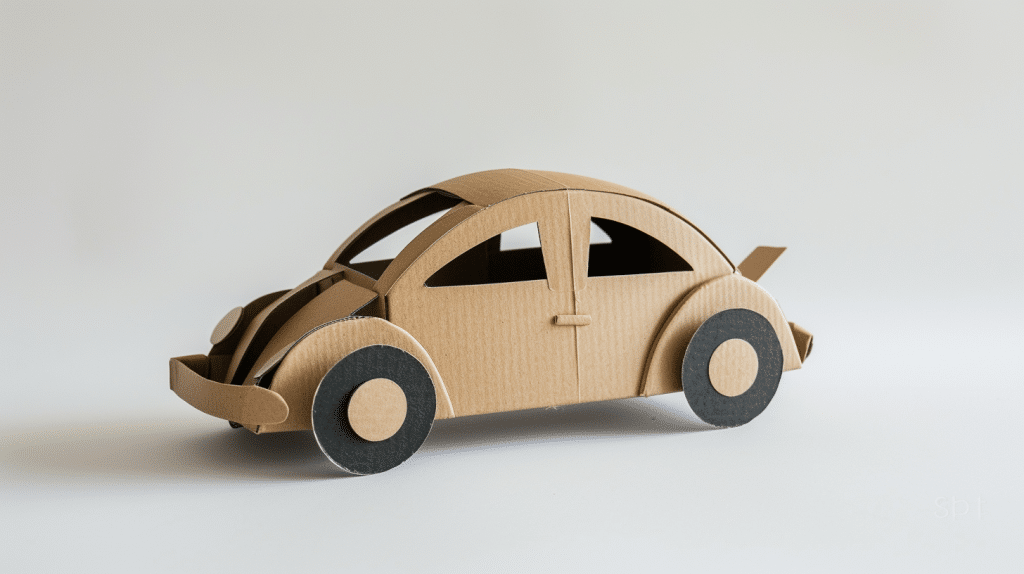
Once you’ve completed all the steps, your cardboard car is ready to use. Take a moment to admire the work, then enjoy rolling it around or showing it off as a fun DIY project.
Tips for a Strong and Safe Cardboard Car
Durability is important, especially if kids will be climbing inside the car. Use these tips to make sure the project lasts.
- Choose sturdy cardboard for the base and sides. Thicker sheets hold up better under weight and daily play.
- Reinforce corners and joints with extra cardboard strips. Use duct tape or a glue gun to keep everything tightly sealed.
- Cover all cut edges with tape to avoid scratches. Even small rough spots can cause discomfort when kids handle the car.
- Pick non-toxic paints or child-safe markers for decoration. Always let the car dry fully before playtime begins.
- Check the car often after use. Tighten loose parts, add more tape, and fix weak areas before kids play again.
These small but effective steps keep the cardboard car safe, sturdy, and ready for hours of fun.
Conclusion
Now that I’ve shown you how to make a cardboard car, you can see how easy and fun this project really is. With just a box, tape, markers, and a little creativity, you can turn plain cardboard into a car kids will love.
This activity is affordable, hands-on, and works great for playtime, school projects, or themed parties. Children enjoy helping with the design and decorating, which makes it even more special.
I encourage you to try it out and see how much fun you and your kids can have together. Gather your supplies, start building, and create a cardboard car that sparks imagination and lasting memories.