You’ve got a free afternoon, a drawer full of supplies you forgot you owned, and absolutely zero plans, and honestly, that’s the perfect setup for a craft day.
The only problem is sitting down to actually pick a project, because when you don’t know where to start, even the most creative person can end up doing nothing at all. That’s exactly what this list is here to fix.
If you’re crafting with kids, flying solo, just starting, or someone who’s been making things for years, there’s something in here for you. Let’s get making.
Why Crafting at Home is Worth Your Time
Here’s the thing about crafting: It’s one of those rare activities that doesn’t just produce something; it genuinely makes you feel better while you’re doing it.
Research consistently shows that creative activities like making things with your hands reduce cortisol levels, ease anxiety, and put the brain into a calm, focused state that’s surprisingly hard to achieve any other way.
For kids, it builds fine motor skills, encourages problem-solving, and gives them a sense of accomplishment that screen time can’t replicate.
For adults, it’s an excuse to slow down, be present, and make something you’re actually proud of at the end of the day.
Fun Crafts to Do at Home
If you’re crafting solo, with your kids, or looking for a weekend project to get stuck into, these are the ideas worth bookmarking. Each one uses simple materials and comes with a straightforward how-to, so you’re never left guessing.
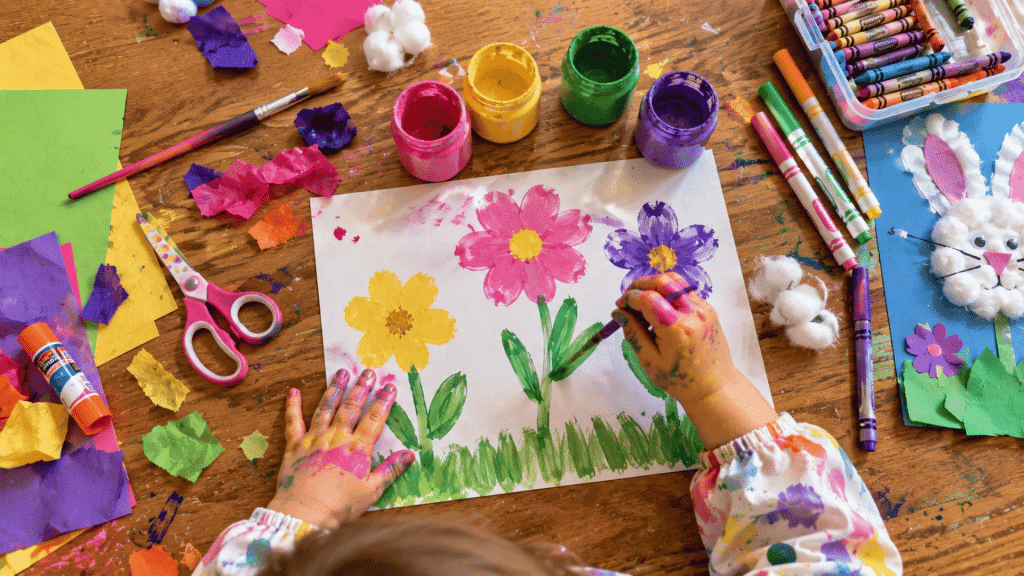
1. DIY Painted Flower Pots
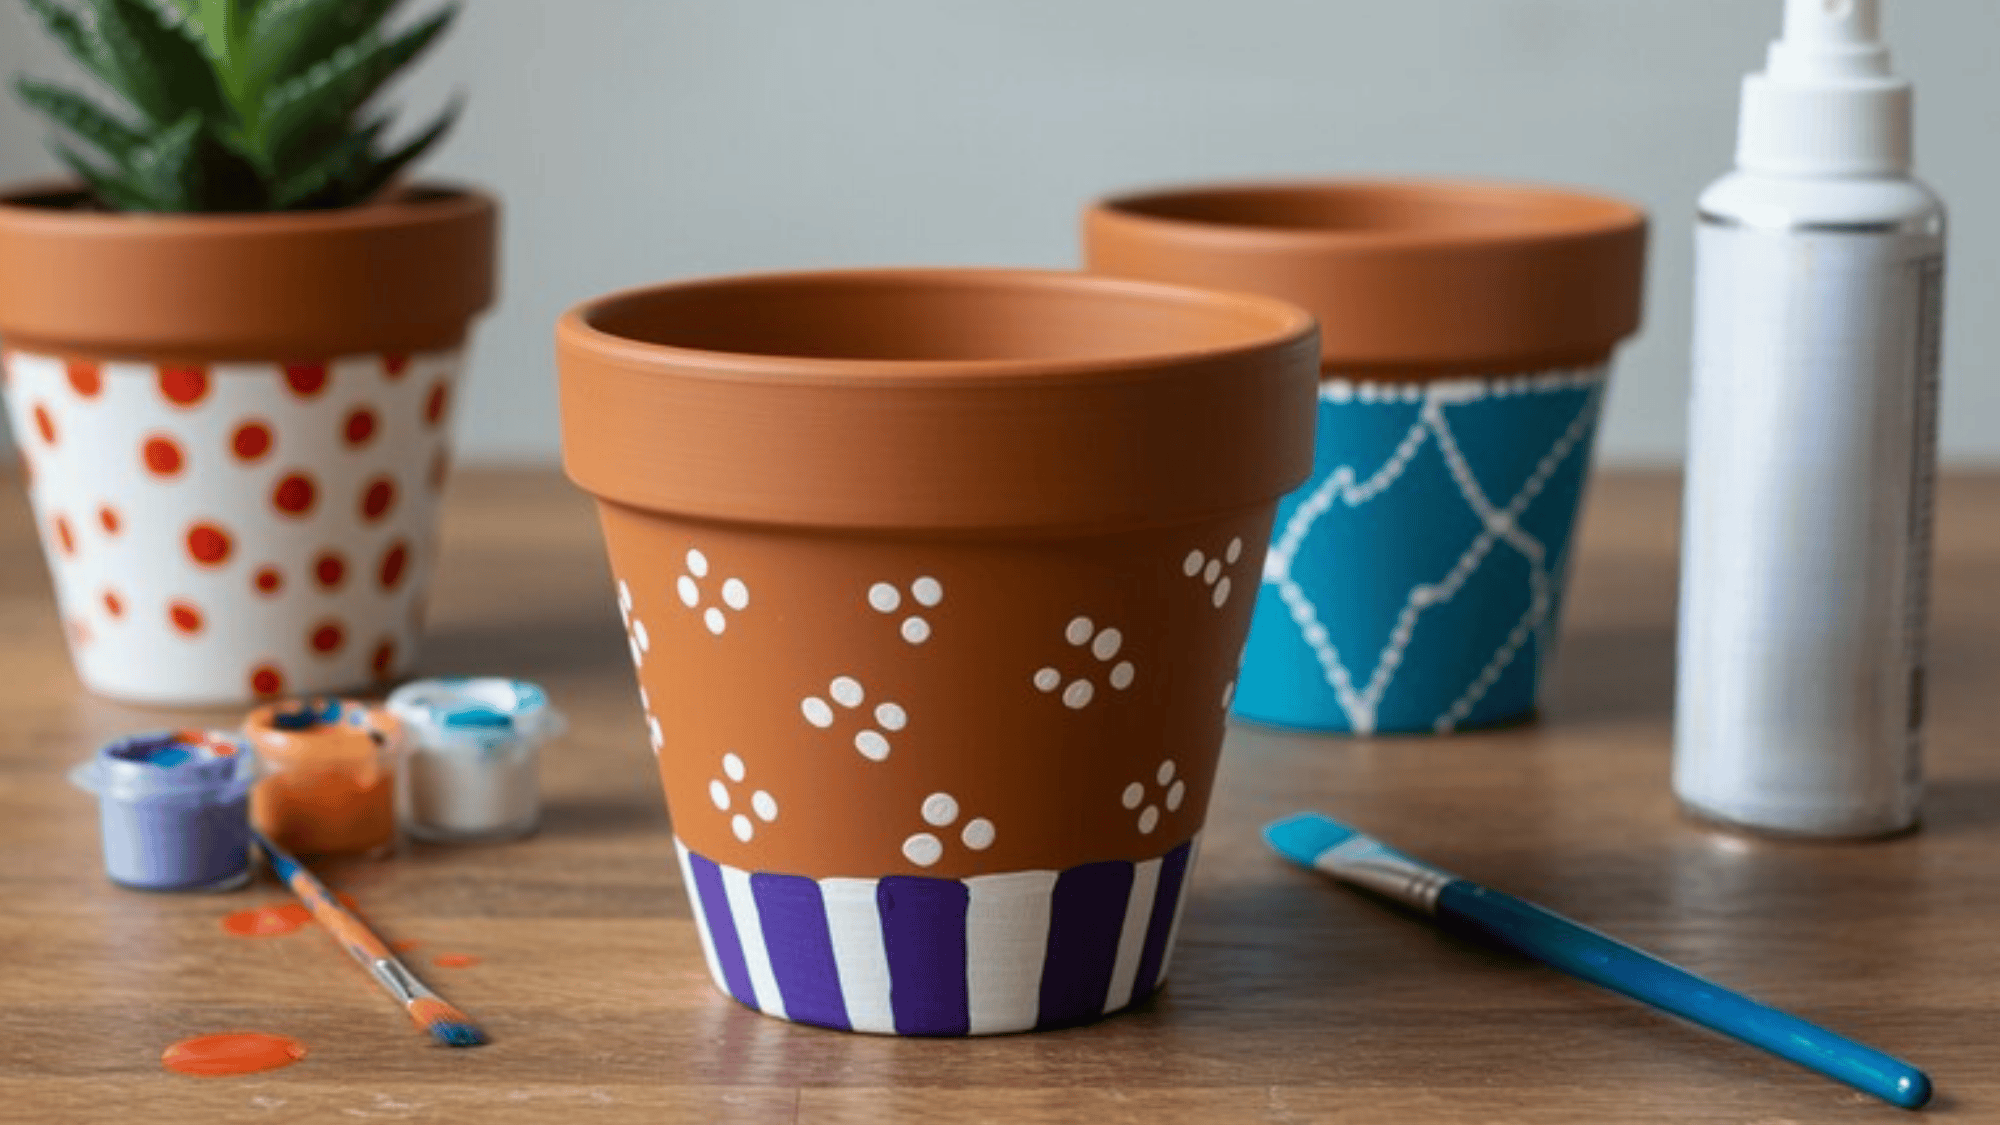
Materials Required: Plain terracotta pots, acrylic paints, paintbrushes, sealant spray
How to Make:
- Clean and dry your terracotta pot completely before you start.
- Paint a base coat in your chosen color and let it dry fully, this usually takes about 20–30 minutes.
- Add patterns, stripes, dots, or freehand designs on top using a smaller brush.
- Once everything is dry, spray with a clear sealant to protect the design from water and wear.
- Plant something in it or use it as a decorative piece; either way, it looks great.
2. Paper Plate Weaving
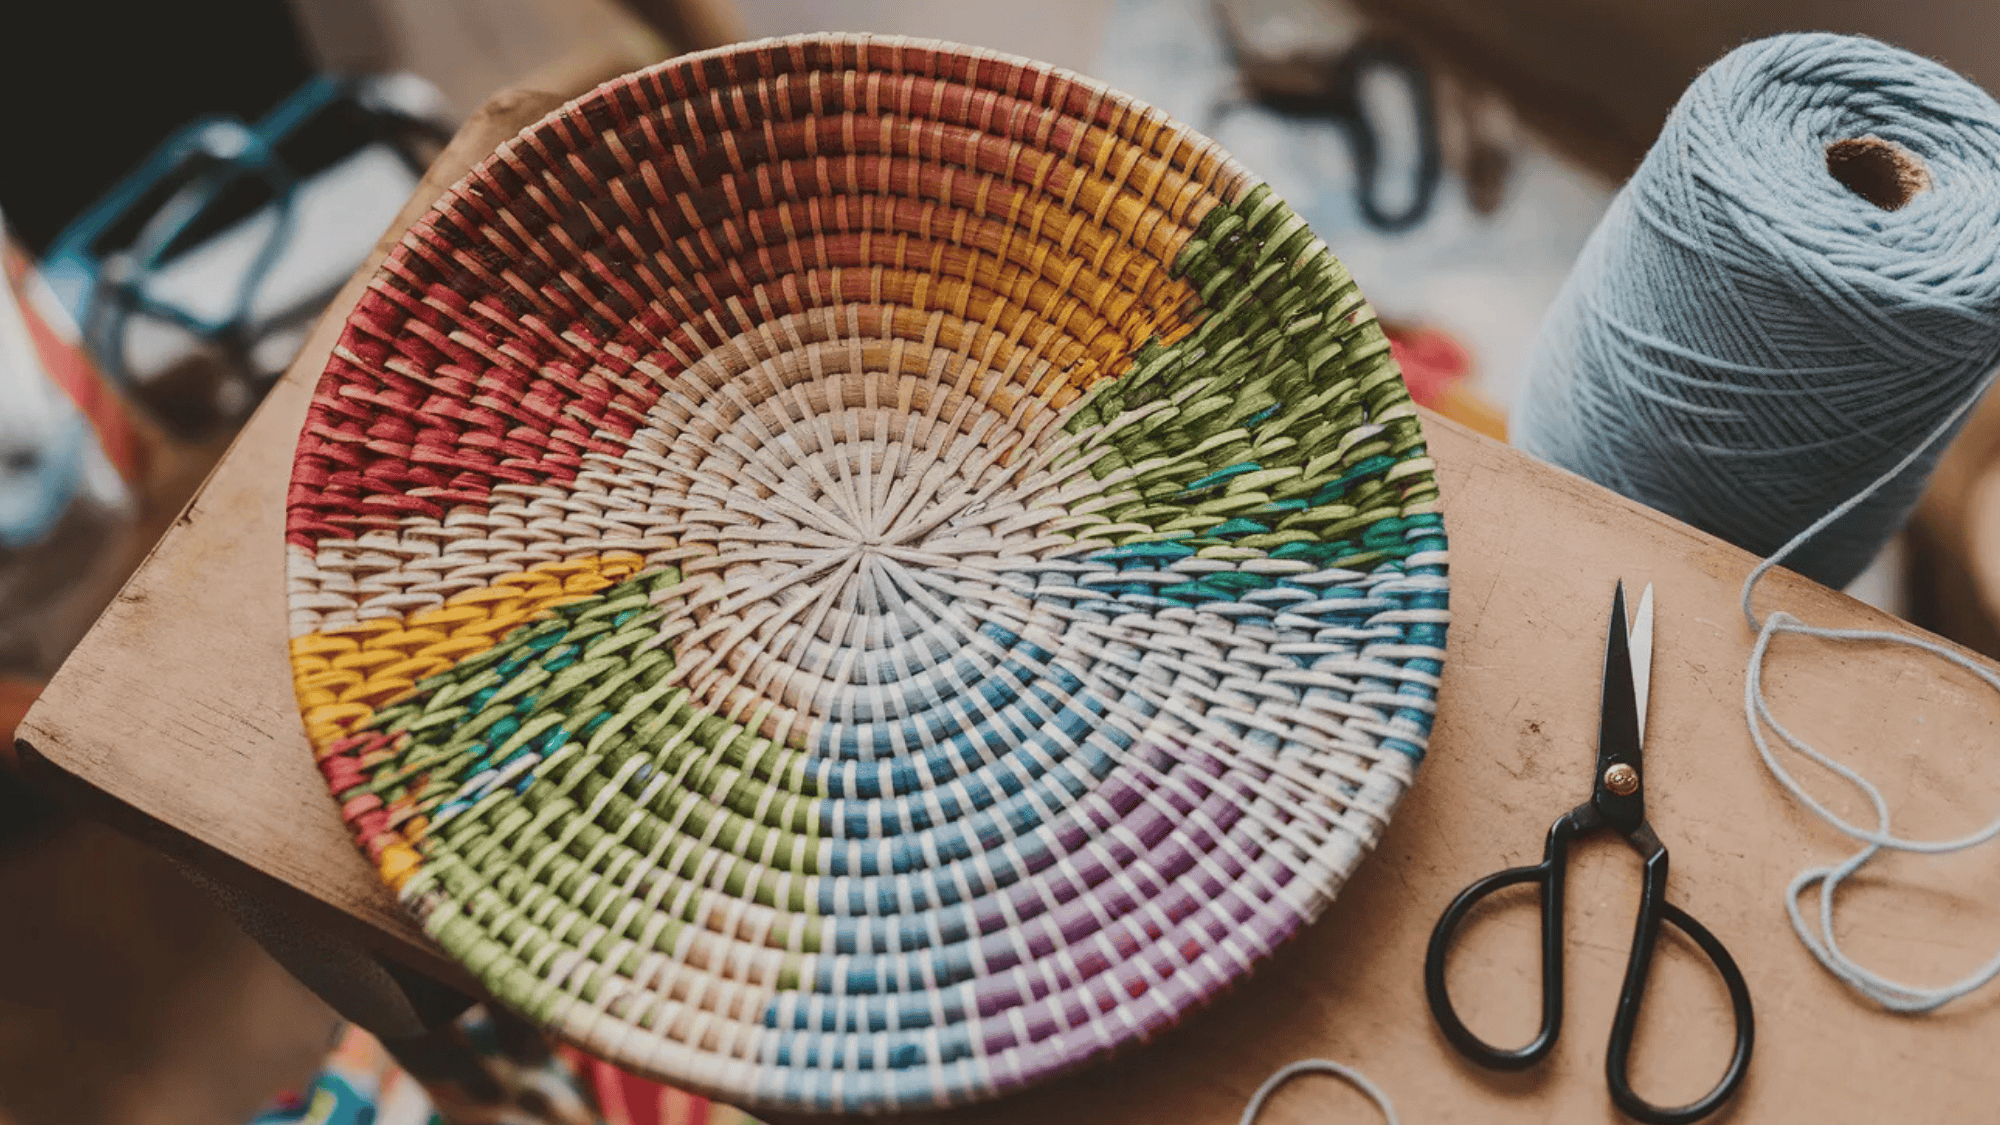
Materials Required: Paper plates, yarn or wool in multiple colors, scissors, tape
How to Make:
- Cut an odd number of slits evenly around the edge of a paper plate, stopping about an inch from the center.
- Tape one end of your yarn to the back of the plate and thread it through the slits to create a spoke pattern.
- Then weave a new piece of yarn over and under the spokes in a circular motion, changing colors whenever you want a new stripe.
- Keep weaving until the plate is full, then knot the end securely at the back and trim any excess.
3. Homemade Candles
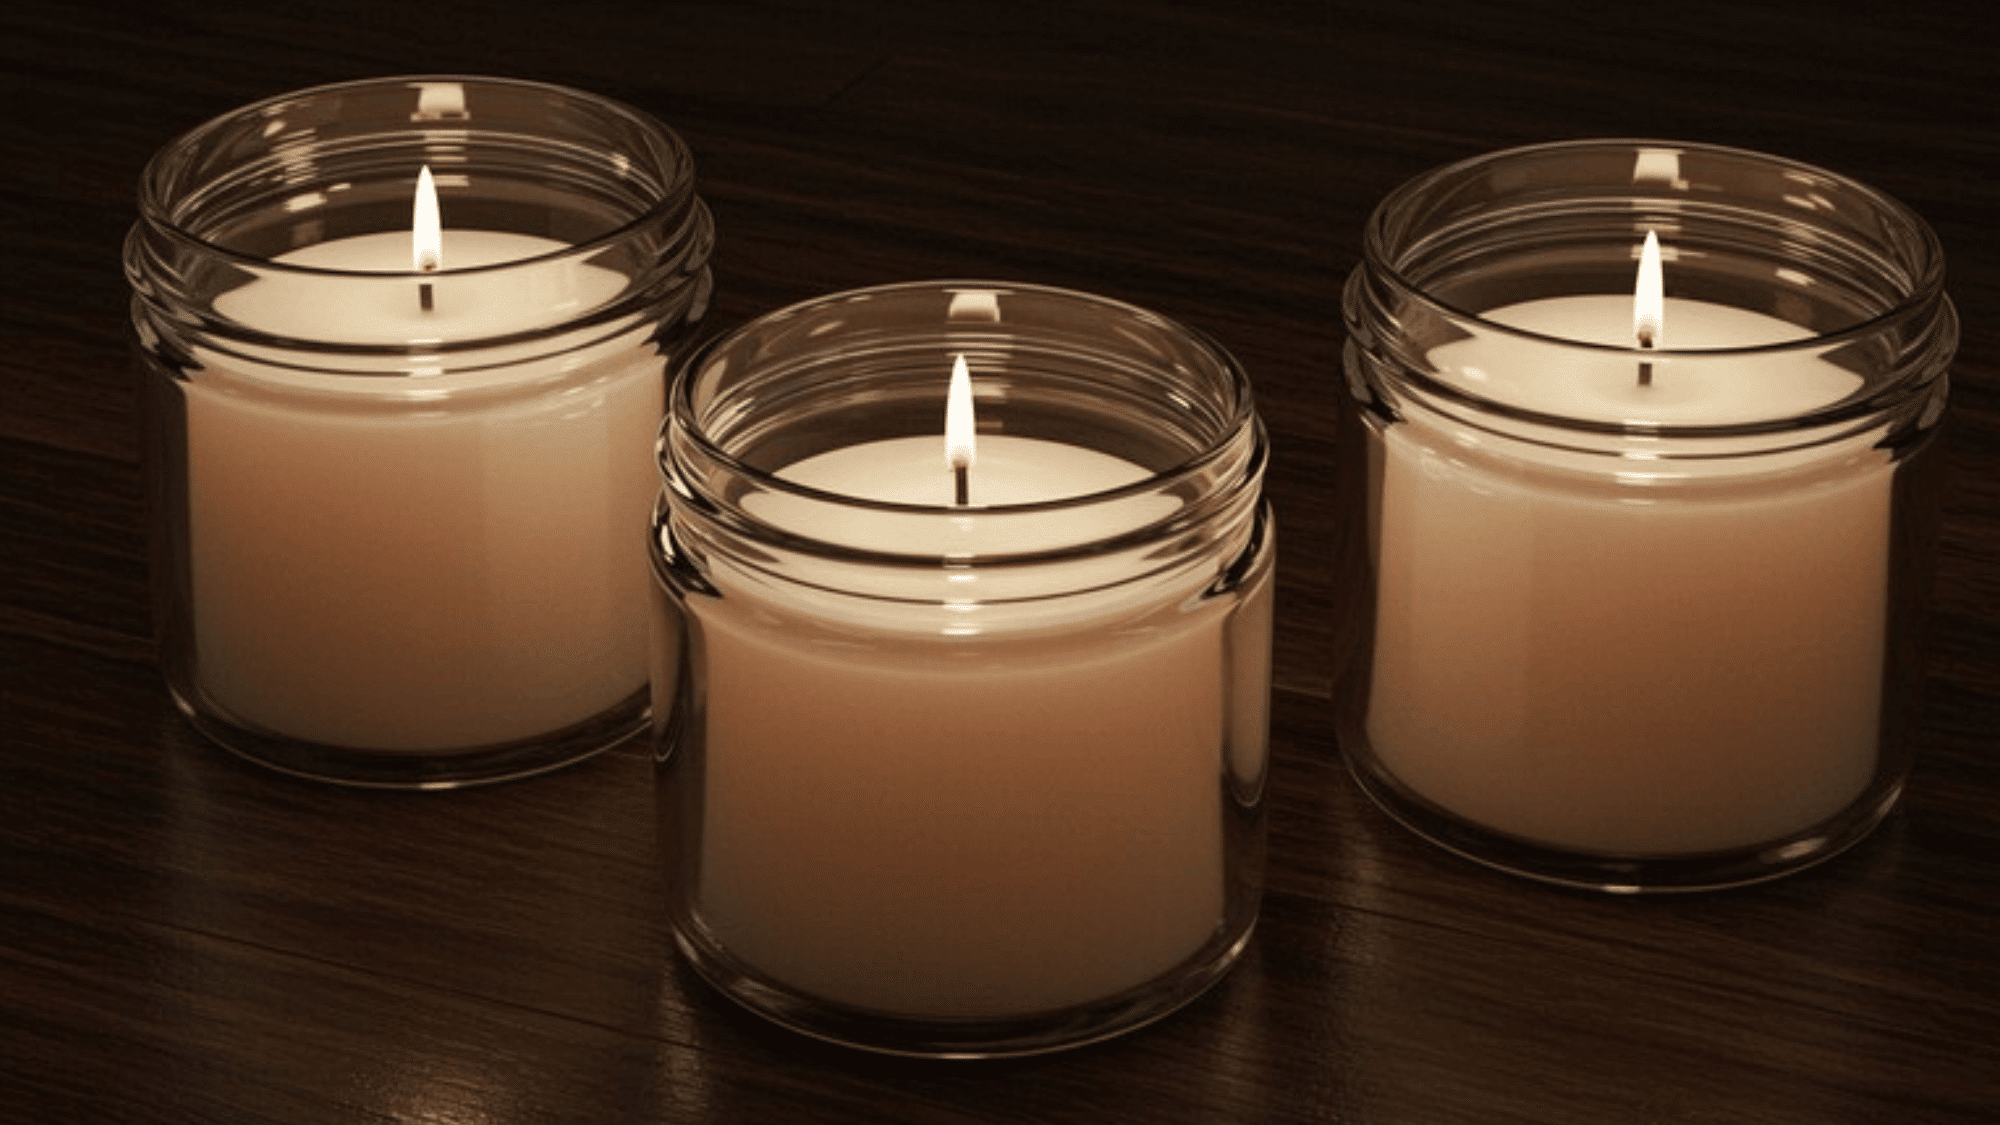
Materials Required: Soy wax flakes, candle wicks, essential oils, a heat-safe jar, a double boiler, a thermometer
How to Make:
- Melt soy wax flakes in a double boiler over medium heat, monitoring the temperature with a thermometer until it reaches around 170°F.
- Remove from heat and stir in your chosen essential oil, about 10–15 drops per cup of wax.
- Secure a wick to the bottom of your jar with a small amount of melted wax, then let it set.
- Pour the scented wax slowly into the jar, holding the wick upright with a pencil or skewer laid across the top.
- Let it cool and set for at least 4 hours before trimming the wick and lighting it.
4. Button Art
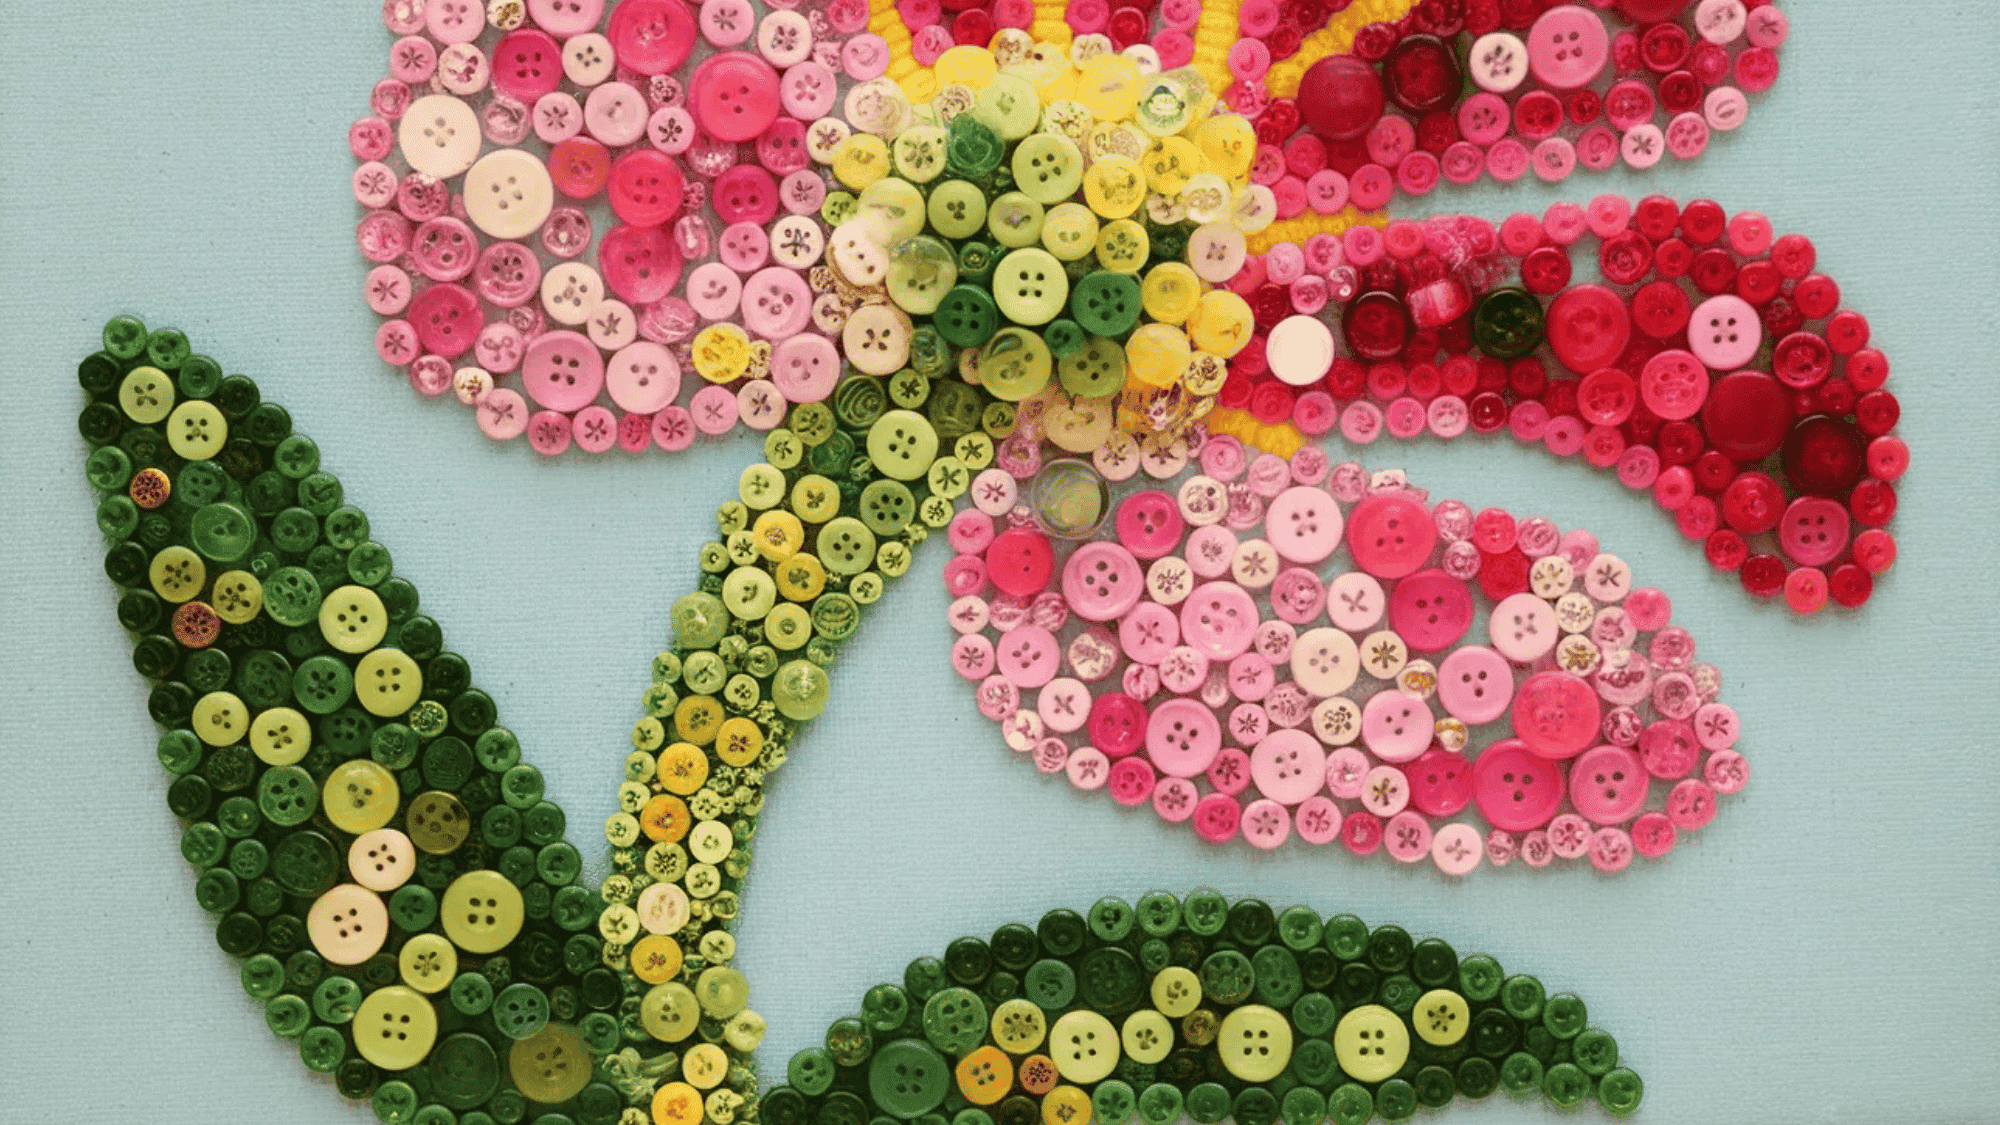
Materials Required: Assorted buttons, a canvas or thick cardstock, craft glue, a pencil
How to Make:
- Lightly sketch your design onto the canvas in pencil; a simple shape, such as a flower, heart, or animal outline, works beautifully.
- Sort your buttons by size and color before you start gluing so you have a clear plan.
- Apply a small dot of craft glue to each button and press it firmly onto the canvas, filling in your design section by section.
- Work from the outside edges inward for cleaner lines and let the finished piece dry flat for at least two hours before hanging.
5. DIY Tote Bag Painting
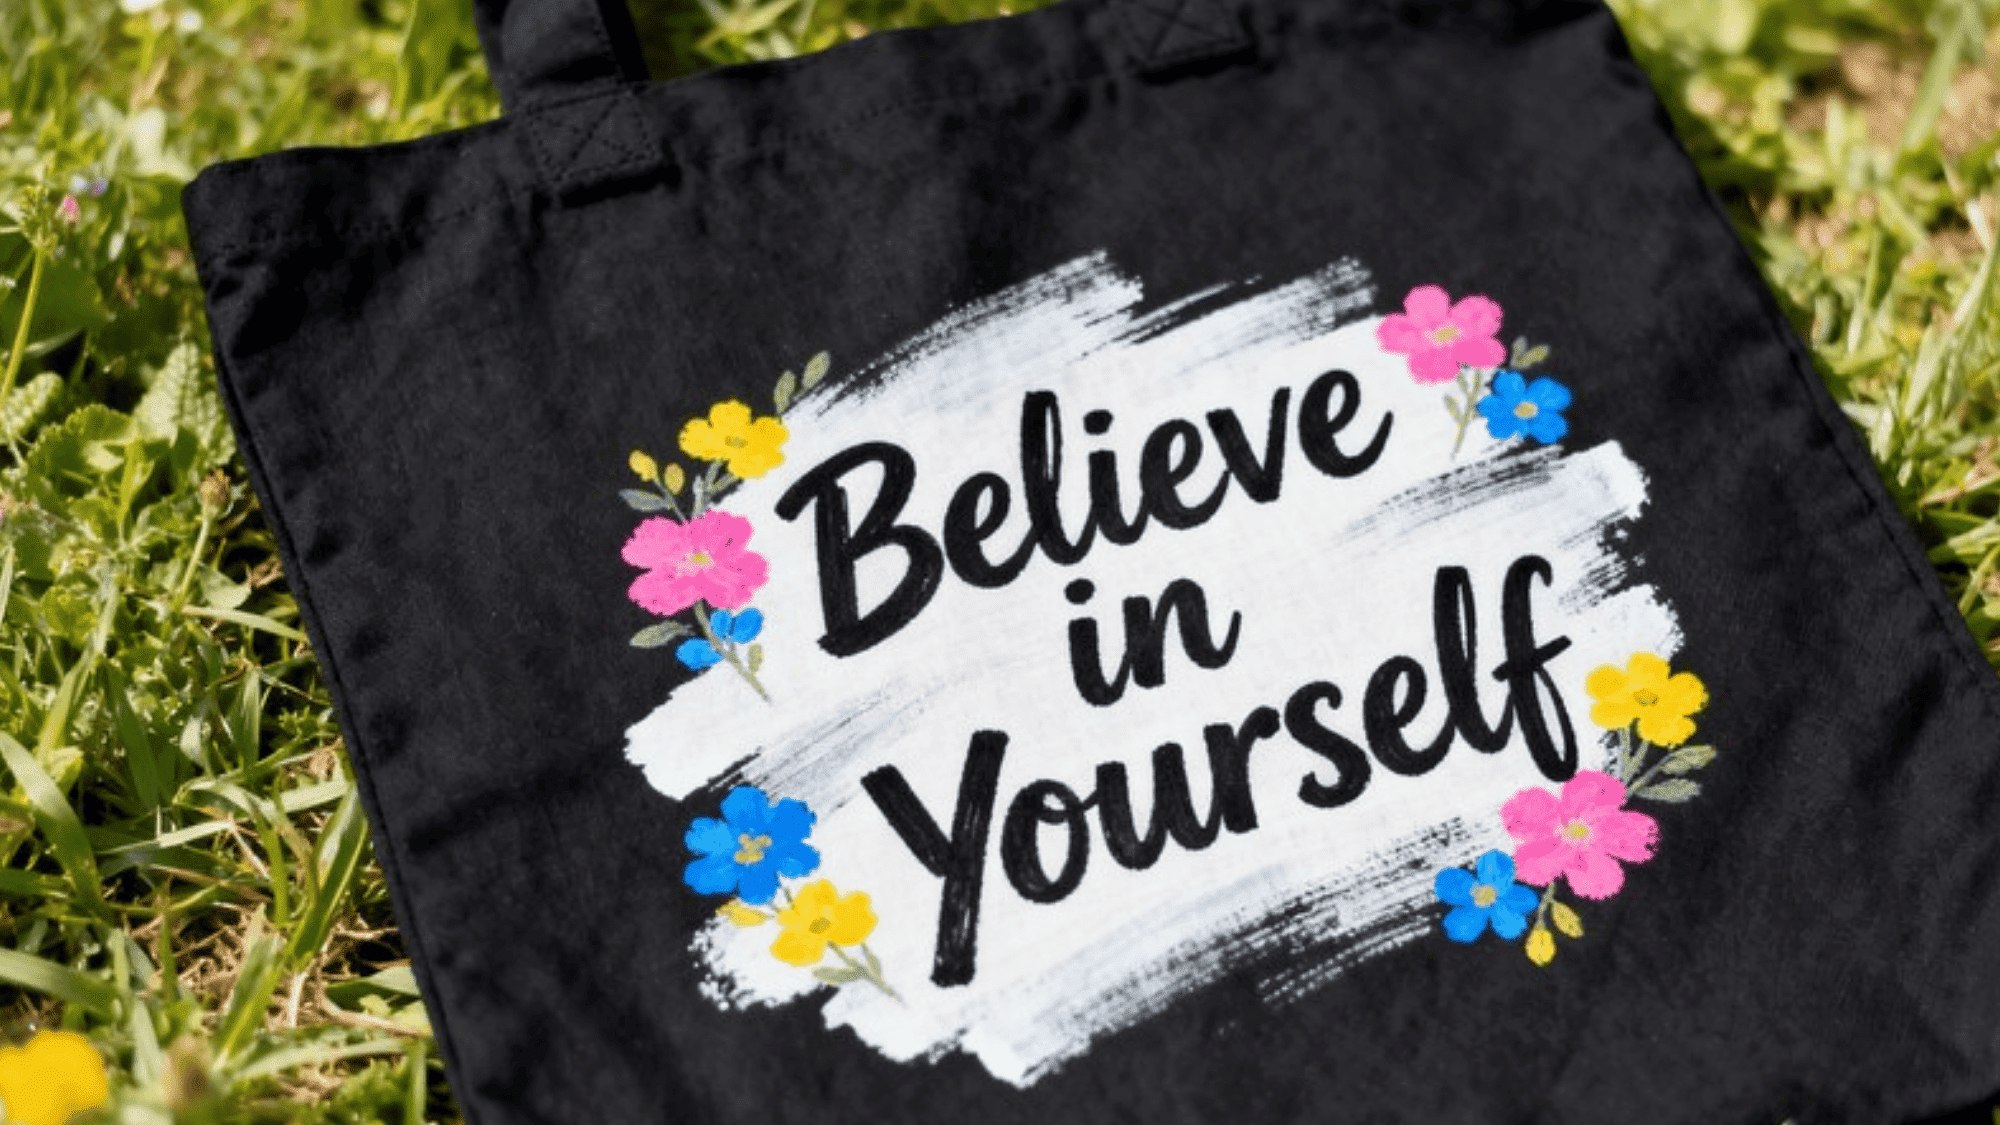
Materials Required: Plain canvas tote bag, fabric paint, paintbrushes, stencils (optional), cardboard
How to Make:
- Slide a piece of cardboard inside the tote bag to prevent paint from bleeding through to the back.
- Plan your design first; you can freehand it, use stencils, or even stamp with cut vegetables for a fun pattern.
- Apply fabric paint using your brush or stencil, building up layers as needed for a solid, opaque finish.
- Let the bag dry completely for at least 24 hours, then heat-set the paint by ironing over the design on a medium setting to make it washable and long-lasting.
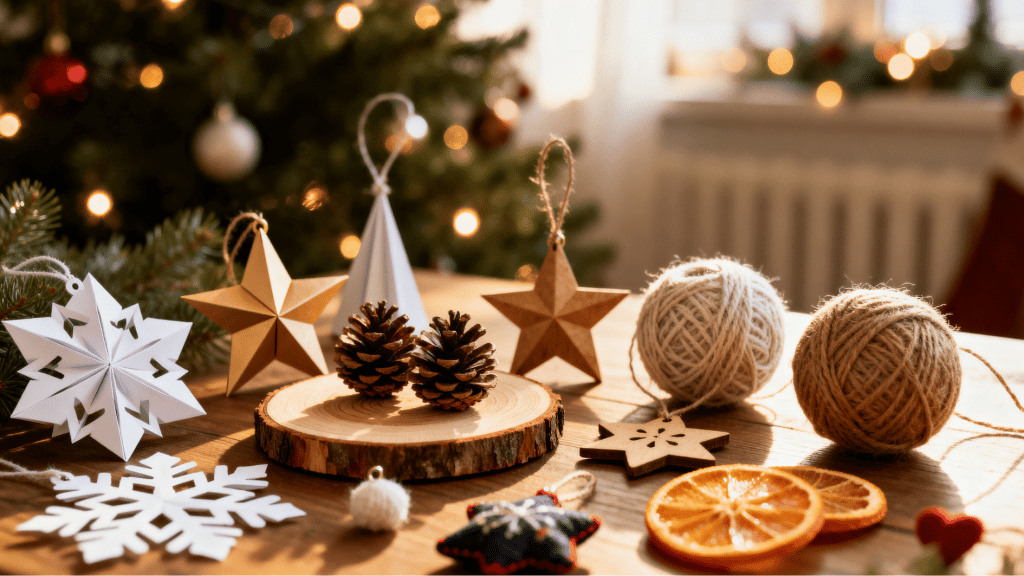
6. Salt Dough Ornaments
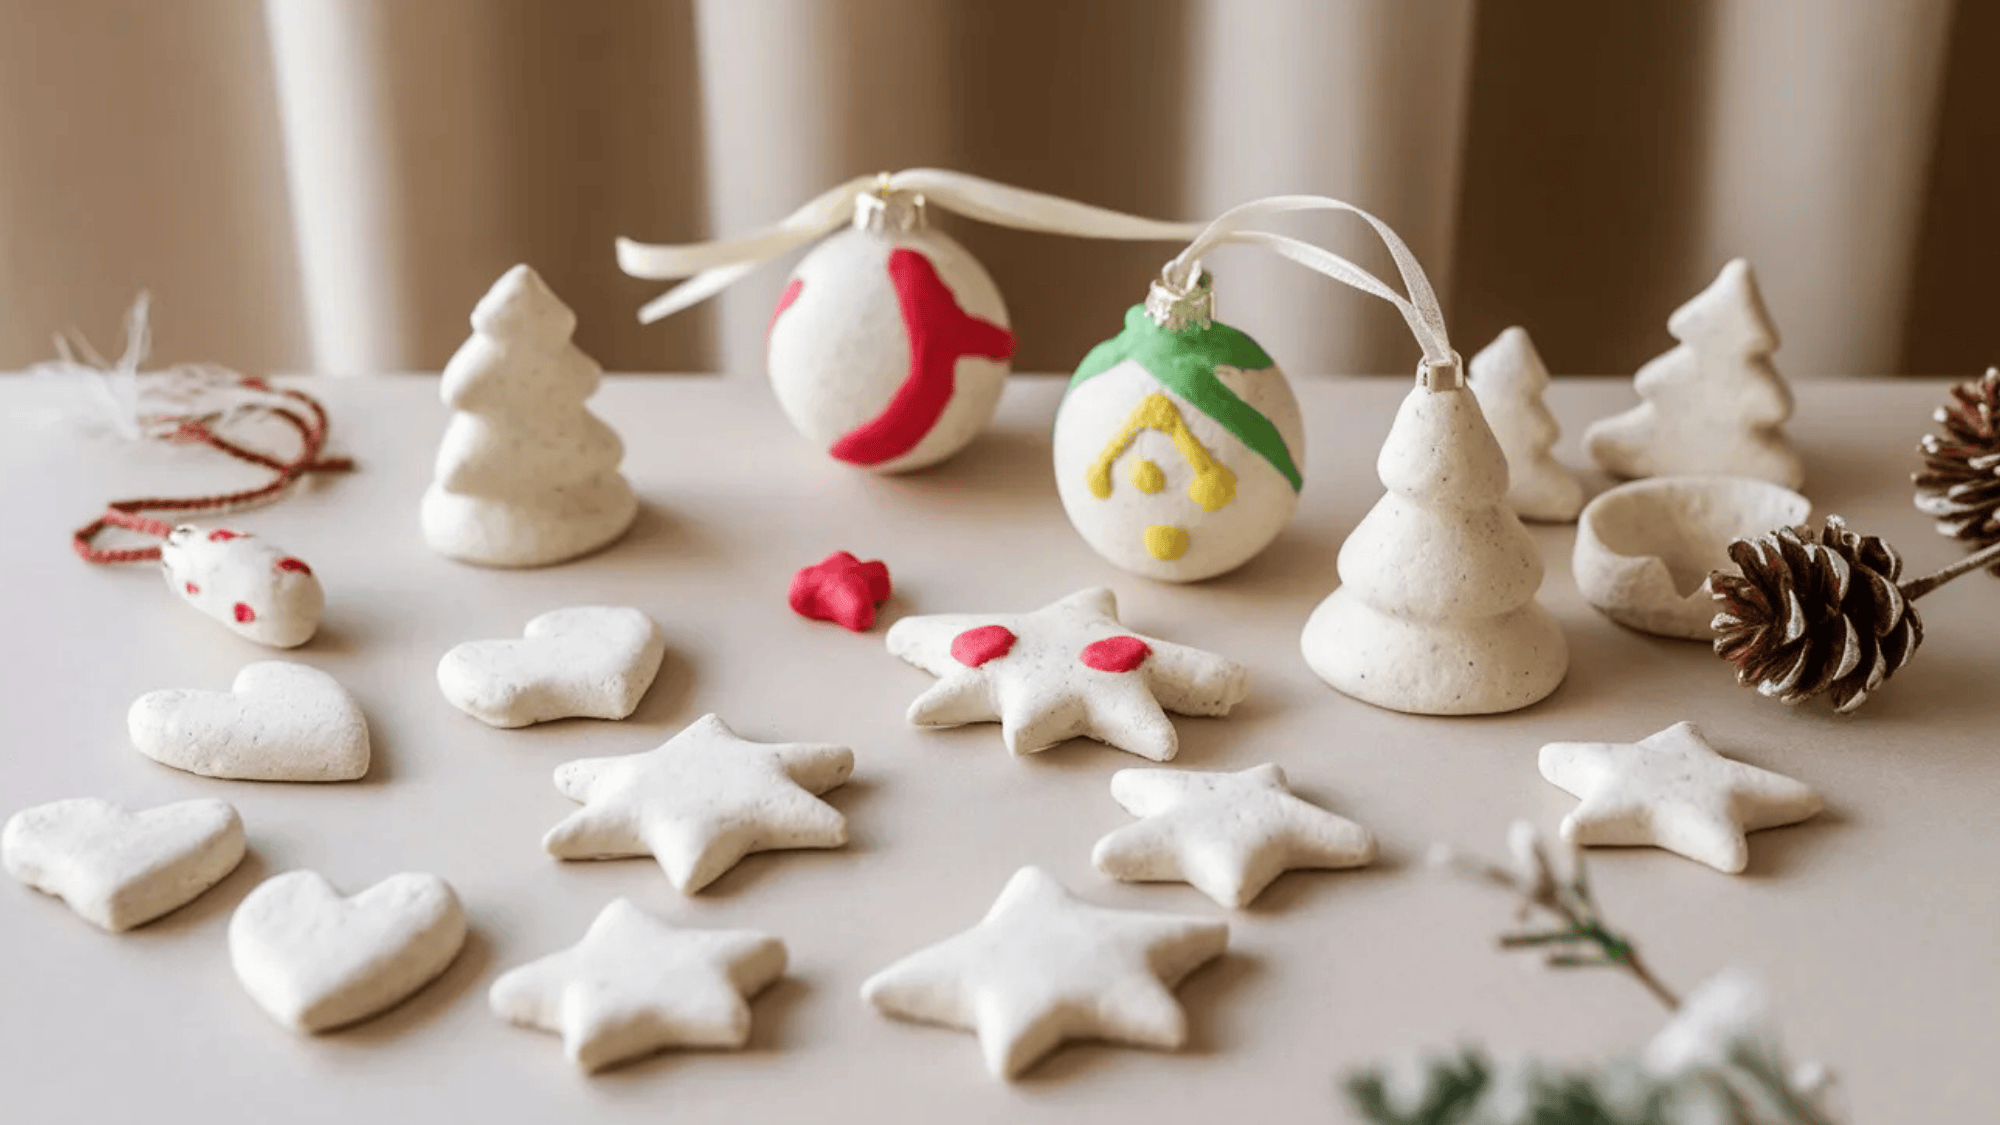
Materials Required: 2 cups flour, 1 cup salt, 1 cup water, cookie cutters, acrylic paint, ribbon, rolling pin
How to Make:
- Mix the flour and salt in a bowl, then gradually add water and knead until you have a smooth, pliable dough. It should feel similar to Play-Doh.
- Roll it out to about half an inch thick, then cut out shapes with cookie cutters.
- Use a straw to poke a hole at the top of each shape for hanging, then bake at 200°F for 2–3 hours until completely hard.
- Once cooled, paint with acrylics, let dry, and thread a ribbon through the hole. They work as ornaments, gift tags, or just decorative pieces year-round.
7. Friendship Bracelets
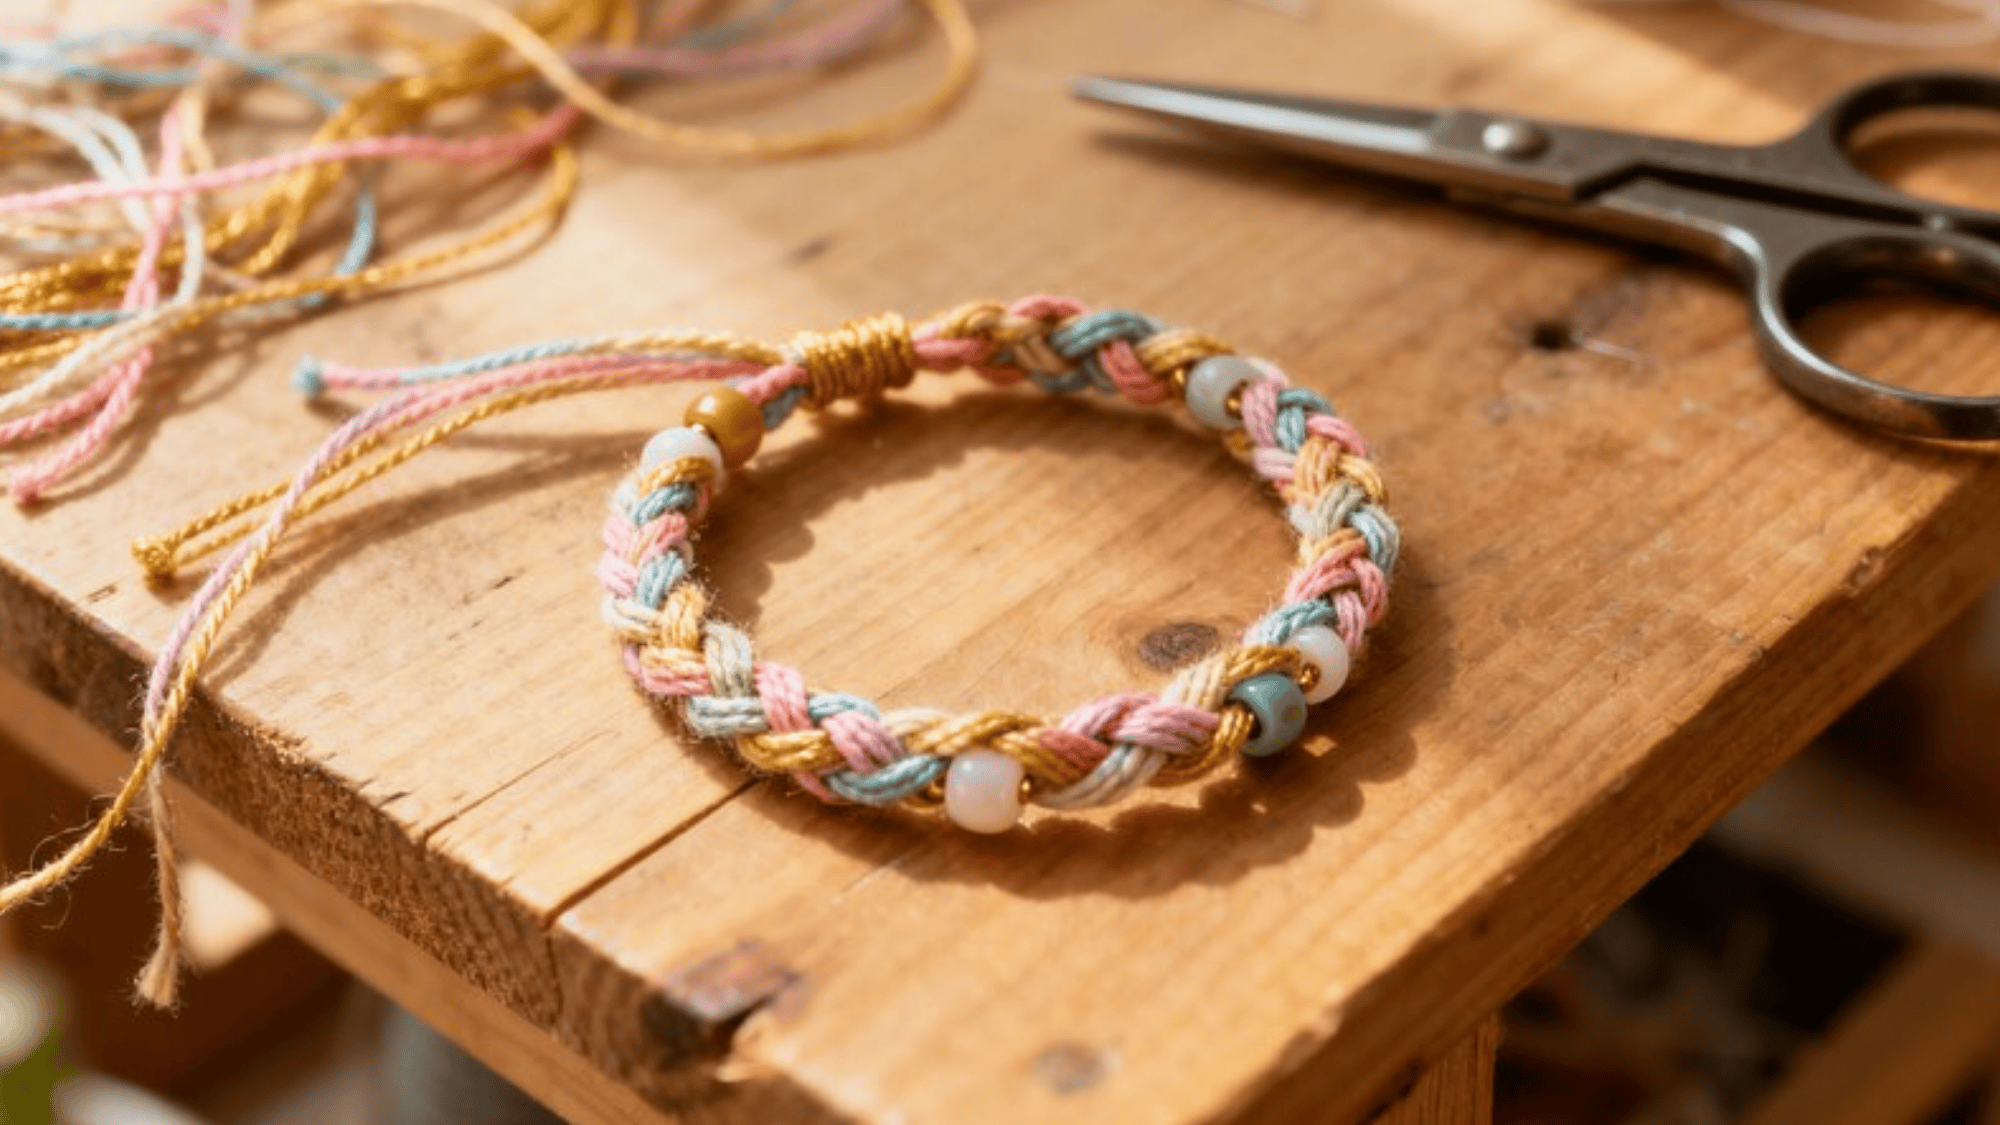
Materials Required: Embroidery floss in multiple colors, scissors, tape, or a clipboard
How to Make:
- Cut several strands of embroidery floss about 24 inches long; you’ll typically need 6–8 strands depending on the pattern.
- Tie them together at one end with a knot and secure that end to a clipboard or tape it to a flat surface so you have something to pull against.
- Choose a simple pattern to start. The basic forward knot pattern works well for beginners, and work your way down, knotting each strand in sequence.
- Keep your tension consistent throughout and finish with another knot at the bottom, leaving enough thread to tie it around your wrist.
8. Decoupage Picture Frame
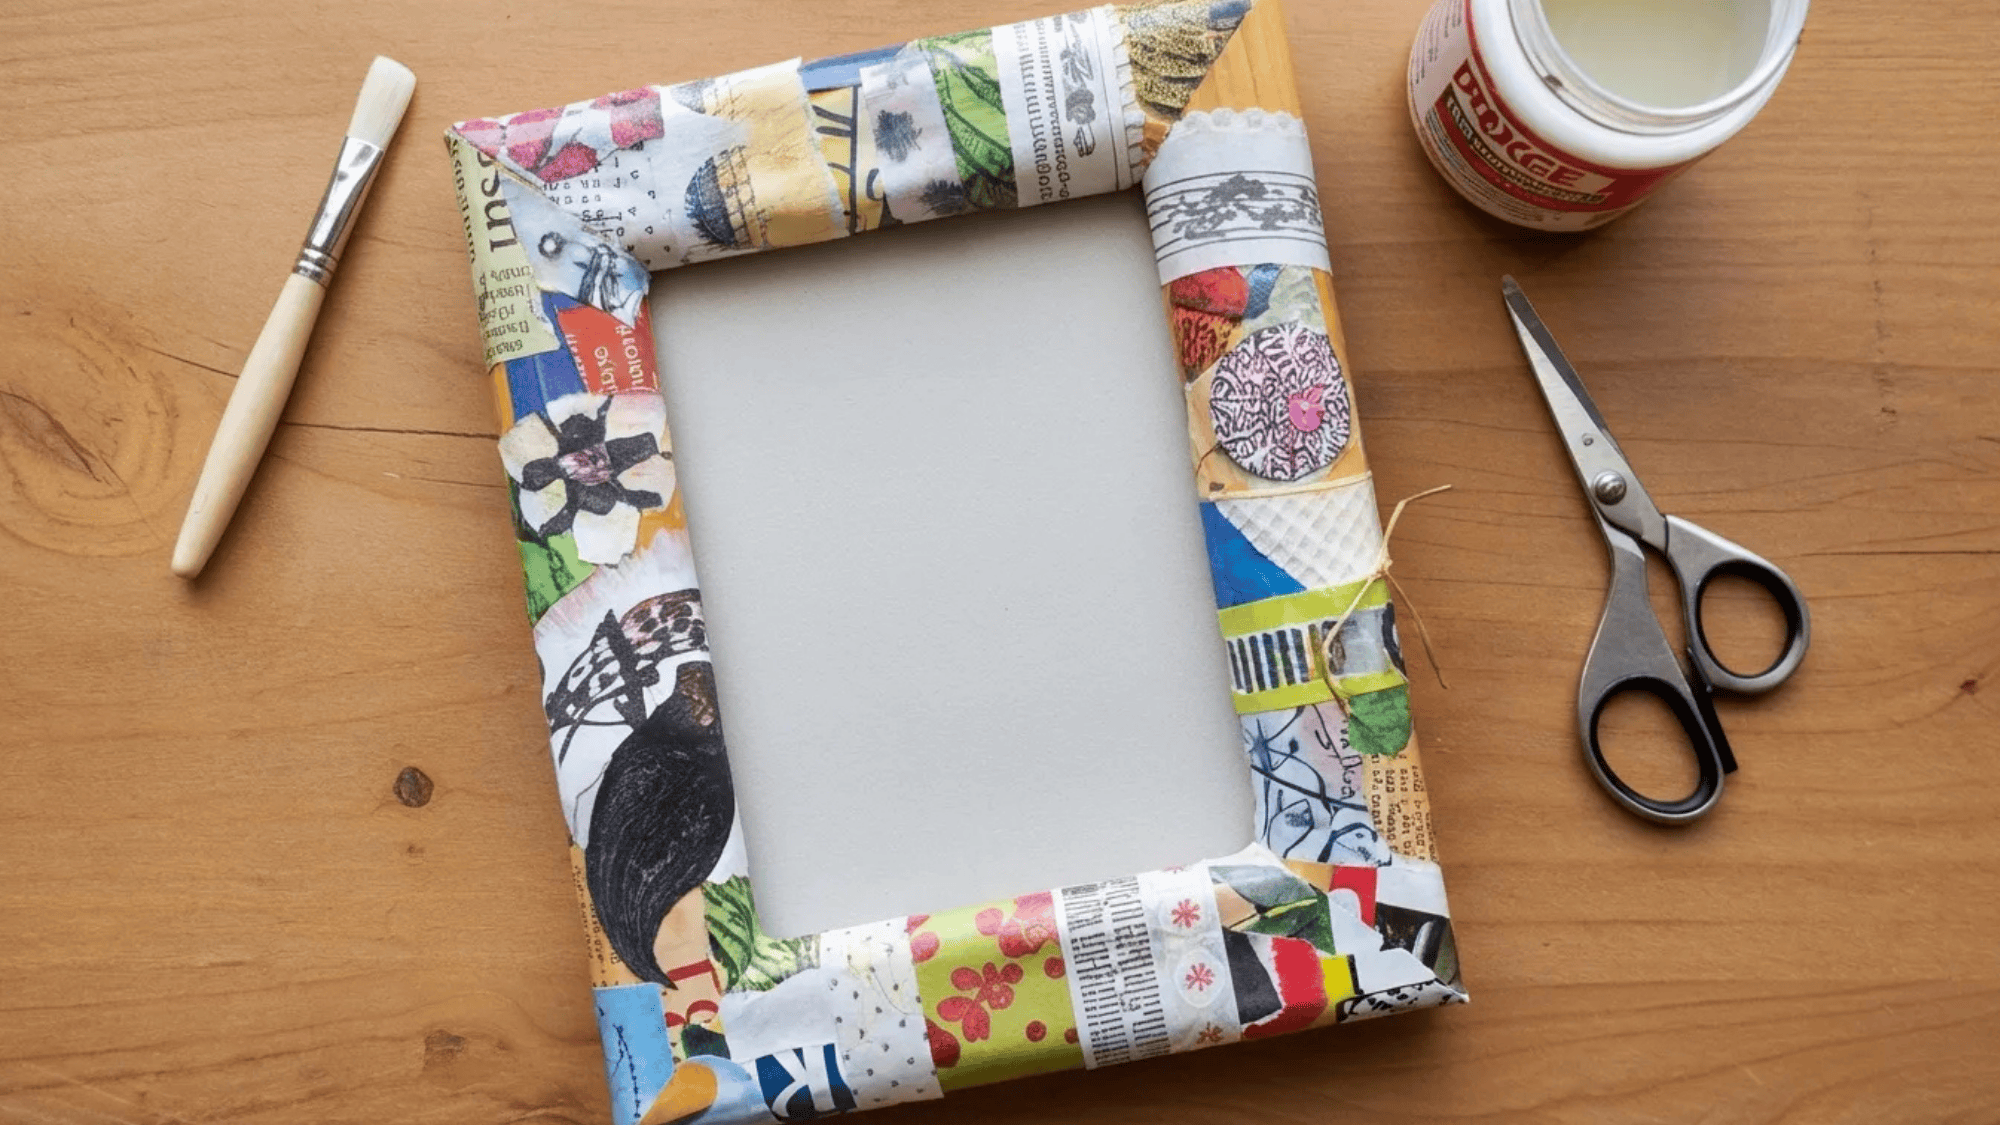
Materials Required: Plain wooden frame, Mod Podge, decorative paper or tissue paper, paintbrush, scissors
How to Make:
- Tear or cut your decorative paper into small pieces or strips; irregular edges actually look more intentional and charming than clean cuts.
- Brush a thin layer of Mod Podge onto a small section of the frame, then press a piece of paper onto it and smooth out any bubbles with your finger.
- Overlap the pieces slightly as you work around the entire frame, covering all the edges neatly.
- Once the frame is fully covered, apply two or three coats of Mod Podge over the top as a sealant, letting each coat dry before adding the next.
9. DIY Snow Globe
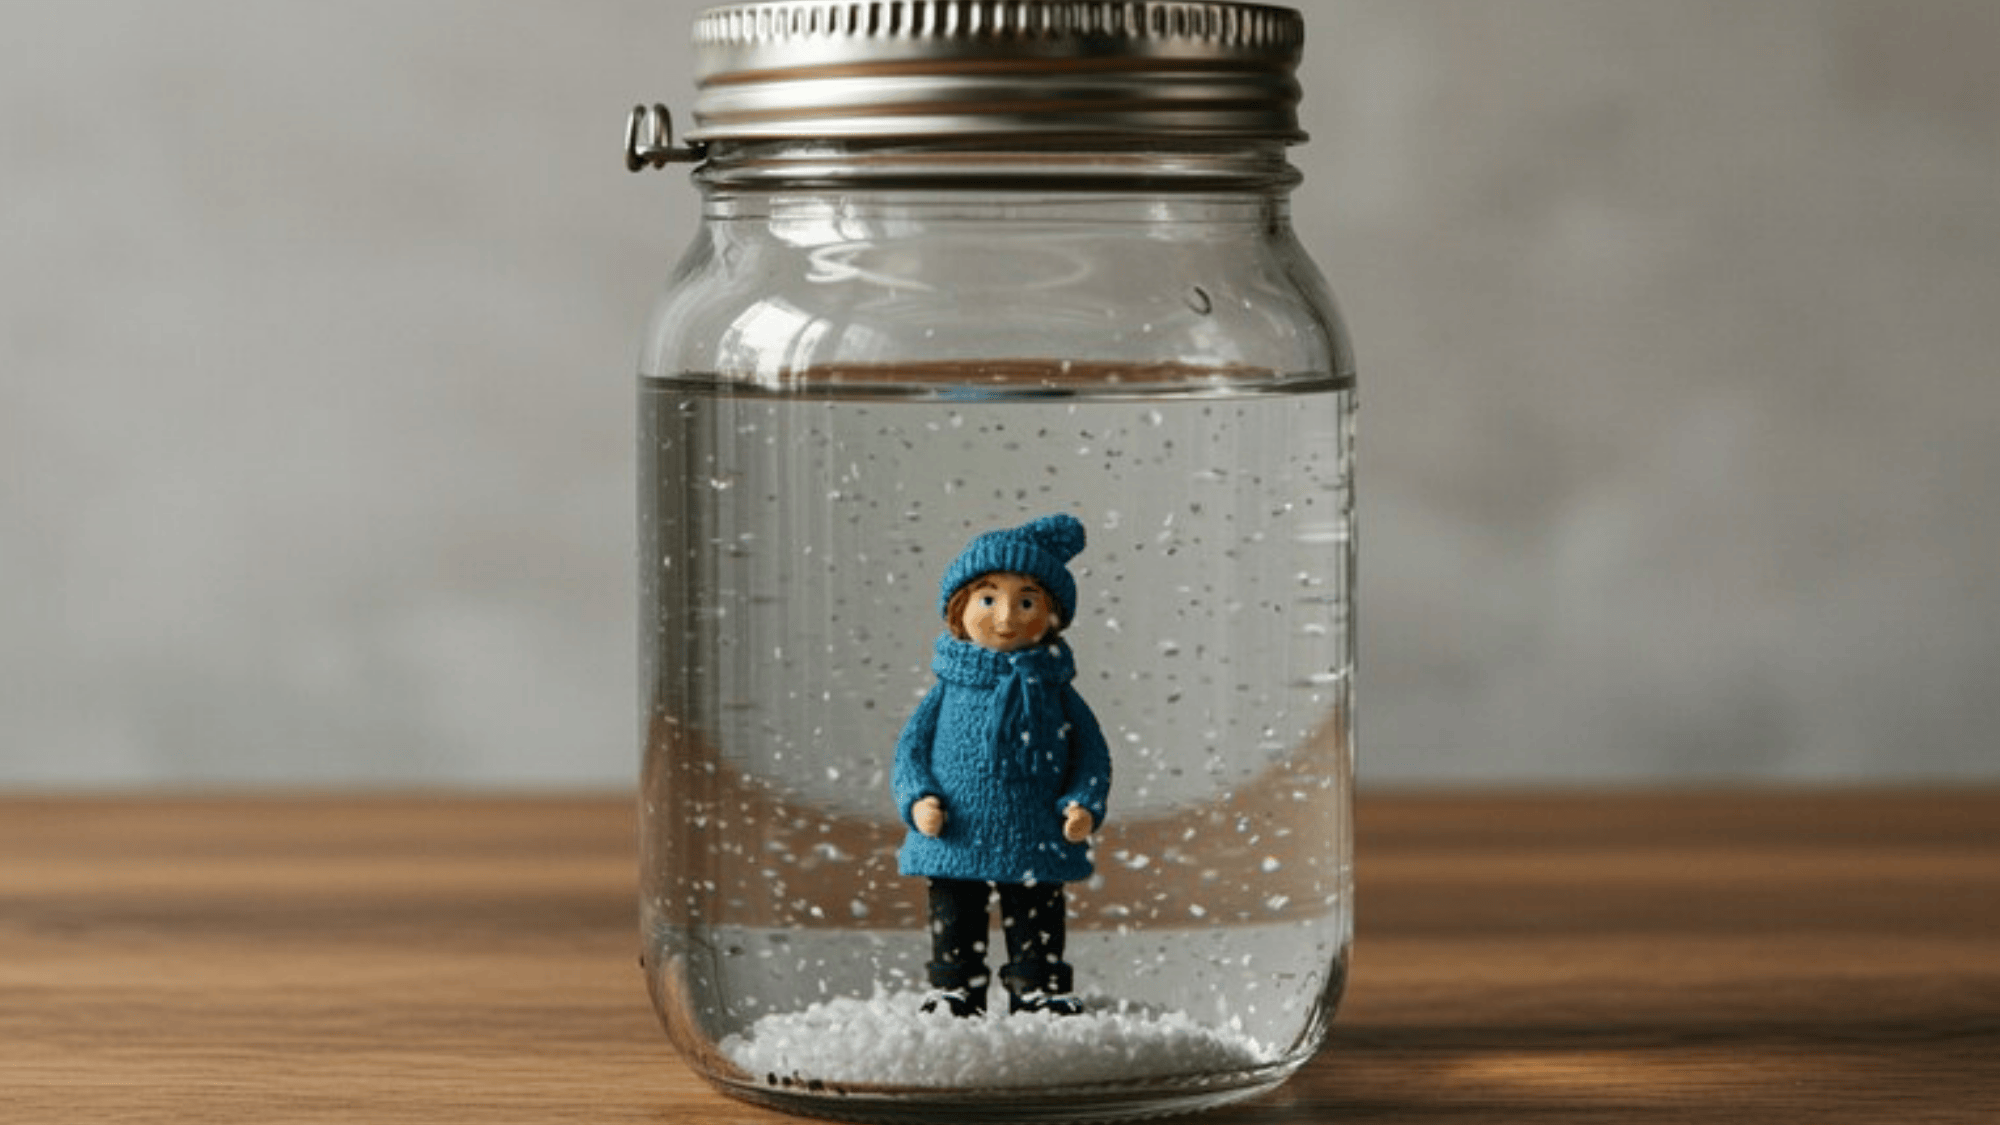
Materials Required: A glass jar with a tight lid, a small waterproof figurine, distilled water, glycerin, white glitter or fake snow, and waterproof glue
How to Make:
- Glue your figurine securely to the inside of the jar lid using a waterproof adhesive, then let it cure completely. This is important, so give it a full 24 hours.
- Fill the jar almost to the top with distilled water, then add a teaspoon of glycerin to slow the movement of the “snow” and a generous pinch of white glitter or fake snow.
- Screw the lid on tightly, adding a bead of waterproof sealant around the rim if needed.
- Flip the jar over so the figurine is upright, give it a shake, and watch the magic happen.
10. Leaf Print Art

Materials Required: Fresh leaves in various shapes and sizes, acrylic paint, paper or canvas, a brayer or paintbrush
How to Make:
- Collect a variety of leaves with interesting shapes and clear vein details; these transfer the most beautifully.
- Apply a thin, even layer of acrylic paint to the underside of each leaf using a brush or a brayer, making sure the veins are well-coated.
- Press the painted side firmly onto your paper or canvas, then cover it with a scrap piece of paper and rub gently across the surface to transfer the print.
- Lift the leaf carefully straight up to avoid smearing and repeat with different leaves and colors, overlapping prints for a layered, artistic effect.
11. Yarn Wrapped Letters
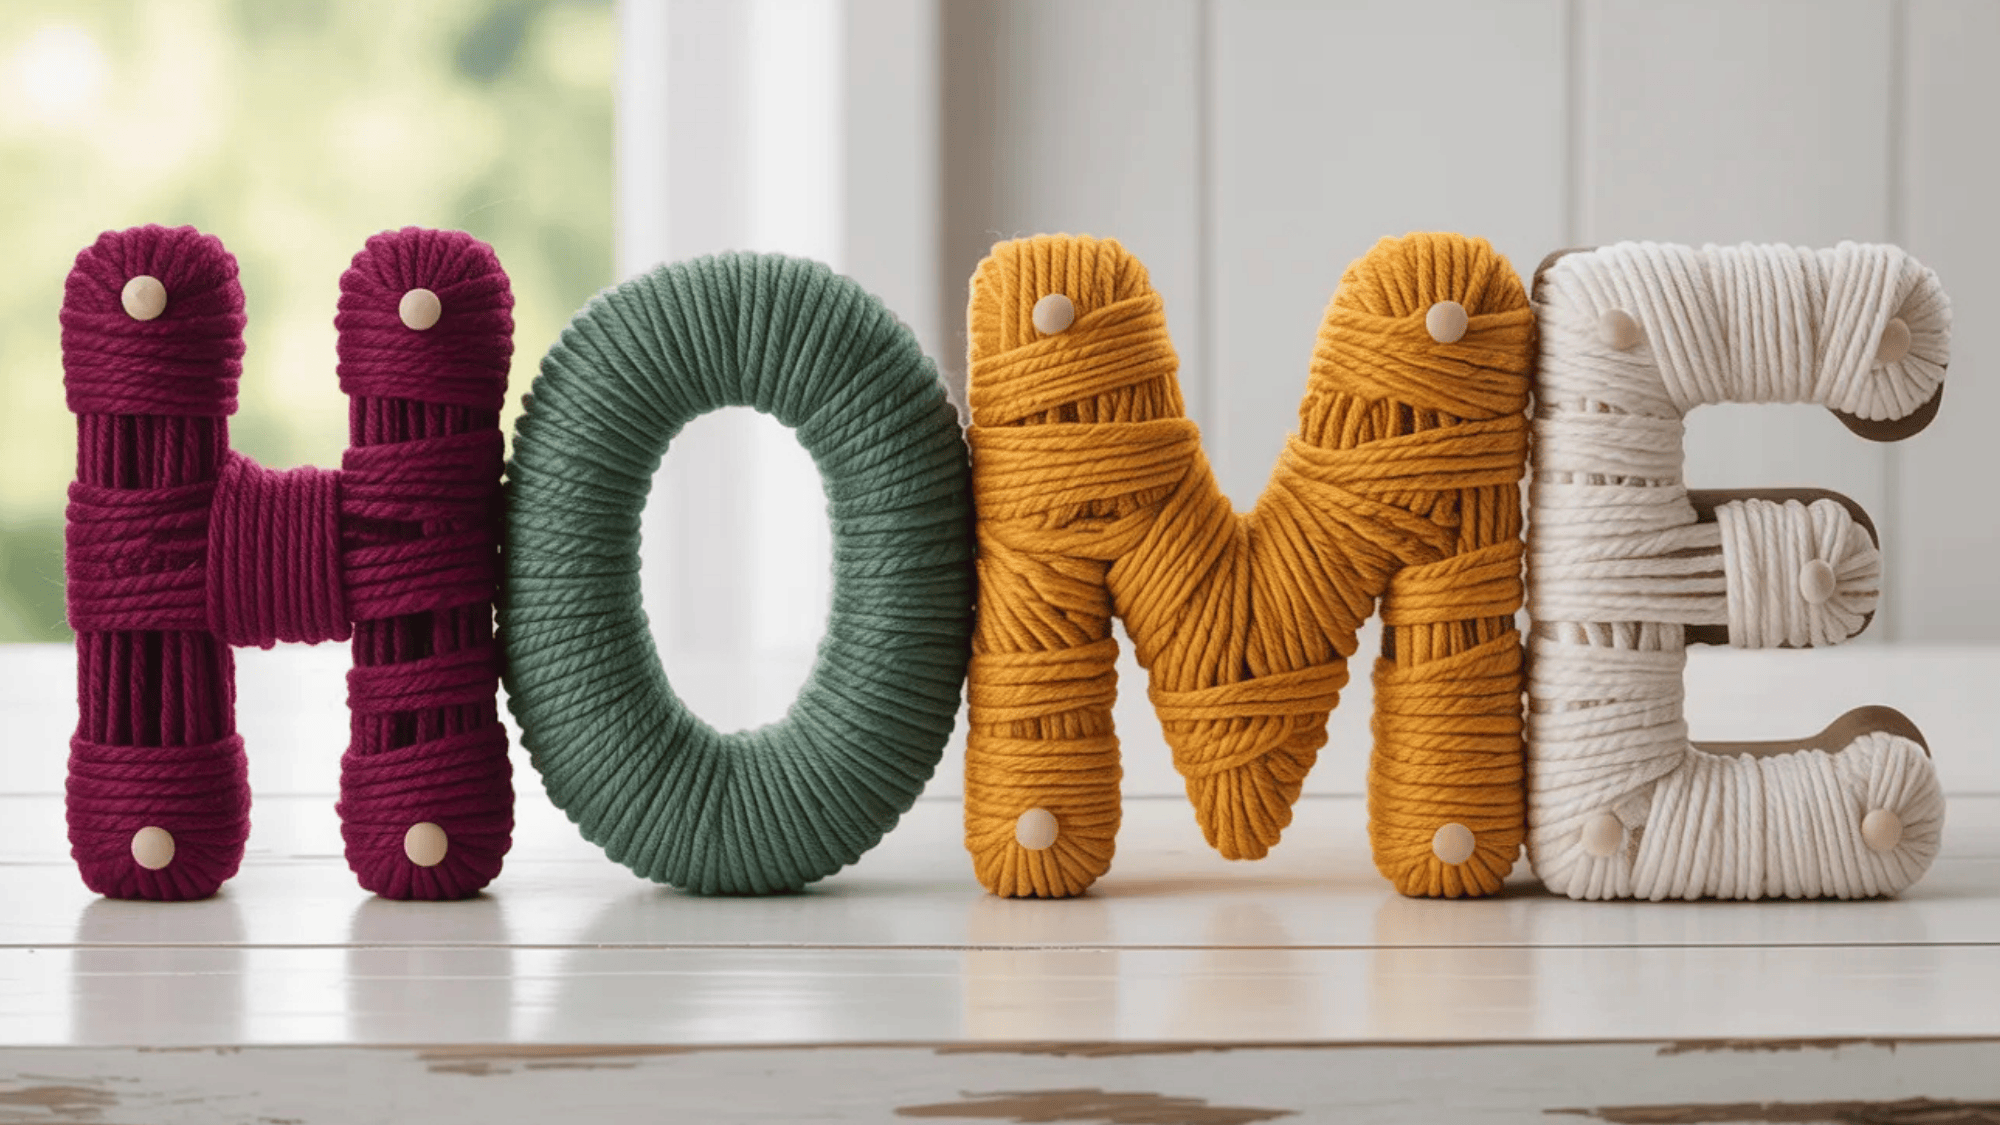
Materials Required: Cardboard or wooden letters, yarn in your chosen colors, craft glue, scissors
How to Make:
- If you’re using cardboard, cut your letters out in a thick, chunky font so there’s enough surface area to wrap.
- Apply a small line of craft glue at the starting point and press the end of your yarn down to secure it.
- Begin wrapping the yarn tightly and evenly around the letter, adding tiny dots of glue every few inches to keep it from slipping.
- When you want to change colors, cut the yarn and glue down the end before starting the new color. Work around any tricky curves slowly and finish by tucking and gluing the end neatly out of sight.
12. DIY Dreamcatcher
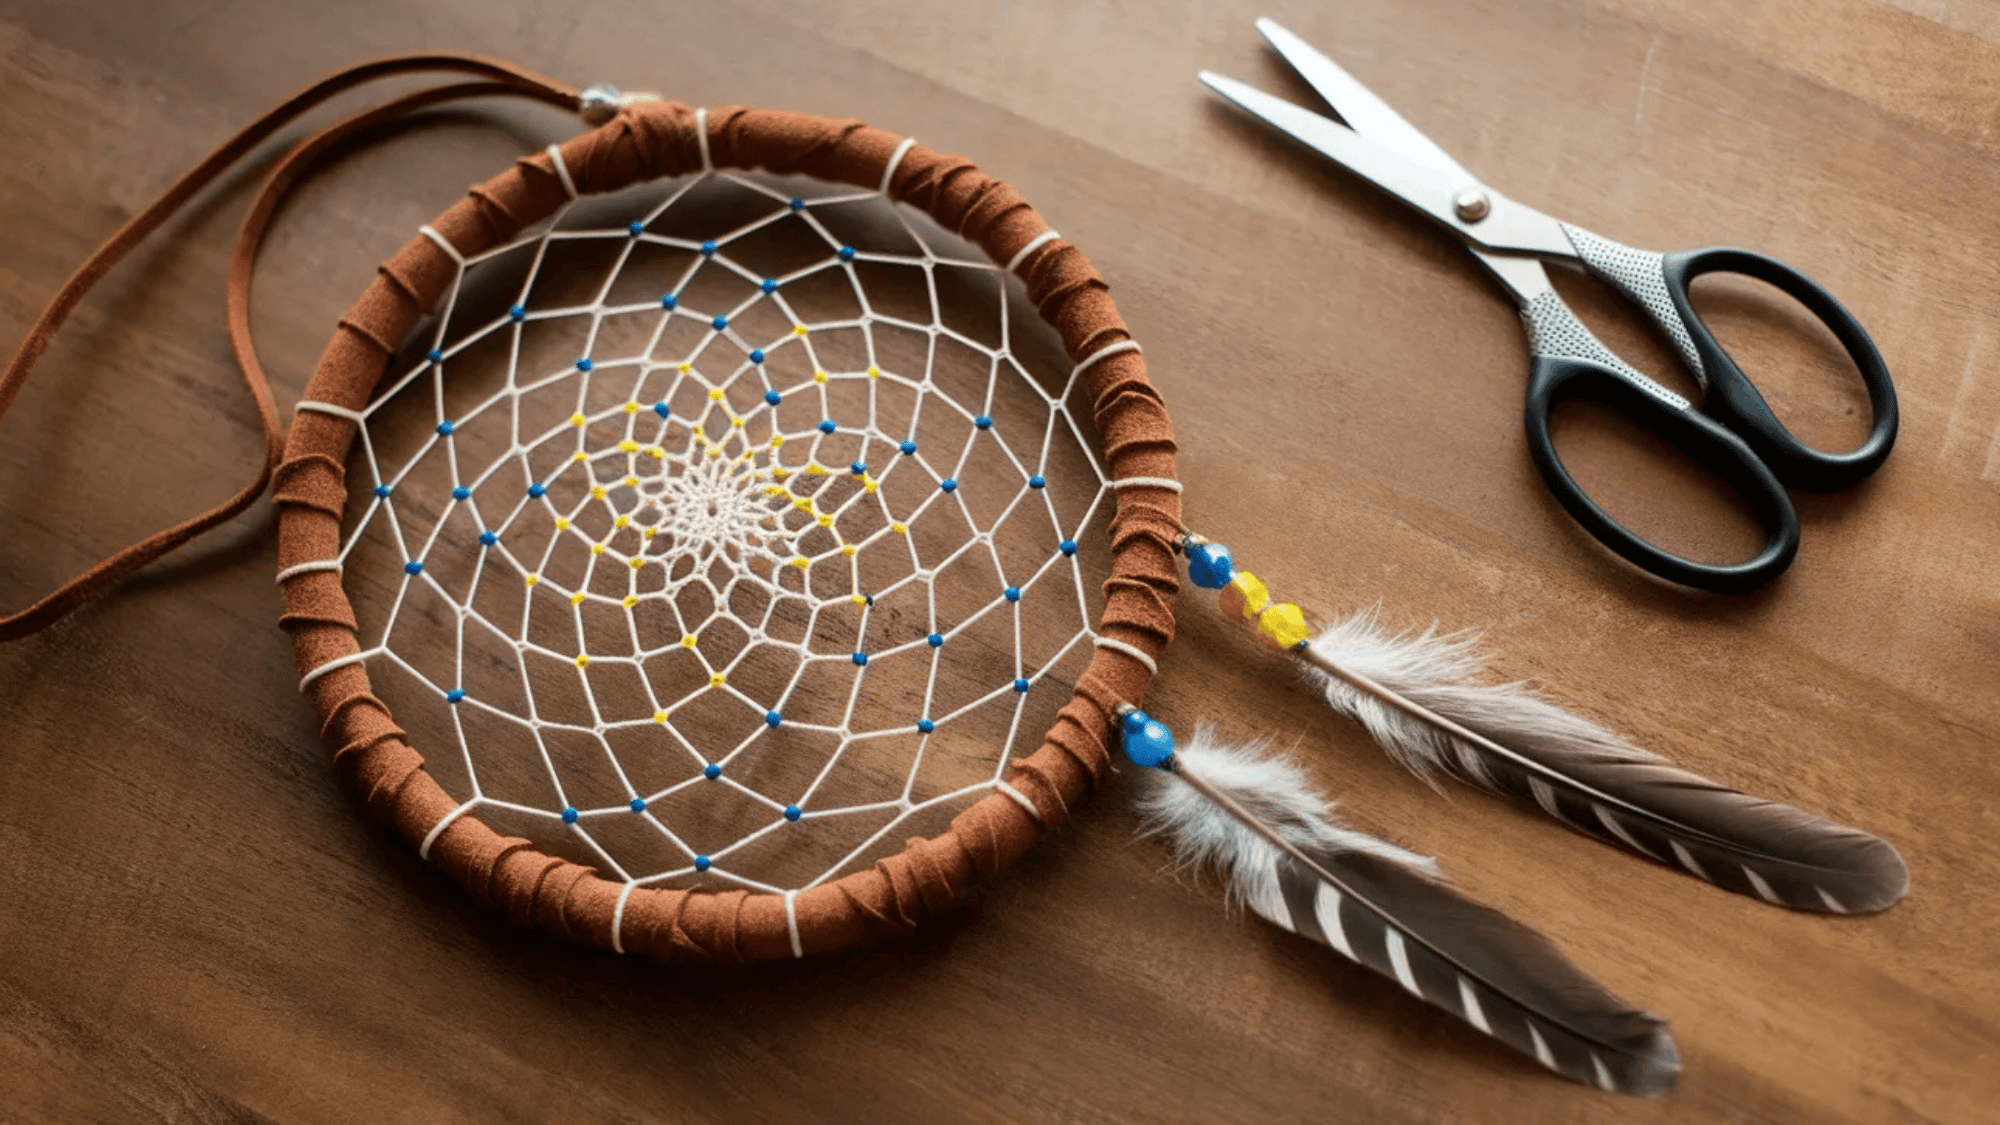
Materials Required: A metal or wooden hoop, suede cord or yarn, feathers, beads, scissors
How to Make:
- Wrap your hoop completely in suede cord or yarn, securing the starting end with a knot and wrapping tightly until the entire ring is covered.
- Tie a length of thin cord to the top of the hoop and begin creating the web by looping it around the inside of the hoop at evenly spaced intervals, then looping through the previous row each time you go around.
- Thread beads onto the web as you work inward if desired. Once the center is reached, tie off and secure the knot. Hang strands of cord from the bottom of the hoop and attach feathers by folding the cord over the feather stem and wrapping it tightly.
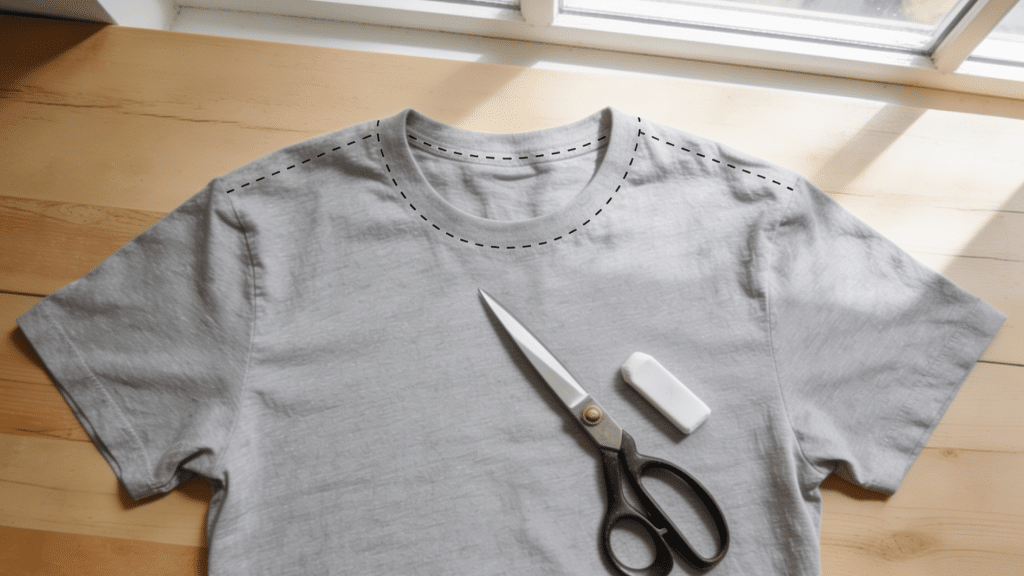
13. Tie-Dye T-Shirts
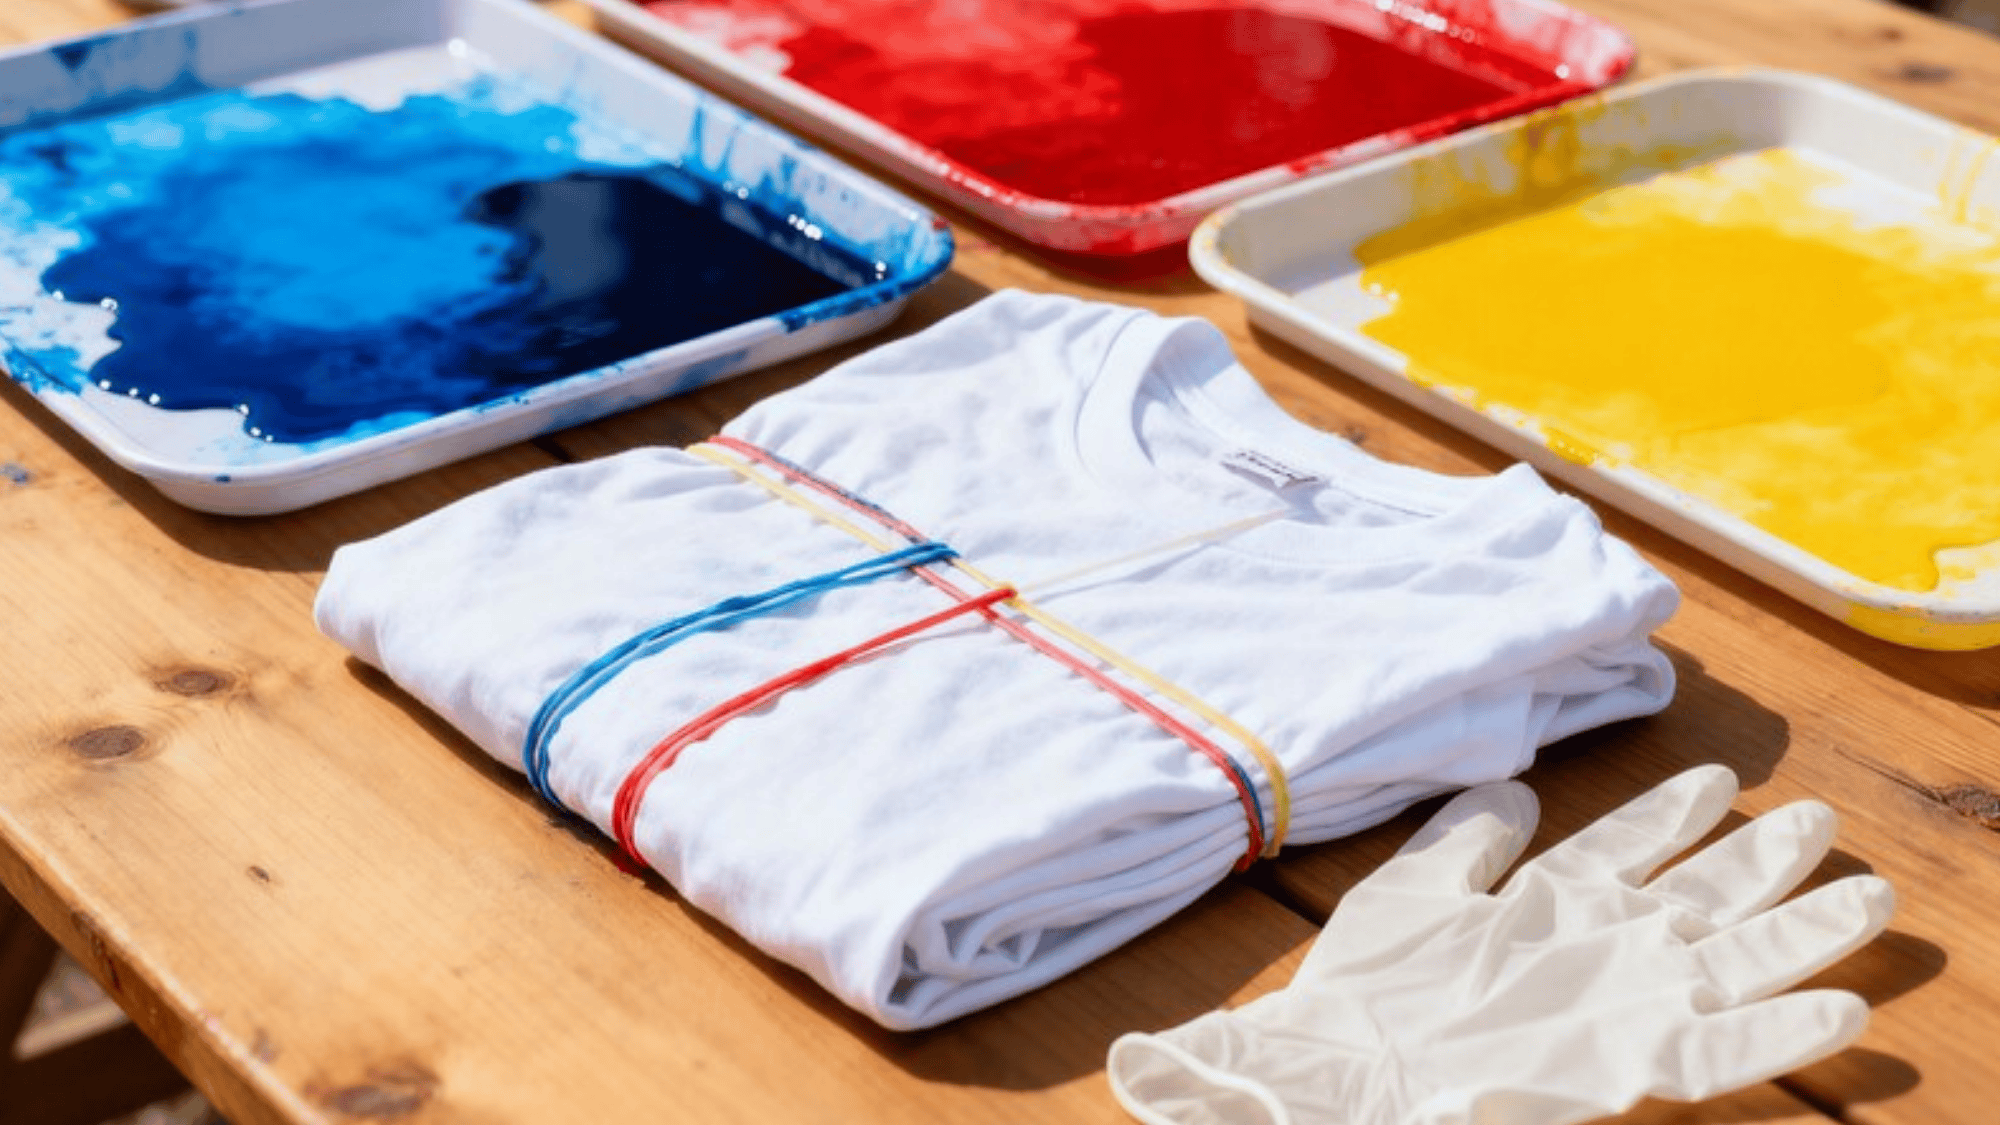
Materials Required: Plain white cotton t-shirts, fiber reactive dye in assorted colors, rubber bands, plastic squeeze bottles, gloves, plastic wrap
How to Make:
- Soak your t-shirt in a soda ash solution for about 20 minutes beforehand to help the dye set. This step makes a big difference in color vibrancy.
- Scrunch, fold, or twist the shirt into your chosen pattern and secure it tightly with rubber bands.
- Mix your dyes according to the packet instructions and pour them into squeeze bottles.
- Apply the colors to different sections of the shirt, working the dye thoroughly through the fabric.
- Wrap the whole thing in plastic wrap and leave it to set for 6–8 hours or overnight.
- Rinse under cold water, remove the rubber bands, and wash separately before wearing.
14. Rock Painting
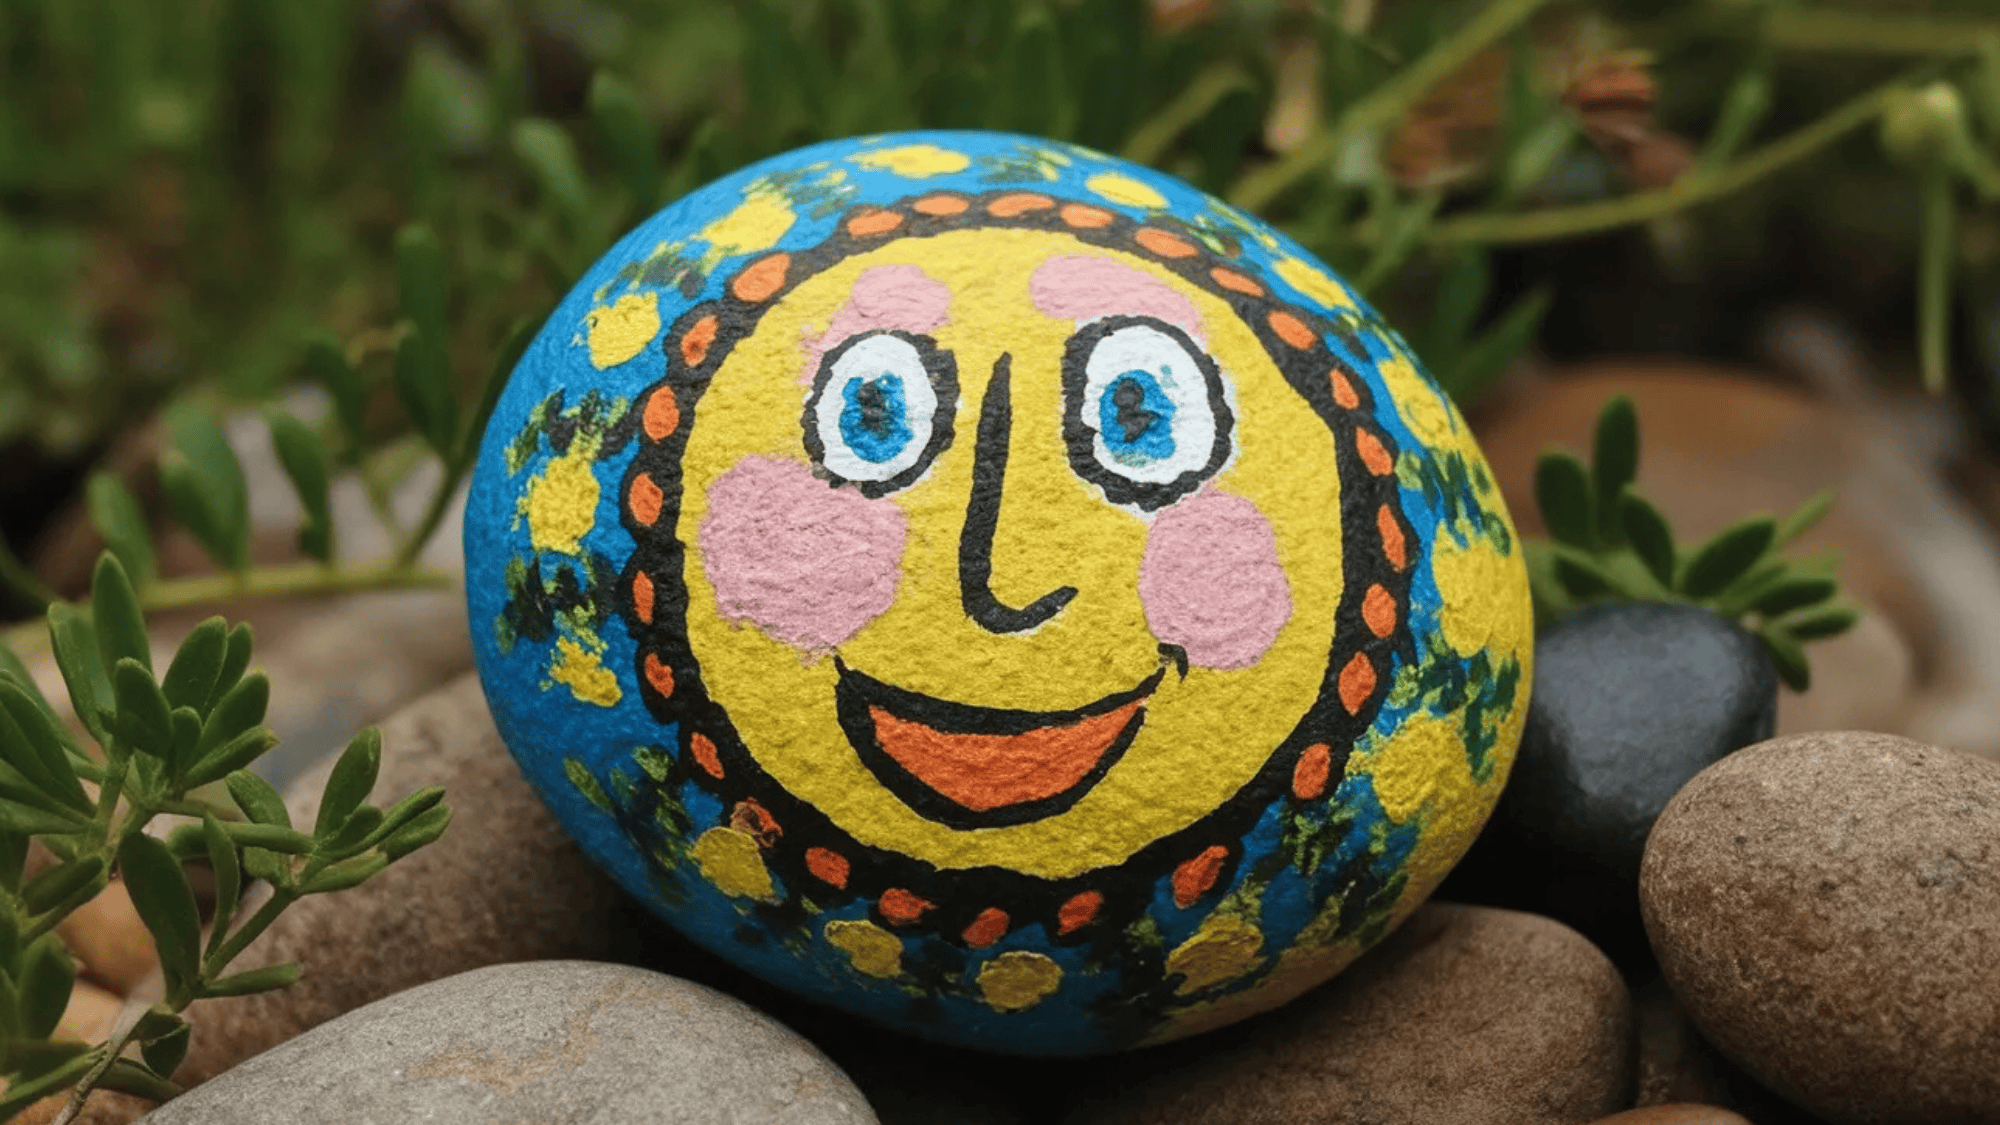
Materials Required: Smooth flat rocks, acrylic paint, fine paintbrushes, sealant spray, paint markers (optional)
How to Make:
- Wash and dry your rocks completely before painting; any dirt or moisture will affect how the paint adheres.
- Apply a white base coat first to make your colors pop, especially on darker stones, and let it dry fully.
- Paint your design with acrylic paint, and let each color dry before adding details. Paint markers are great for fine lines and outlines.
- Once your design is finished and completely dry, seal the whole rock with a clear spray sealant to protect it from chipping and weather if you plan to leave it outdoors.
15. Macramé Wall Hanging

Materials Required: Macramé cord, a wooden dowel or stick, scissors, a comb (for fringe)
How to Make:
- Cut your macramé cord into lengths about 4 times as long as your desired finished piece; you’ll lose a lot of length in the knotting.
- Fold each length in half and attach it to the dowel using a simple lark’s head knot, lining them up across the full width of the dowel.
- Work your way down using square knots, the most fundamental macramé knot, grouping cords in sets of four and alternating the groupings with each row to create a diagonal pattern.
- Finish the bottom edge however you like, an even horizontal cut, a V-shape, or a long fringe combed out for a boho feel.
16. DIY Terrarium
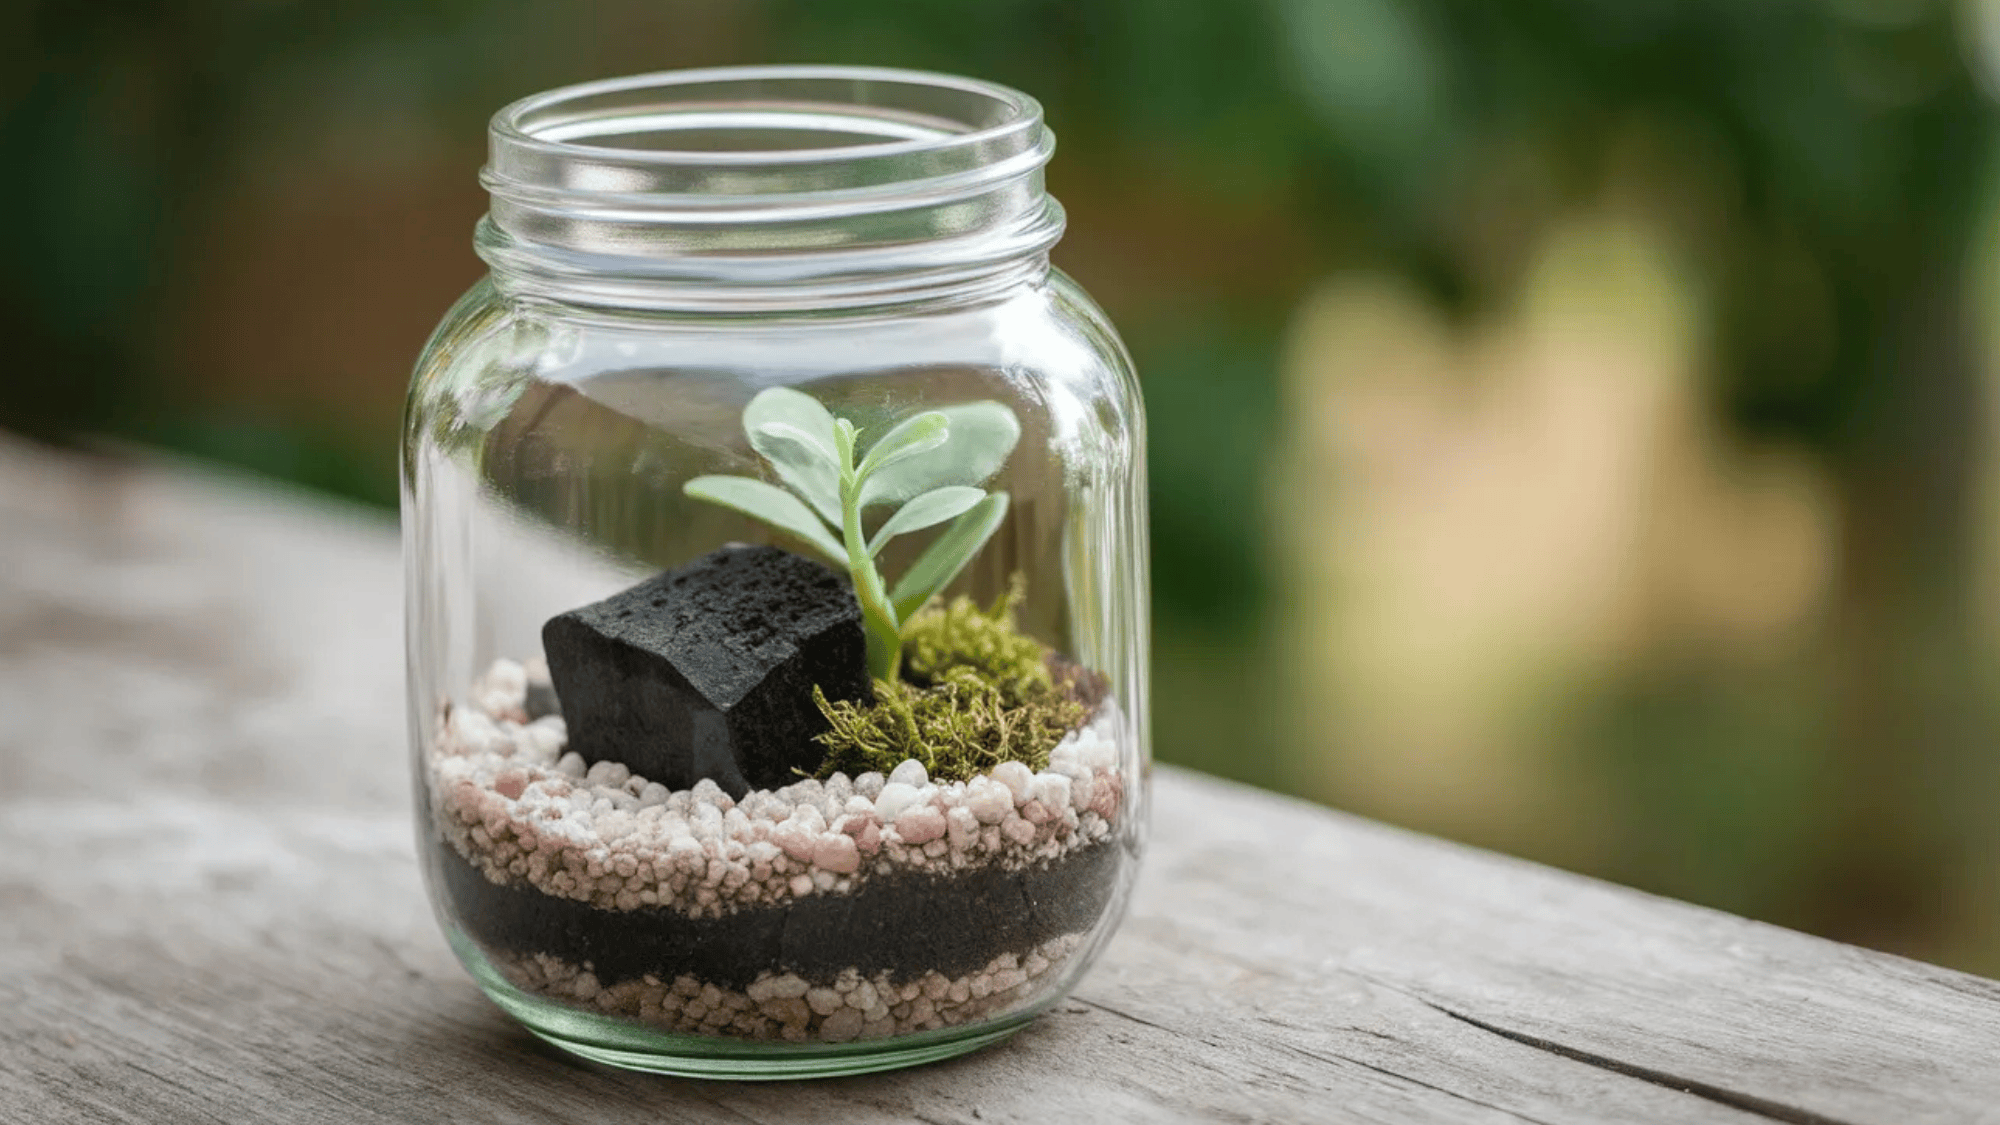
Materials Required: A glass jar or container, small pebbles, activated charcoal, potting soil, small plants or succulents, moss (optional)
How to Make:
- Start with a clean, dry glass container, a wide-mouth jar, a fishbowl, or even an old aquarium, all of which work well.
- Add a layer of small pebbles at the bottom for drainage, followed by a thin layer of activated charcoal to keep the soil fresh and prevent mold.
- Spoon in a layer of potting soil deep enough to accommodate your plants’ roots.
- Plant your chosen succulents or small plants by making a small hole in the soil, placing the plant, and gently pressing the soil around the roots.
- Finish with decorative moss or small stones on the surface and mist lightly with water.
17. Pressed Flower Art
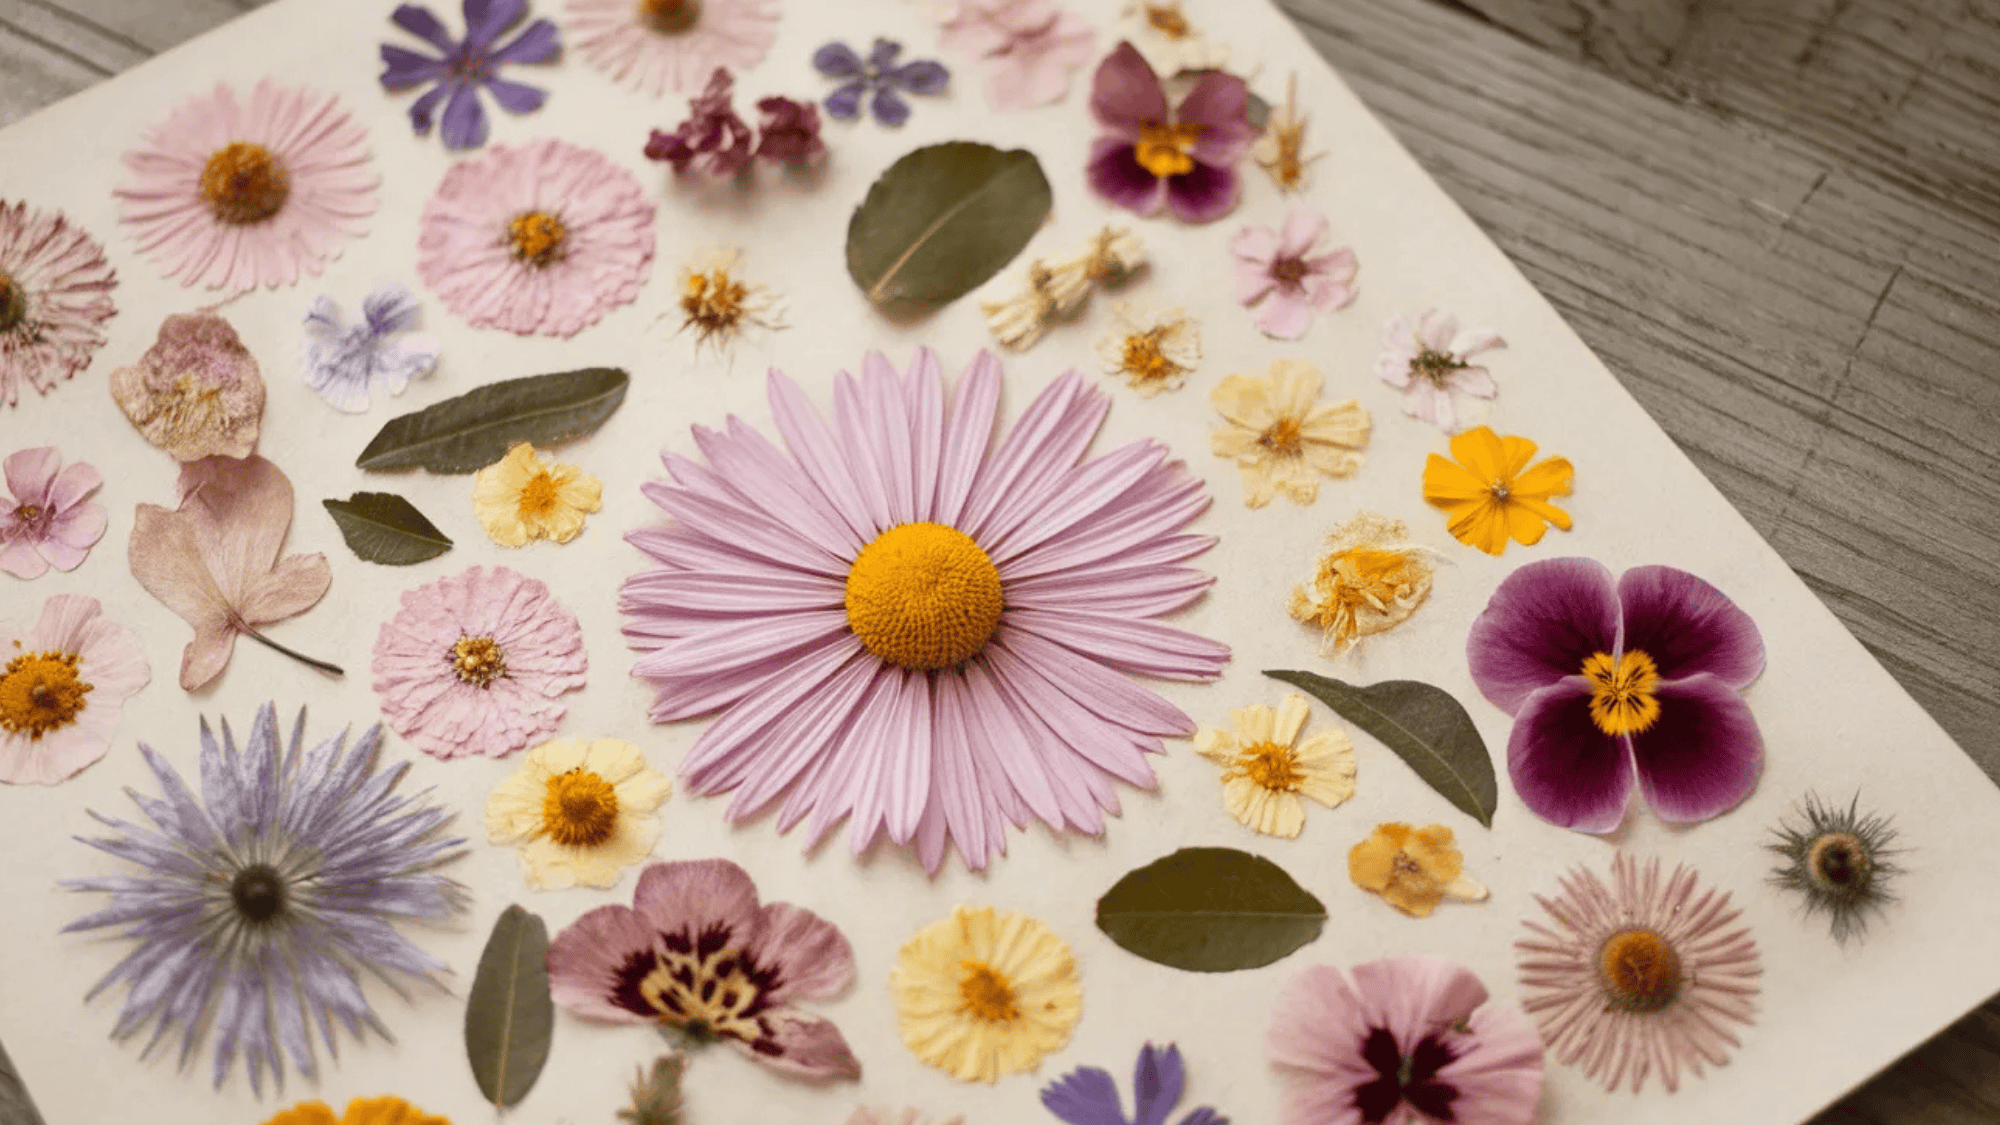
Materials Required: Fresh flowers and leaves, heavy books, parchment paper, a frame, craft glue or Mod Podge
How to Make:
- Pick your flowers on a dry day and place them between two sheets of parchment paper inside a heavy book, a dictionary, or an encyclopedia.
- Stack more heavy books on top and leave them for at least two weeks, checking occasionally to make sure they’re pressing flat.
- Once fully pressed and dried, arrange your flowers on a sheet of paper or cardstock in a design you like before committing to gluing them down.
- Apply a small amount of craft glue or Mod Podge to the back of each flower and press it carefully into place. Frame and hang once completely dry.
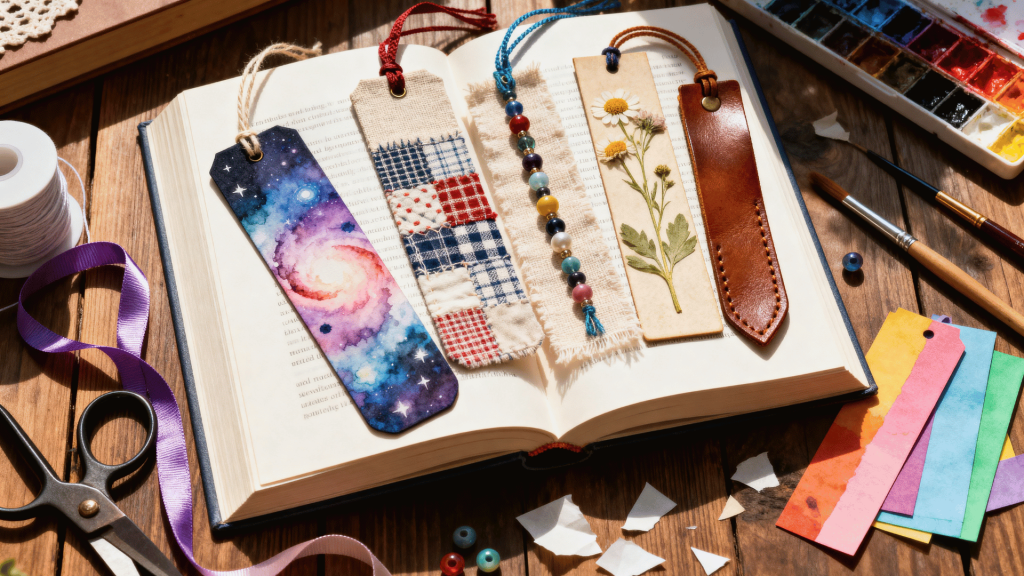
18. DIY Bookmarks
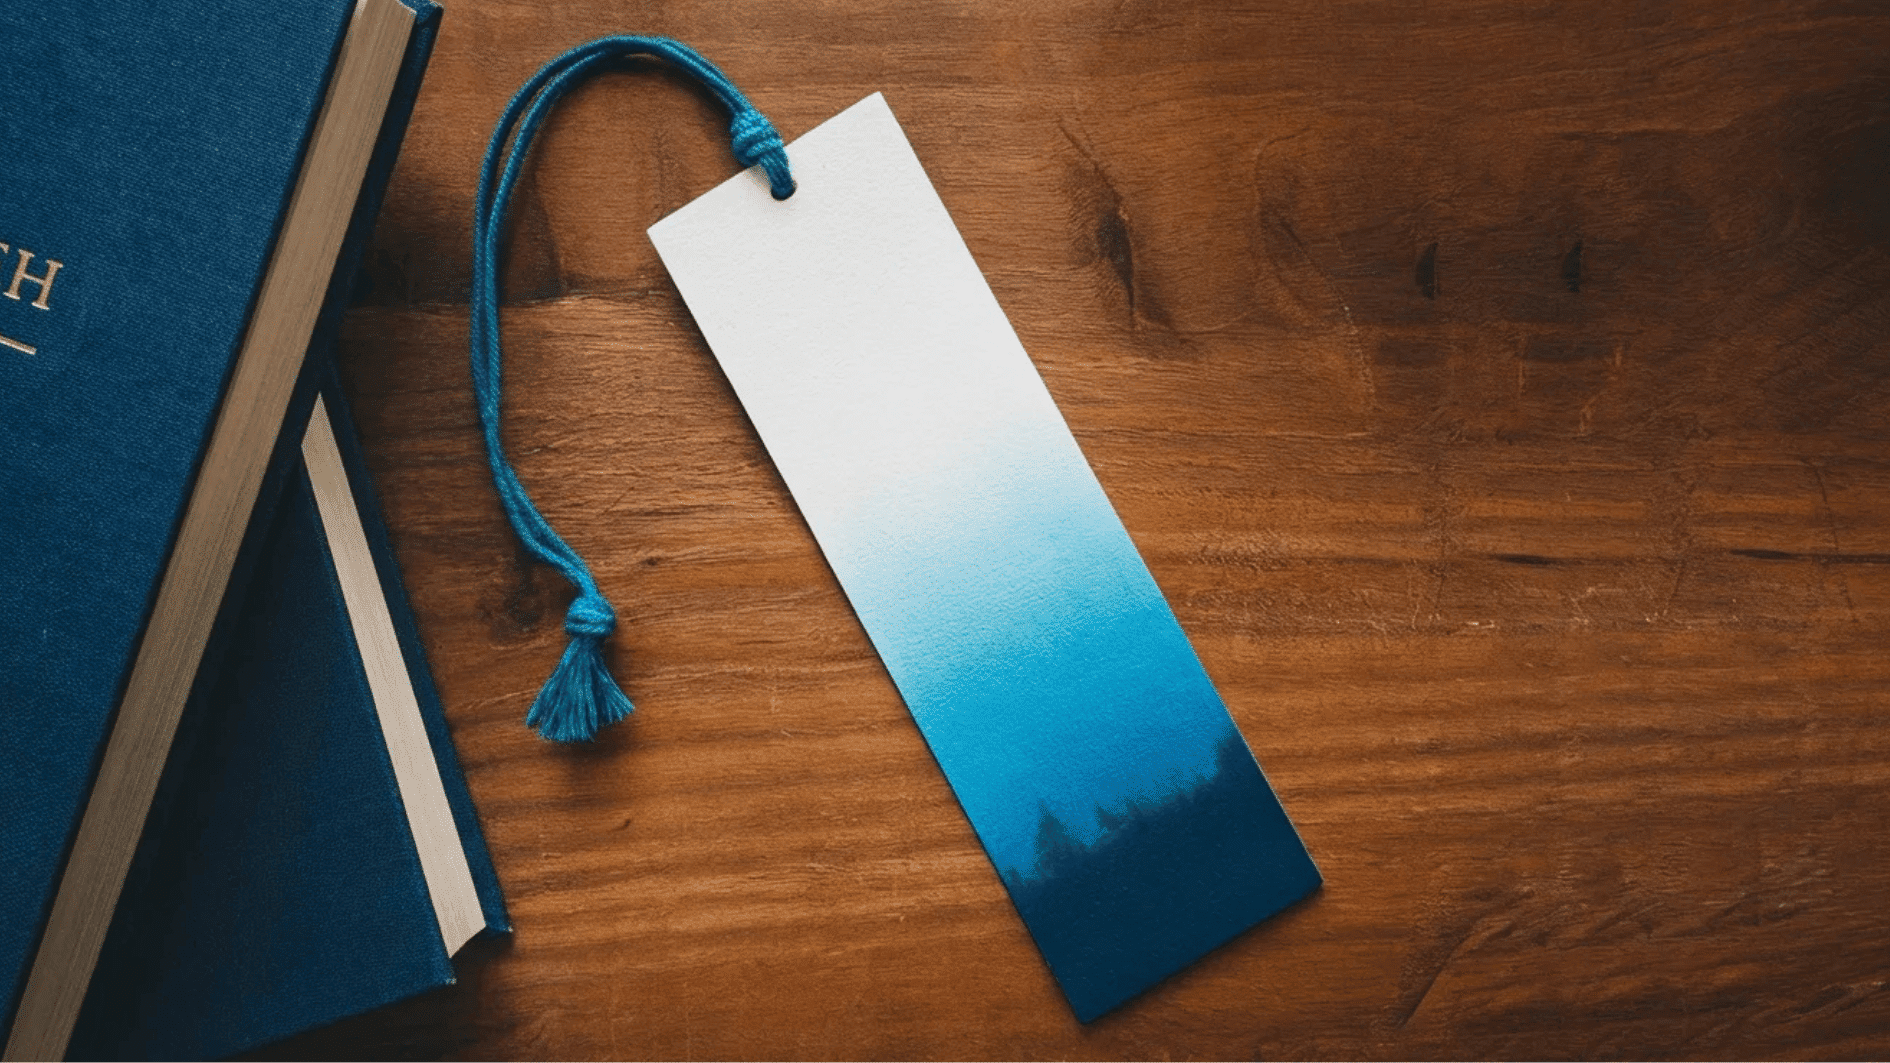
Materials Required: Cardstock or thick paper, scissors, markers or watercolors, hole punch, ribbon or tassel
How to Make:
- Cut your cardstock into bookmark-sized strips, roughly 2 inches wide and 7 inches long, which is a good standard size.
- Decorate the front however you like, watercolor washes, hand-lettered quotes, doodles, or stamped patterns all work beautifully.
- Once the decoration is dry, use a hole punch to create a hole at the top, then thread a ribbon or tassel through it and knot it securely.
- To make them more durable, laminate them or cover both sides with clear contact paper before adding the tassel.
19. Sock Puppets
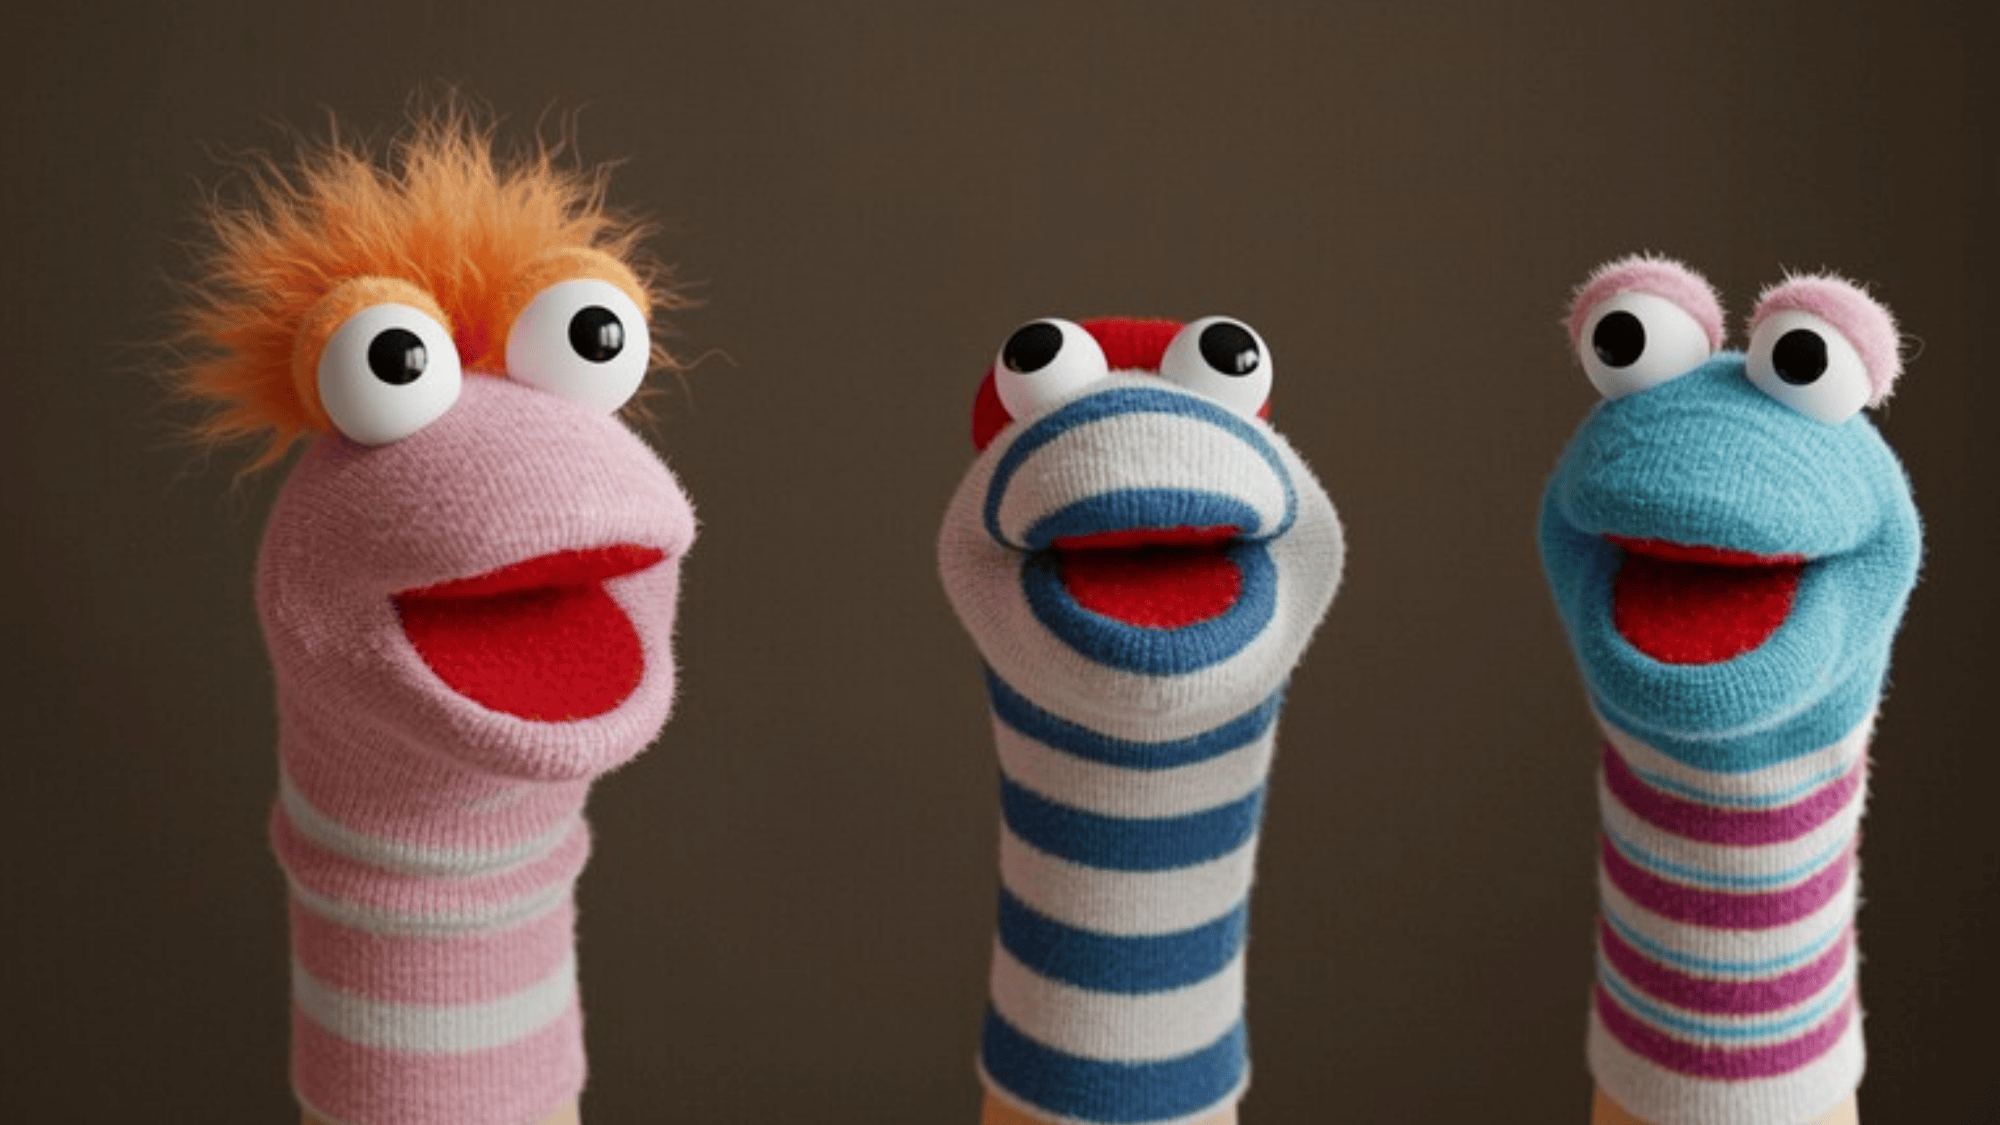
Materials Required: Old socks, googly eyes, felt scraps, yarn, craft glue or a hot glue gun, scissors
How to Make:
- Pull an old sock over your hand and identify where the mouth would naturally fall when you open and close your fingers.
- Cut a small oval from felt and glue it inside the sock to create a lining for the mouth.
- Glue googly eyes above the mouth area and use felt scraps to add ears, hair, teeth, tongues, or whatever character details you want.
- Yarn makes great hair. Cut it into strips and glue a bunch together at the top of the head. Let everything dry fully before putting on a puppet show.
20. DIY Resin Coasters
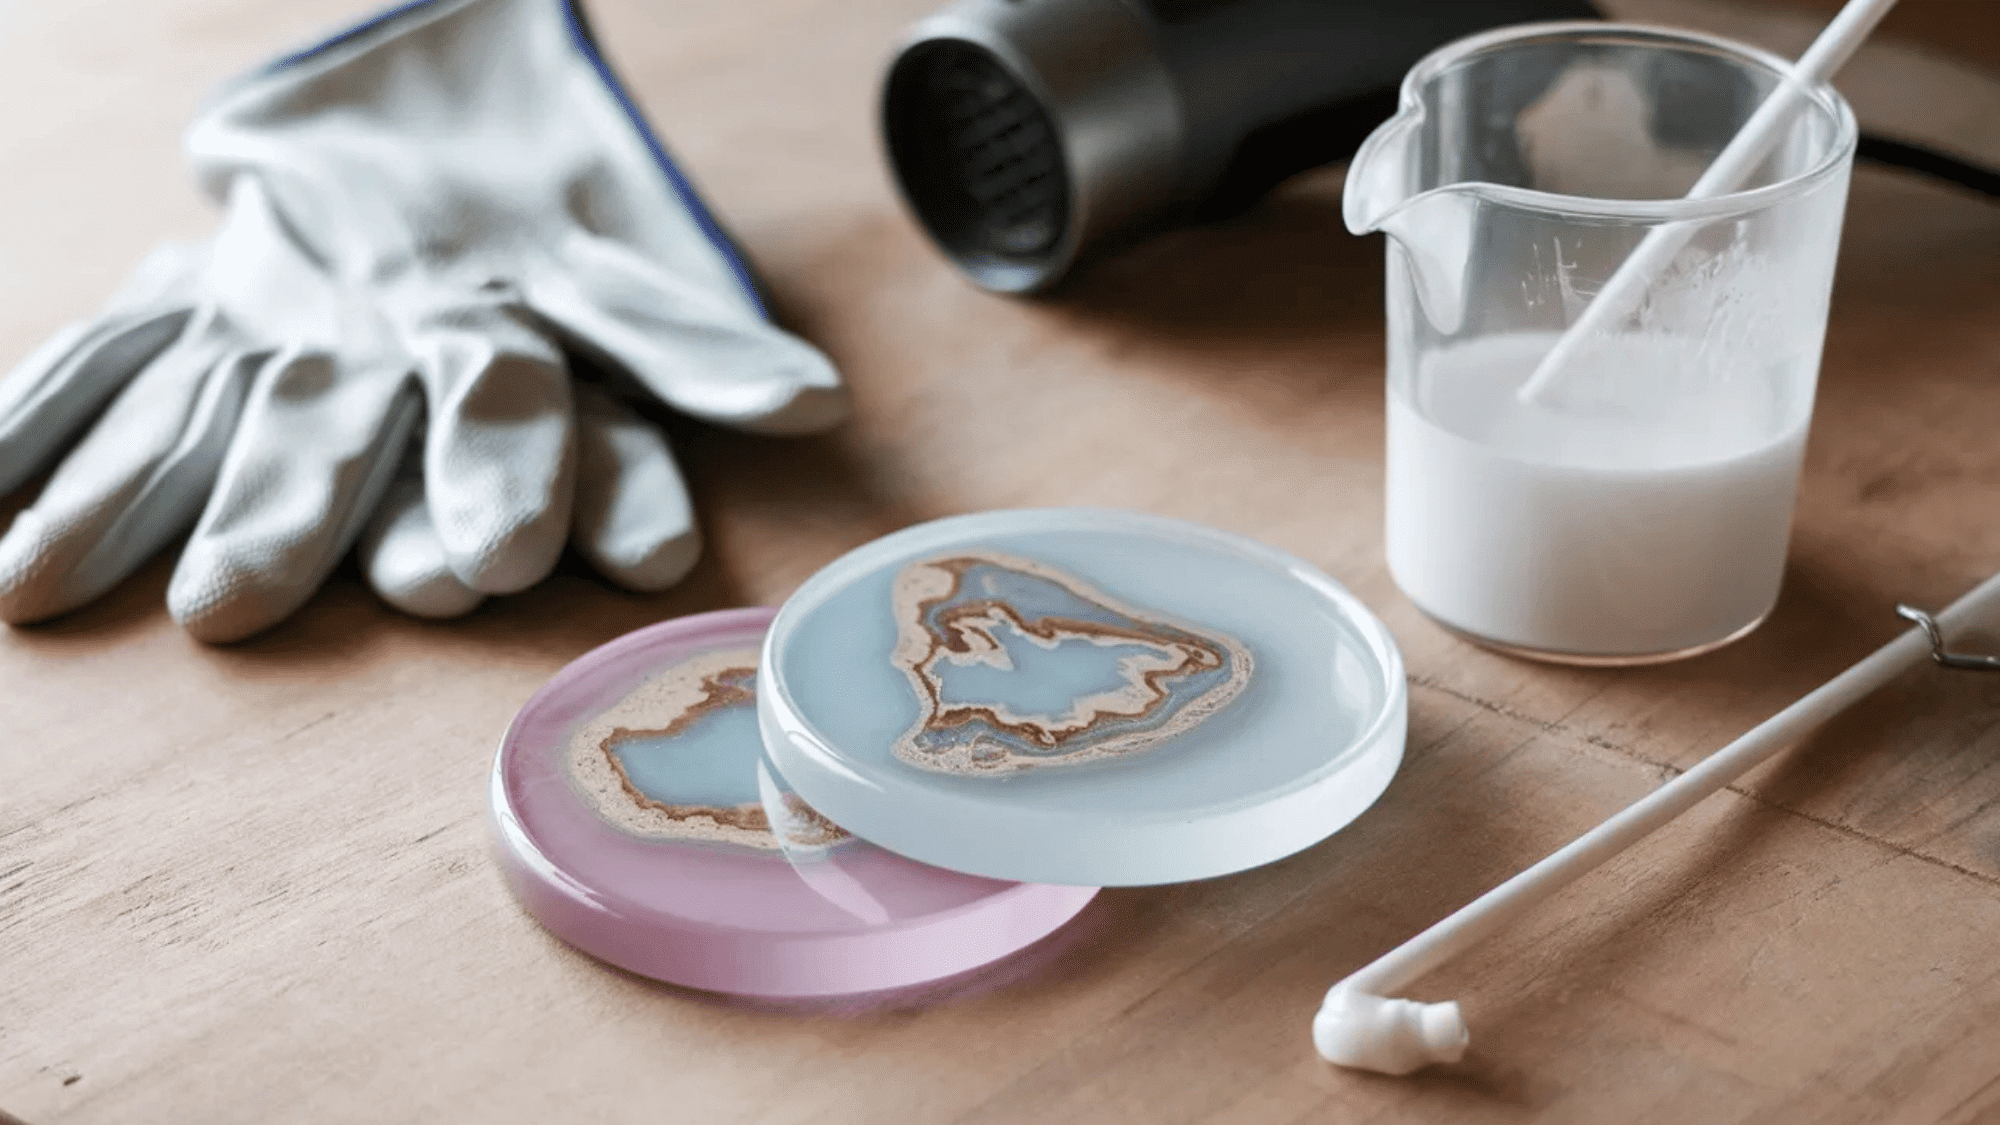
Materials Required: Epoxy resin and hardener, silicone coaster molds, alcohol ink or resin pigments, gloves, a heat gun or lighter, mixing cups, and stir sticks
How to Make:
- Put on your gloves before you start; resin is sticky and stains.
- Mix the epoxy resin and hardener in the exact ratio specified in your product’s instructions, and stir slowly for a full 2 minutes to avoid introducing too many bubbles.
- Add drops of alcohol ink or pigment and swirl gently with a stir stick to create a marble effect.
- Pour into your silicone molds, then use a heat gun or lighter held a few inches above the surface to pop any bubbles that rise. Leave to cure for 24–48 hours, then pop them out of the molds.
21. Paper Mache Bowl
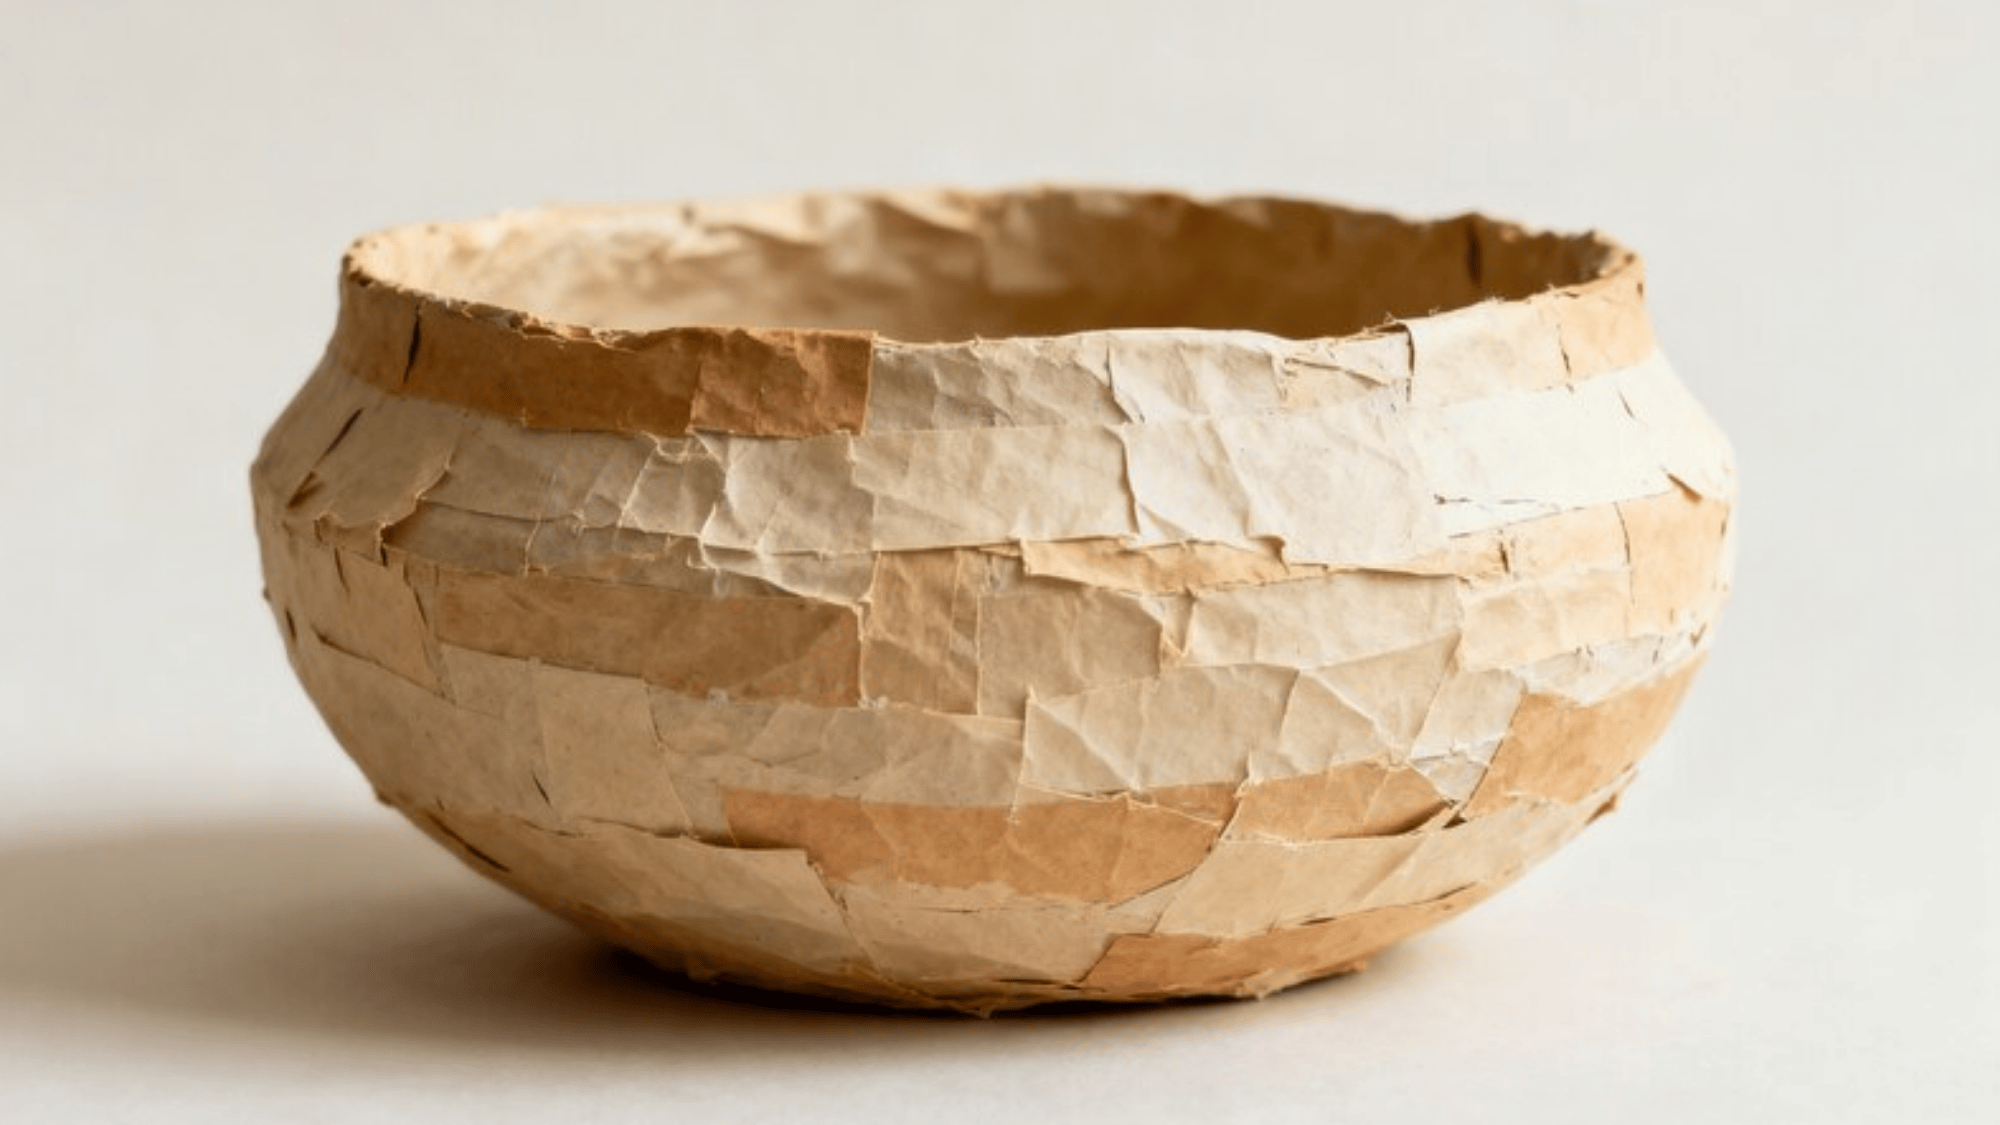
Materials Required: Newspaper strips, PVA glue mixed with water, a balloon or bowl as a mold, paint, and sealant
How to Make:
- Blow up a balloon to roughly the size of the bowl you want, or turn an existing bowl upside down and cover it with plastic wrap first so the papier-mache doesn’t stick.
- Dip newspaper strips into your PVA and water mixture (roughly 1:1) and layer them over the mold, smoothing out any wrinkles as you go.
- Apply at least four layers, letting each one dry before adding the next. Once fully dry and hard, pop the balloon and remove it from the mold, or lift it off the mold.
- Trim the edges neatly, then paint and seal however you like.
22. Hand-Painted Mugs
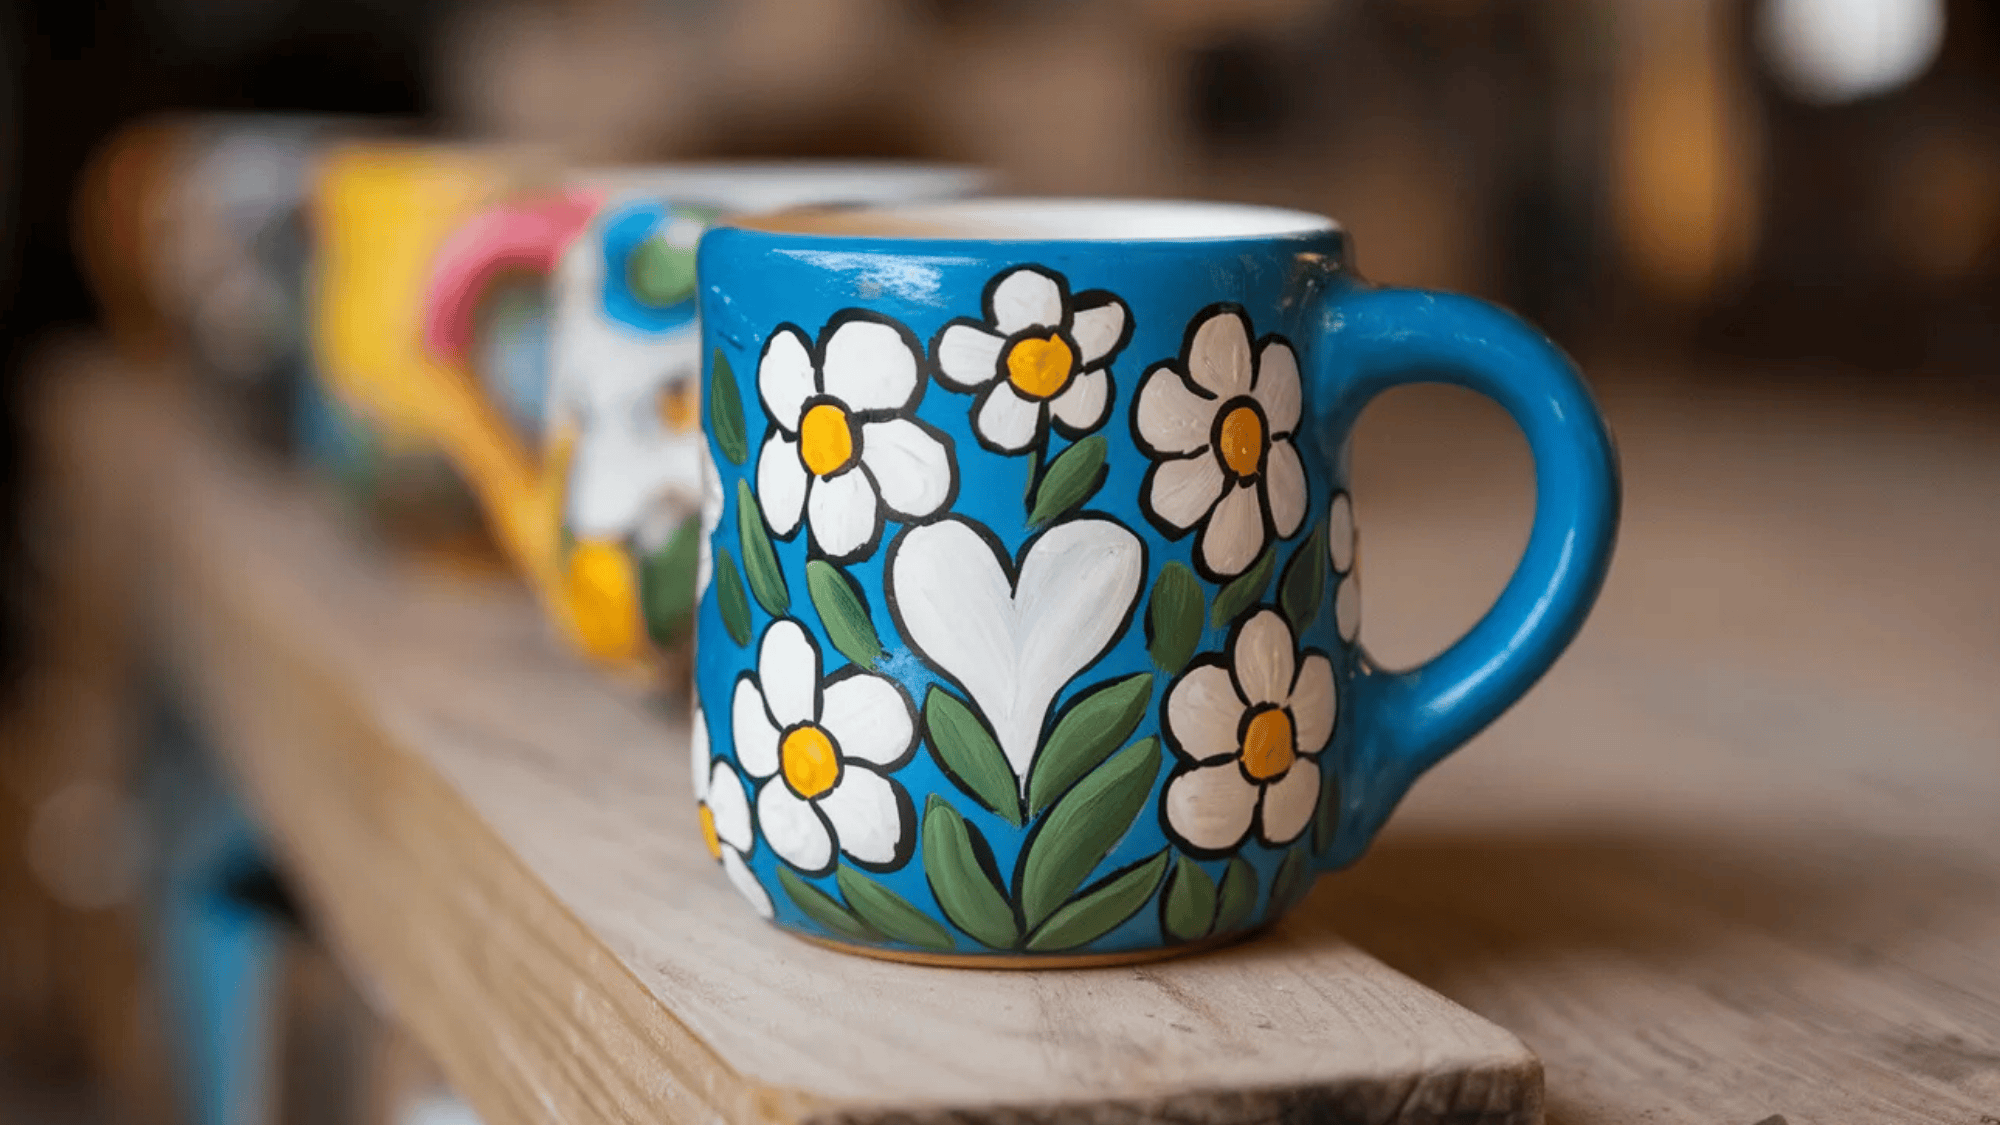
Materials Required: Plain white ceramic mugs, oil-based paint markers or porcelain paint, and an oven
How to Make:
- Make sure your mug is completely clean and grease-free before you start.
- Wipe it down with rubbing alcohol for the best adhesion. Use oil-based paint markers or porcelain paint to draw your design directly onto the mug surface, working slowly and steadily.
- Let the design air dry for at least an hour before baking. Place the mug in a cold oven, heat to 350°F, and bake for 30 minutes.
- Starting in a cold oven prevents the ceramic from cracking due to a sudden temperature change. Turn the oven off and let the mug cool inside before removing. Hand washes only to preserve the design.
23. Washi Tape Wall Art
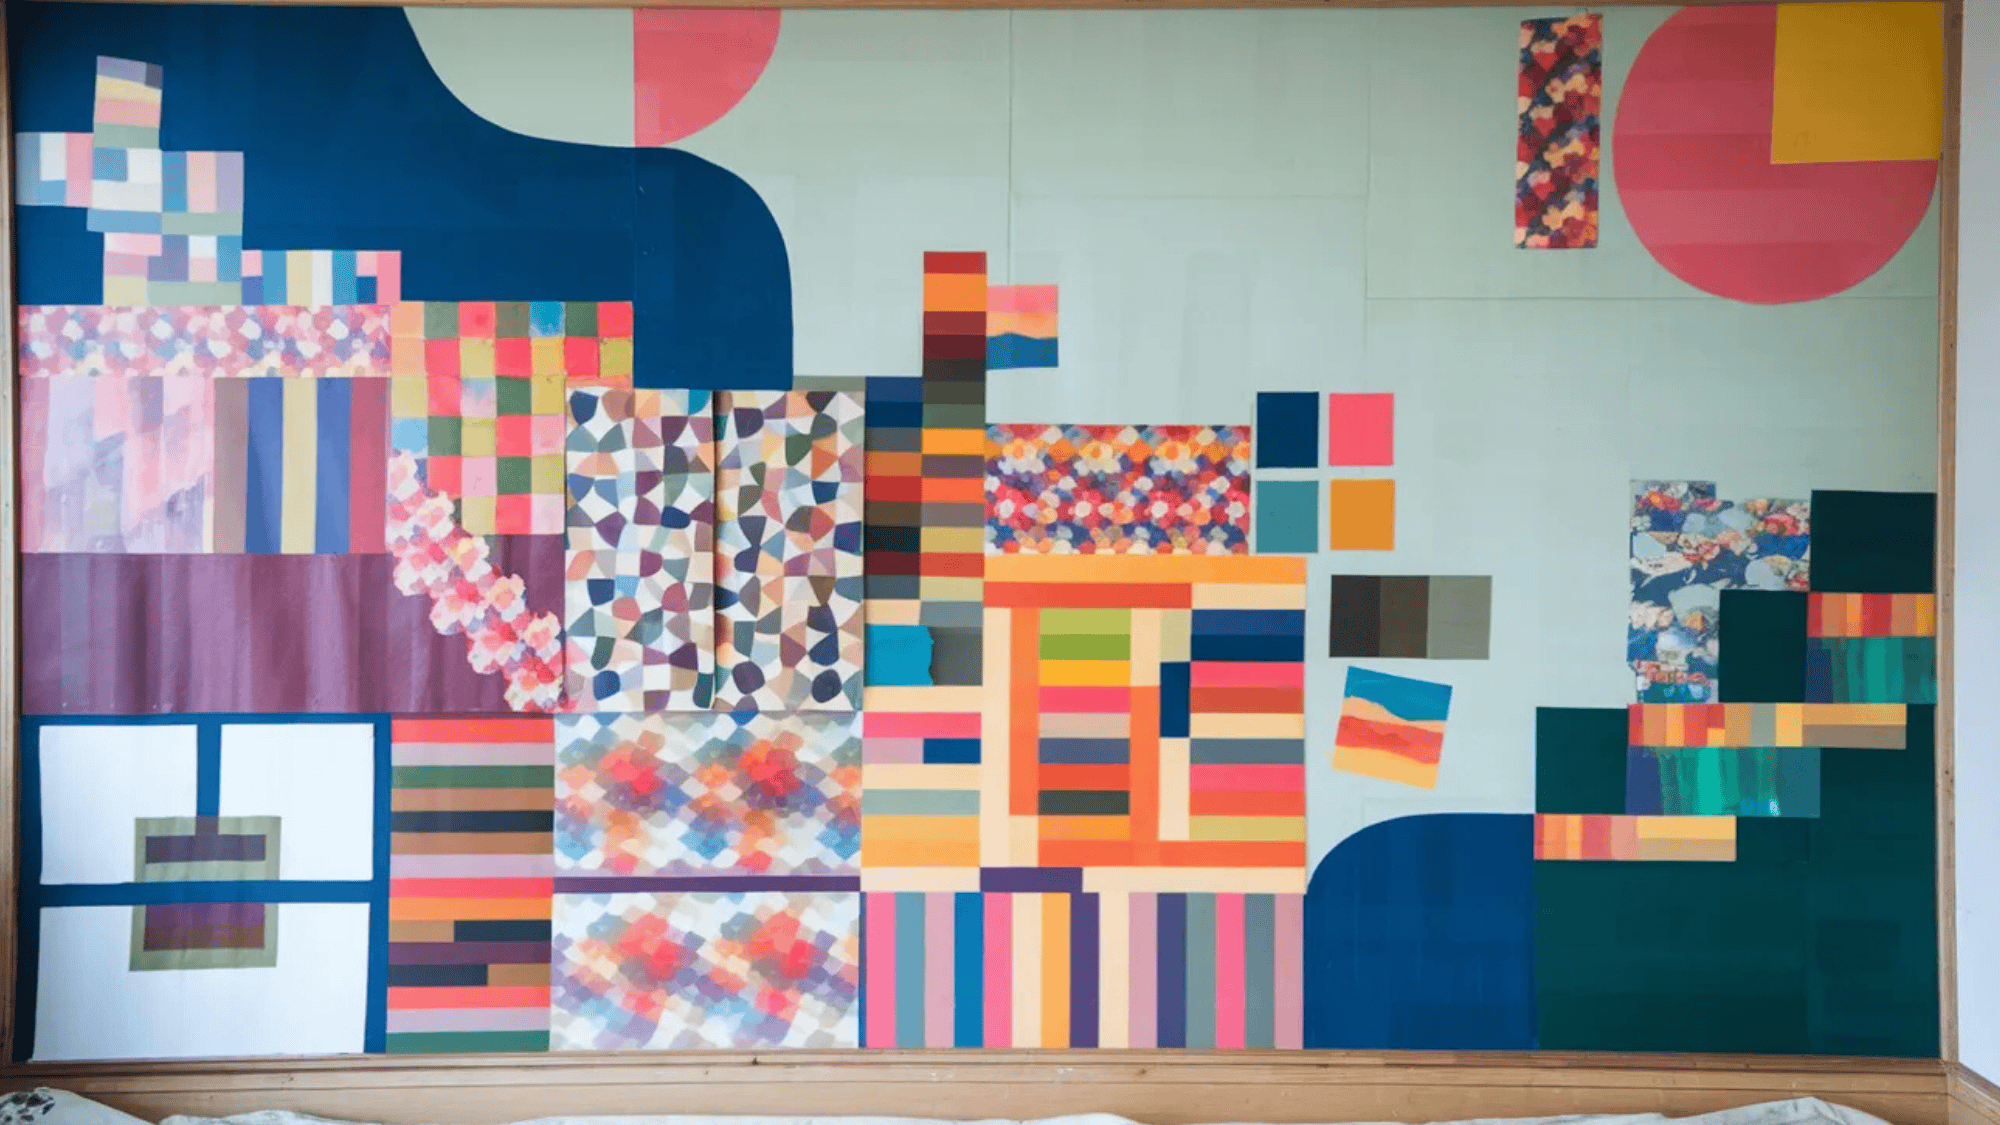
Materials Required: Washi tape in various colors and patterns, a blank wall or canvas, and scissors
How to Make:
- Plan your design before you start sticking. Geometric patterns, abstract shapes, or even a large-scale mural all work well with washi tape.
- Start with the longest lines first, using a single strip of tape pulled straight across the wall or canvas, pressing it down firmly as you go.
- Layer additional colors and patterns on top or alongside to build up the design, cutting the tape cleanly at angles for sharp corners and intersections.
- The best part about washi tape is that it peels off cleanly, so you can adjust, reposition, and redesign as many times as you want without damaging the surface.
24. DIY Scented Sachets
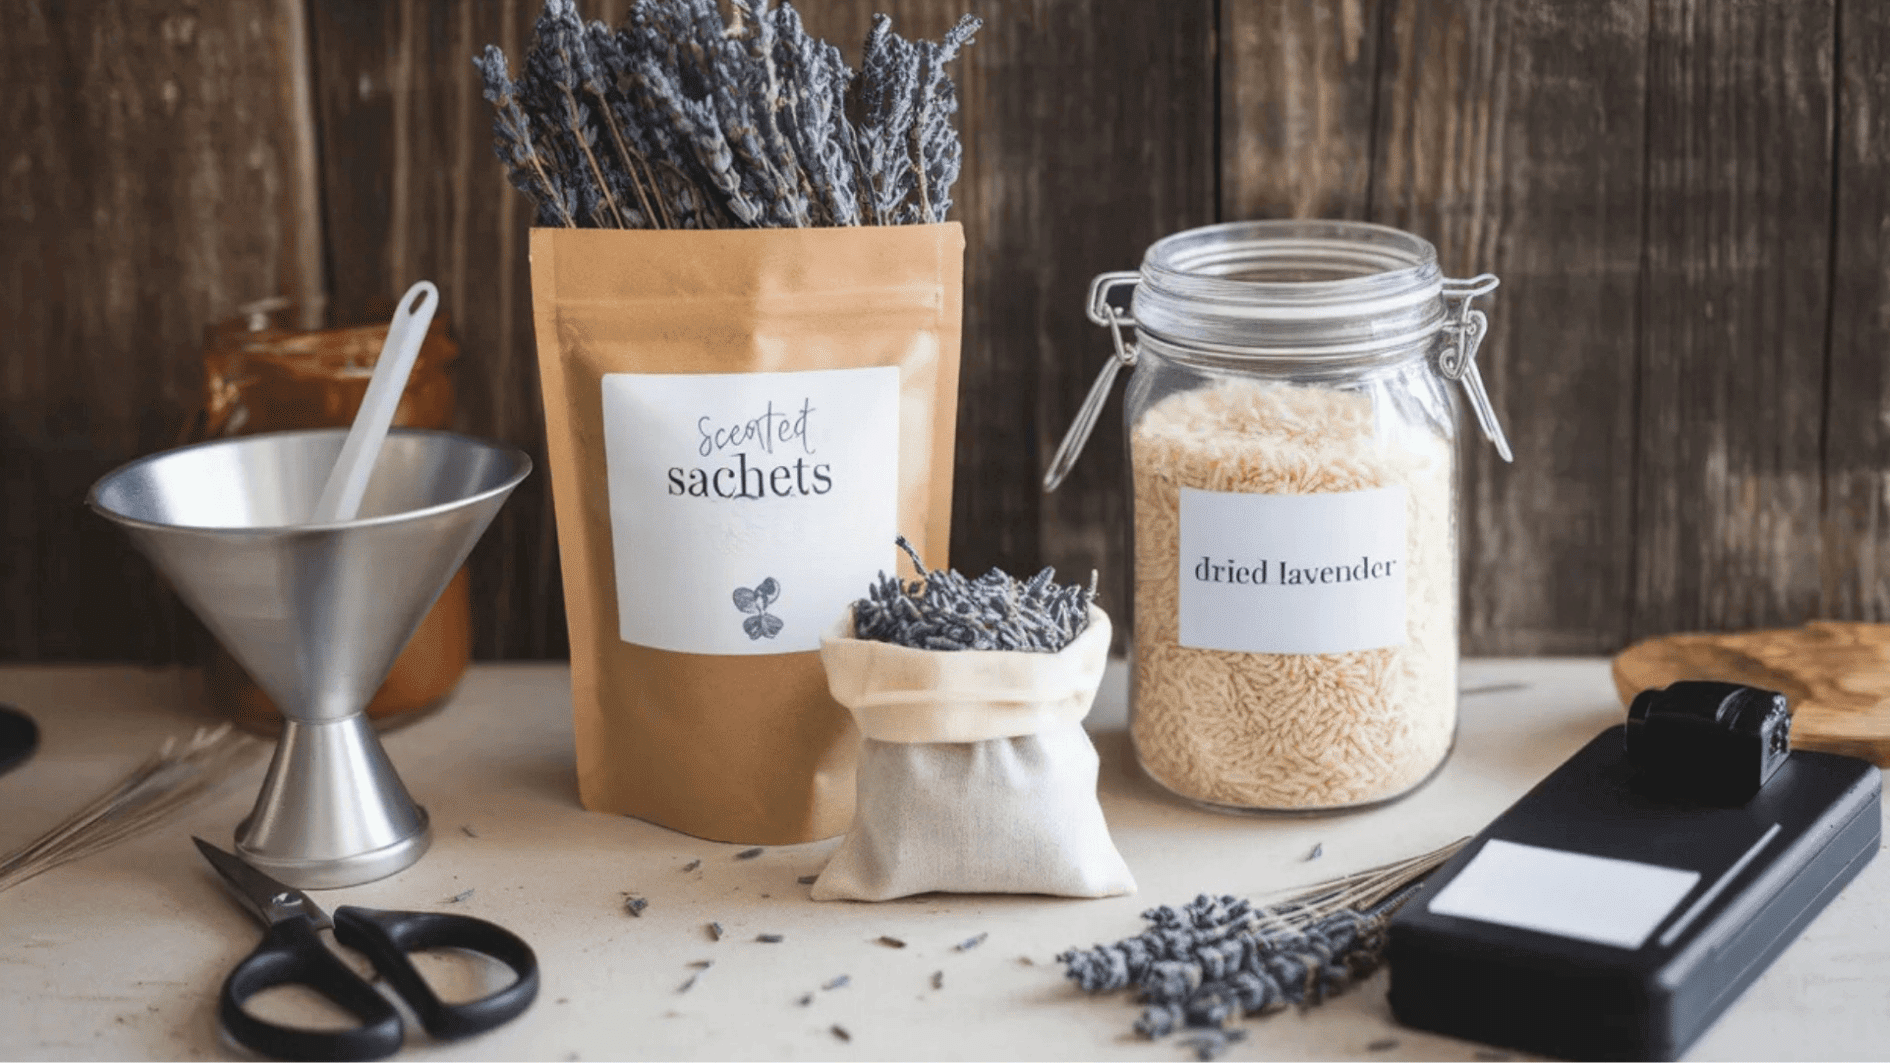
Materials Required: Small squares of breathable fabric like muslin or cotton, dried lavender or herbs, ribbon or twine, a needle and thread, or fabric glue
How to Make:
- Cut two equal squares of fabric, about 4×4 inches is a good size for a sachet.
- Place them together with the patterned sides facing inward and sew around three of the four edges, leaving one side open for filling.
- Turn the pouch right-side out so the seams are hidden inside. Fill it loosely with dried lavender, herbs, or a mixture of both; don’t overfill, or it won’t close neatly.
- Fold the open edges inward and sew or glue them shut.
- Tie a ribbon around the top for a decorative finish and tuck them into drawers, closets, or gift bags.
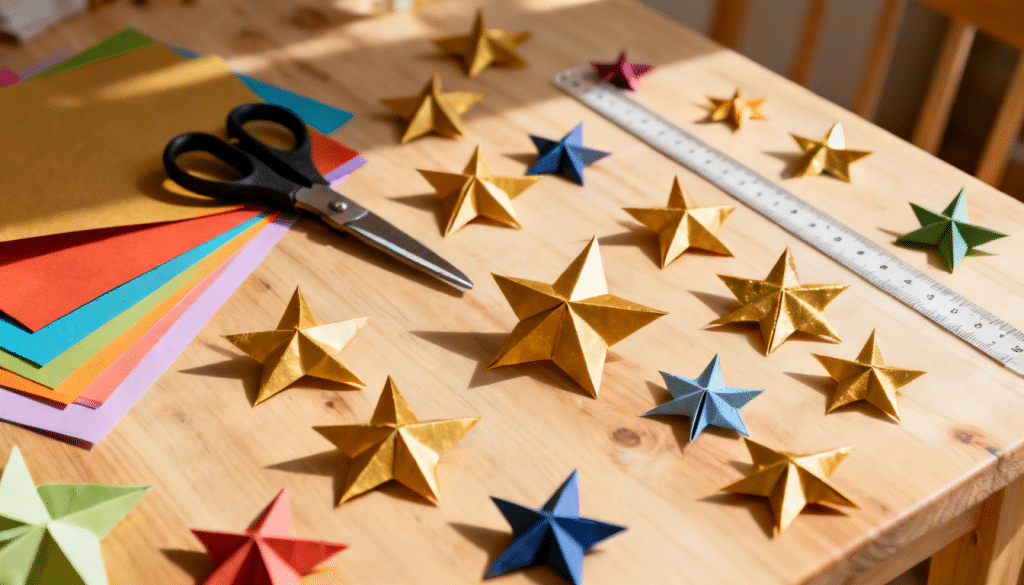
25. Origami Animals
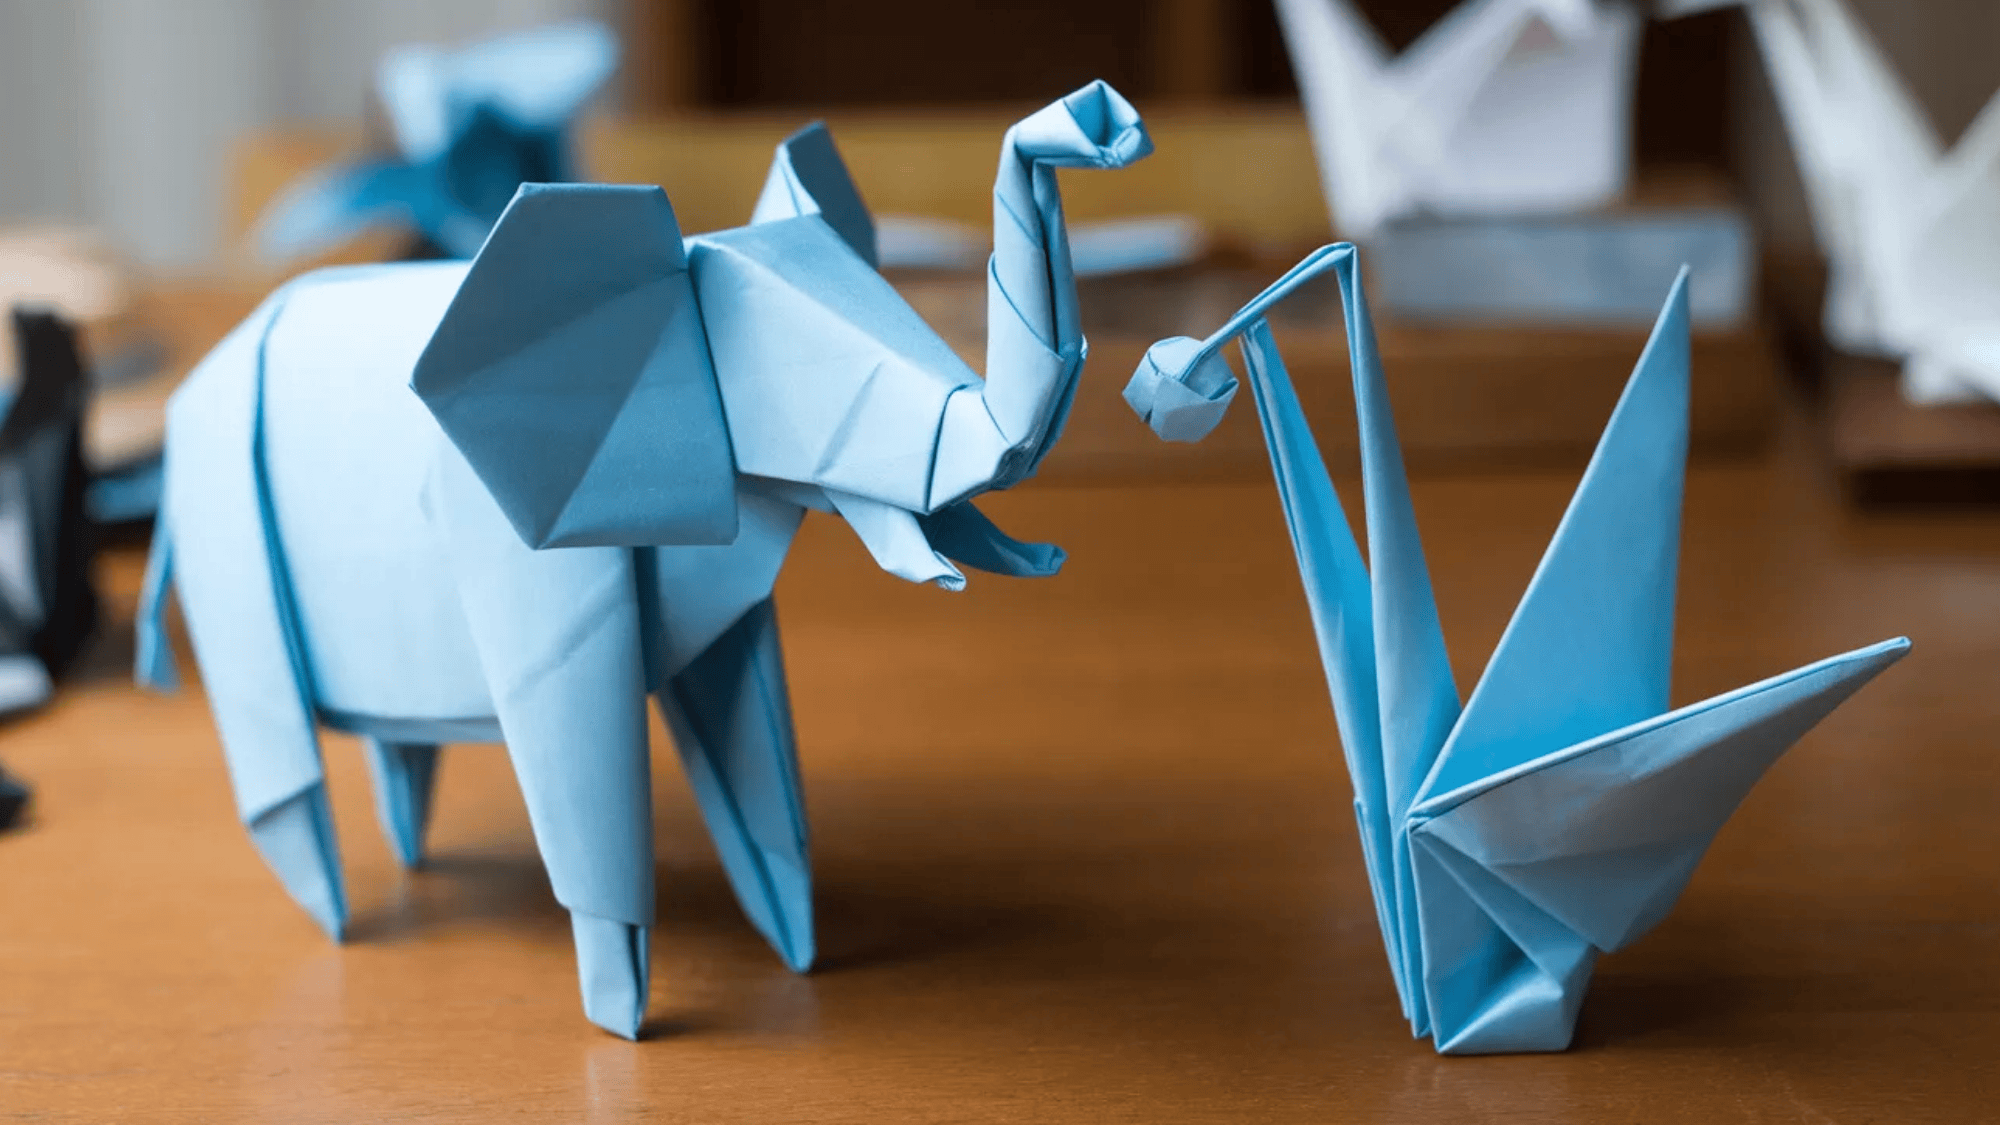
Materials Required: Square sheets of origami paper or any square paper, a flat surface, a bone folder (optional)
How to Make:
- Start with a beginner-friendly animal, such as a crane, a frog, or a fox, as a great entry point into origami.
- Print or pull up a step-by-step diagram of your chosen animal, and work through each fold slowly, pressing each crease firmly before moving to the next.
- Sharp, precise folds are the key to clean origami; a bone folder helps a lot if you have one, but a fingernail works in a pinch.
- Don’t rush the process, especially during the final shaping steps; that’s where most beginners lose patience and end up with a crumpled mess instead of a recognizable animal.
More Fun Crafts to Do at Home
You didn’t think that was the whole list, did you? These next fun crafts to do at home are just as good; some are quick wins, some are weekend projects, and all of them are completely doable with basic supplies. Keep going.
- DIY Lip Balm: Melt beeswax pellets and coconut oil together in a double boiler, then stir in a few drops of your chosen essential oil and a few drops of vitamin E oil for a nourishing finish. Pour the mixture into small tins or lip balm tubes and leave them to set for about an hour; no special equipment is needed, just a little patience.
- Cardboard Box Castle: Grab a few large cardboard boxes, cut out turrets, windows, and a drawbridge using a craft knife, and tape the sections together to build a multi-room structure your kid will absolutely lose it over. Paint the whole thing in stone grey with brown details, and it looks surprisingly convincing.
- DIY Bath Bombs: Mix baking soda, citric acid, and cornstarch, then slowly add coconut oil and a few drops of essential oil while stirring continuously to prevent the mixture from fizzing prematurely. Pack tightly into bath bomb molds and leave them to set for 24 hours before unmolding. They make great gifts, too.
- Painted Rock Garden Markers: Paint each smooth rock a solid base color, let it dry, then use a paint marker to write the name of a herb or plant on the front in clean, legible lettering. Seal with a waterproof spray once fully dry and press them into the soil in your garden for a charming, personalized touch.
- DIY Stress Balls: Stretch a balloon over a funnel, then pour in flour or fine sand until the ball feels satisfyingly squishy in your hand; tie the end off securely. Draw a funny face on the front with a permanent marker, and you’ve got a genuinely useful calm-down tool that takes about five minutes to make.
- Fabric Tie-Dye Pillow Covers: Twist a plain white cotton pillowcase into your chosen pattern, secure it tightly with rubber bands, and apply fiber-reactive dye generously to each section. Wrap in plastic and leave overnight to set, then rinse under cold water, remove the bands, and wash before use. The results are always a little different and always satisfying.
- Painted Wine Glasses: Use glass-specific paint to add designs around the base and stem of plain wine glasses, working slowly for clean, controlled lines. Let them air-dry for an hour, then bake at 325°F for 30 minutes to permanently cure the paint. Just remember to hand-wash them afterward to keep the design intact.
- Paper Lanterns: Fold a sheet of colored cardstock lengthwise and cut evenly spaced slits along the fold, stopping before the edges; then unfold and curl it into a cylinder. Staple the edges together, add a strip of cardstock as a handle at the top, and drop a battery-operated tea light inside for a warm, glowing effect.
- Homemade Playdough: Mix 2 cups of flour, 1/2 cup of salt, and 2 tablespoons each of cream of tartar and oil, then add 1.5 cups of boiling water and stir in food coloring. Combine everything until it comes together, then knead on a floured surface until smooth. It keeps for weeks in an airtight container.
- Bottle Cap Magnets: Cut small circular images or stickers to fit snugly inside metal bottle caps, then seal them in place with a layer of Mod Podge and let it dry to a clear finish. Hot glue a small round magnet to the back of each cap, and you’ve got a set of custom fridge magnets that cost almost nothing to make.
- Nature Collage: Head outside and collect leaves, twigs, petals, and seeds in as many shapes and sizes as you can find, then arrange them into a design or scene on a piece of cardstock. Glue everything down, starting with the largest pieces first, let it dry flat under a heavy book, and frame it if you want to keep it long-term.
- DIY Bookends: Wrap two bricks or heavy rocks tightly in fabric or twine, securing everything with hot glue as you work around the edges for a neat, intentional finish. Cut felt to size and glue it to the bottom of each brick so they sit without scratching your shelves. Simple, functional, and genuinely good-looking.
- Pom-Pom Animals: Wrap yarn densely around a pom-pom maker or a pair of cardboard rings, tie the center off as tightly as you can, and cut the loops to release a fluffy, full pom-pom. Add felt ears, googly eyes, and any other character details with craft glue, and let everything dry completely before handling.
- DIY Photo Collage: Lay out your printed photos in an overlapping collage arrangement on a large sheet of cardstock or canvas, playing with the layout before you commit to gluing anything down. Mod Podge each photo into place, let the whole thing dry, and finish with a glossy top coat for a polished, sealed result.
- Beaded Keychain: Thread assorted beads onto a length of elastic cord in whatever pattern or color combination you like, then knot the ends together tightly and trim any excess. Loop the finished beaded section through a keyring and secure it with a double knot, quick to make and genuinely useful to keep or give away.
- Leaf Bowl: Coat a large fresh leaf with a thin layer of petroleum jelly, then layer papier-mache strips over the top surface and let it dry completely; this usually takes a full day. Peel the leaf away from the hardened bowl shape underneath, then paint and seal the finished bowl however you like.
- DIY Tassels: Wrap yarn or embroidery floss around a small piece of cardboard until you’ve built up the thickness you want, then slide a short tie piece under the loops at the top and knot it firmly. Cut the bottom loops open, wrap another length of yarn around the top section to form the tassel head, and trim the bottom ends to an even length.
- Painted Pebble Magnets: Paint tiny designs, flowers, geometric patterns, simple faces, onto small smooth pebbles using fine brushes and acrylic paint, then seal with a clear coat once everything is dry. Glue a strong magnet to the flat back side once the sealant has fully cured, and they’re ready to stick to any magnetic surface.
- DIY Stickers: Design your stickers digitally or draw them by hand, then print them onto printable sticker paper and let the ink dry completely before cutting anything out. Use scissors for simple shapes or decorative craft punches for a cleaner, more professional-looking edge on each sticker.
- Woven Paper Basket: Lay strips of colored paper or magazine pages horizontally across a flat surface and weave vertical strips over and under in an alternating pattern to build the base. Fold the extending strips upward and continue weaving in rounds to form the sides of the basket, securing the top edge with a thin strip of glue.
- DIY Puzzle: Glue a printed photo or drawing to a piece of thick cardboard, let it dry completely under a heavy book, then flip it over and, using a pencil, draw your puzzle piece shapes on the back. Cut carefully along the lines with a craft knife on a cutting mat; the more irregular the shapes, the more satisfying the puzzle is to put together.
- Shadow Box Display: Line the back of a deep picture frame or shadow box with decorative paper, then arrange your chosen mementos, tickets, pressed flowers, small photos, and tiny figurines in a layout that tells a story. Glue each piece into place, close the frame, and hang it somewhere you’ll actually see it every day.
- DIY Wrapping Paper: Roll out a length of plain brown kraft paper on a flat, protected surface and decorate it with repeated stamped patterns, sponge-painted shapes, or potato prints in your chosen colors. Let it dry completely before using. The best part is that every sheet comes out slightly different, which makes it feel genuinely handmade.
- Knitted or Crocheted Dishcloths: Cast on about 30 stitches using cotton yarn, and work in a simple garter or moss stitch all the way down until the piece is square. Then cast off and weave in the ends. They’re one of the most beginner-friendly knitting projects out there and genuinely useful once they’re done.
- Collage Journal Cover: Arrange magazine clippings, washi tape strips, and flat embellishments across the cover of a plain notebook in a design that feels like you, then Mod Podge everything down in layers. Let each coat dry before adding the next, and finish with a topcoat for a durable, ready-to-use finish.
- DIY Wind Chimes: Cut several lengths of twine to varying lengths and tie one end of each to a wooden dowel at evenly spaced intervals, then thread shells, beads, keys, or metal washers onto each length. Knot between each element to keep them spaced apart, hang the dowel somewhere it’ll catch the breeze, and enjoy the sound.
- Fabric Bookmark: Cut two matching fabric strips and one matching interfacing strip to the same size; iron the interfacing onto the back of one strip, then sew the two strips together with the patterned sides facing inward, leaving a small gap to turn it right-side out. Press flat, hand sew the gap closed, and it’s done, a small project with a satisfying, polished finish.
- DIY Marble Run: Cut cardboard tubes in half lengthwise to create open chutes and tape them to a large piece of cardboard or directly to a wall at varying downward angles, positioning each one so a marble rolls off the end and into the next. Test and adjust until the marble flows all the way from top to bottom without stopping. The troubleshooting is half the fun.
- Painted Denim Jacket: Lay a plain denim jacket flat on a protected surface, plan your design across the back panel, collar, and pockets, then apply fabric paint with a brush in slow, deliberate layers for a solid, opaque result. Let each section dry completely before adding detail work on top, then heat set the whole design with an iron once you’re finished.
- Paper Bead Jewelry: Cut long triangular strips from magazine pages or decorative paper, apply a thin line of glue along each strip, and roll tightly around a toothpick starting from the wide end. Slide each bead off, let it dry, seal with Mod Podge, and string the finished beads onto elastic cord to make bracelets or necklaces.
- Embroidered Hoop Art: Stretch fabric tightly over an embroidery hoop, lightly transfer your chosen pattern onto it in pencil, then stitch through it using a basic running stitch, backstitch, or satin stitch, depending on what each area needs. Work slowly, keep your tension consistent throughout, and the finished piece looks genuinely impressive even if it’s your first time picking up a needle.
- DIY Pressed Flower Phone Case: Arrange pressed flowers inside a clear phone case in a layout you’re happy with, then apply a thin coat of Mod Podge over them to seal everything in place. Let it dry, then add one or two more coats for a smooth, protective finish that keeps the flowers looking fresh and prevents them from shifting around in the case.
- Washi Tape Vase: Clean and dry a plain glass vase or bottle thoroughly, then wrap strips of washi tape in horizontal bands, mixing and matching patterns and colors for a layered, eclectic look. Press each strip down firmly as you go to prevent peeling, and trim the edges neatly at the base and rim for a tidy finish.
- DIY Seed Paper: Soak torn scrap paper in water overnight, blend it into a smooth pulp, stir in your chosen seeds, and spread the mixture evenly onto a mesh screen in a thin, flat sheet. Press out the excess water with a sponge and leave it to dry for a day or two. Once fully dry, cut it into shapes or cards that can be planted directly in soil.
- Personalized Tote Bag With Iron-On Vinyl: Cut your chosen design from iron-on vinyl, weed away the excess material from around the edges, and position it on a plain canvas tote bag with the carrier sheet facing up. Press firmly with a hot iron over a pressing cloth for about 30 seconds, let it cool, then peel the carrier sheet back slowly to reveal a clean, professional-looking transfer.
Conclusion
So many ideas, endless possibilities, and the only rule is that you actually pick one and start.
The beauty of fun crafts to do at home is that there’s no wrong entry point. If you grabbed a project from the image section or spotted something in the bonus list that clicked, that’s your starting point.
Don’t overthink the supplies, don’t wait for the perfect afternoon, and don’t worry about it turning out exactly as planned. Half the joy is in the making, not just the result.
Bookmark this list, come back to it whenever you need inspiration, and share it with someone who could use a creative afternoon.