Have you ever wanted to make a simple task way more fun? That’s what Rube Goldberg machines are all about.
I’ll walk you through what these machines are, the science that makes them work, and the best Rube Goldberg machine ideas you can try yourself.
You’ll find easy builds for beginners, creative setups for school projects, and even funny advanced designs for bigger challenges.
Along the way, I’ll share tips on how to build one step by step, plus classroom guides and troubleshooting advice.
By the end, you’ll not only know how these machines work but also how you can create your own chain reaction at home, in class, or just for fun.
What is a Rube Goldberg Machine?
A Rube Goldberg machine is named after Rube Goldberg, a cartoonist from the early 1900s. He became famous for drawing humorous contraptions that required an excessive number of steps to accomplish a relatively simple task.
The core idea is simple: do an easy task in the most complicated way possible. A marble might roll, knock over dominoes, pull a string, and finally flip a switch.
Today, these machines are used in classrooms and STEM projects because they make learning fun. Kids and adults get to practice problem-solving, creativity, and teamwork all at once.
Principles Behind Rube Goldberg Machines
These machines may look silly, but they’re based on real science. Here are the main ideas that make them work:
1. Energy Transfer & Chain Reactions: Each step passes energy to the next. A rolling ball might push a lever, which in turn tips a cup, causing it to pull a string.
2. The Six Simple Machines:
- Wheel and axle
- Lever
- Inclined plane (ramp)
- Pulley
- Screw
- Wedge
Builders often combine these to keep the reaction going.
3. Physics Concepts:
- Momentum: objects in motion keep moving unless stopped.
- Gravity: pulls balls, marbles, and weights downward.
- Friction: slows things down, which can help or cause trouble.
Understanding these basics makes it easier to design a working chain reaction.
Top Rube Goldberg Machine Ideas
Below are some Rube Goldberg machine examples you can try. They range from easy setups to more creative and challenging designs.
Easy Rube Goldberg Ideas for Beginners
These setups are simple and use common items you probably already have. They’re great for kids, classrooms, or anyone just starting out:
1. Drop a Ball in a Bucket
Roll a ball down a ramp and let it land in a bucket. It’s a quick way to see gravity and momentum in action. You can build the ramp from cardboard, wood, or a paper tube. Simple, visual, and satisfying, this one’s perfect for kids just starting out.
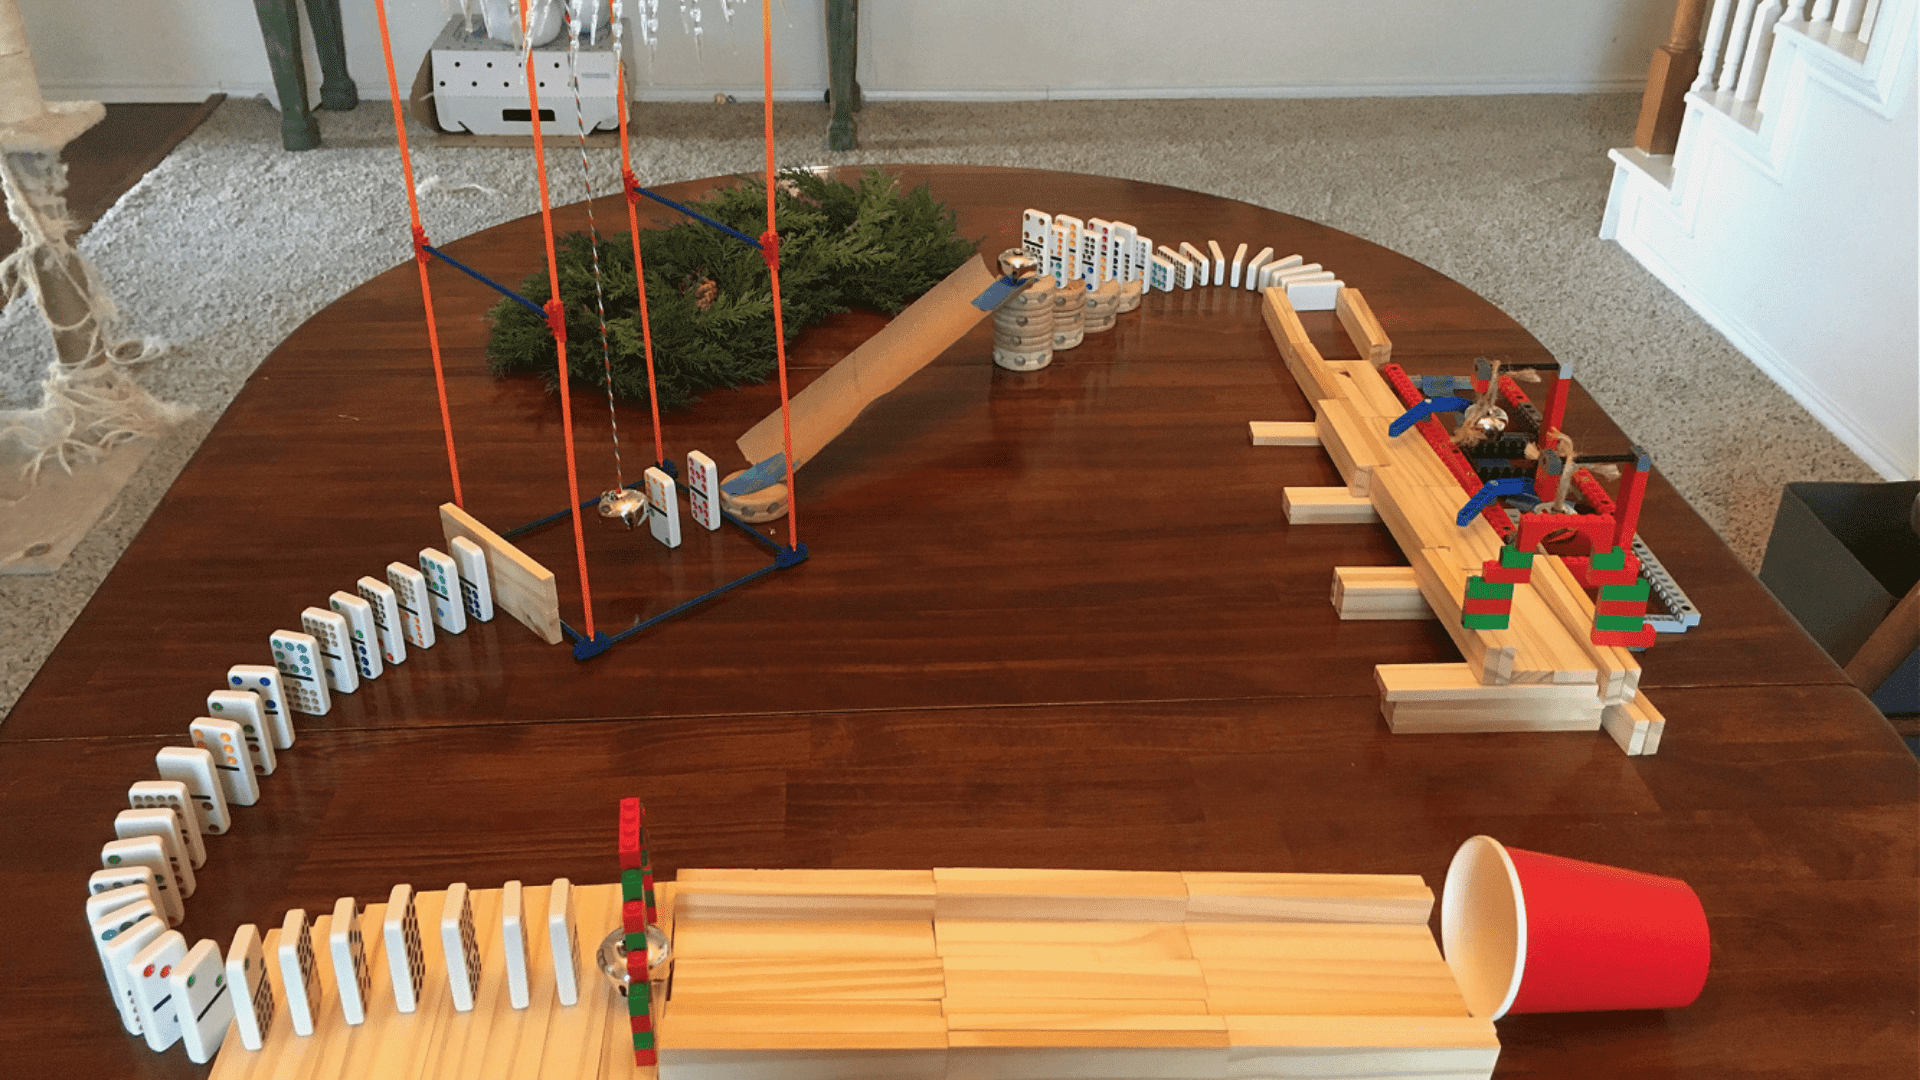
2. Knock Down a Domino Chain
Line up dominoes and watch one tap trigger the rest. The chain can knock over another object, flip a switch, or hit a ball. It’s all about spacing and timing, which makes it a good way to practice precision.
Kids love the dramatic effect and can continue to expand it.
3. Turn Off a Light or Alarm Clock
A marble or toy car can push a lever or pull a string to flip a switch. It’s a simple way to link physics with everyday life. Kids get to see how chain reactions can actually control something useful, which makes this project especially engaging in the classroom.
4. Pop a Balloon
Set up a pendulum or rolling ball to push a pin into a balloon. The big “pop” adds noise and surprise, which makes it memorable. It’s quick to set up with basic items. Add adult supervision if younger kids are involved, as sharp points are part of this build.
5. Ring a Bell
A ball pulls a string that makes a bell ring. It’s both visual and audible, which feels rewarding. This idea is easy enough for beginners, but it still teaches about force and pulleys. You can also link it as part of a longer chain reaction.
Creative Rube Goldberg Ideas (Intermediate Level)
These setups require more steps and utilize a combination of simple machines. They’re perfect for school projects where you want to show planning and problem-solving:
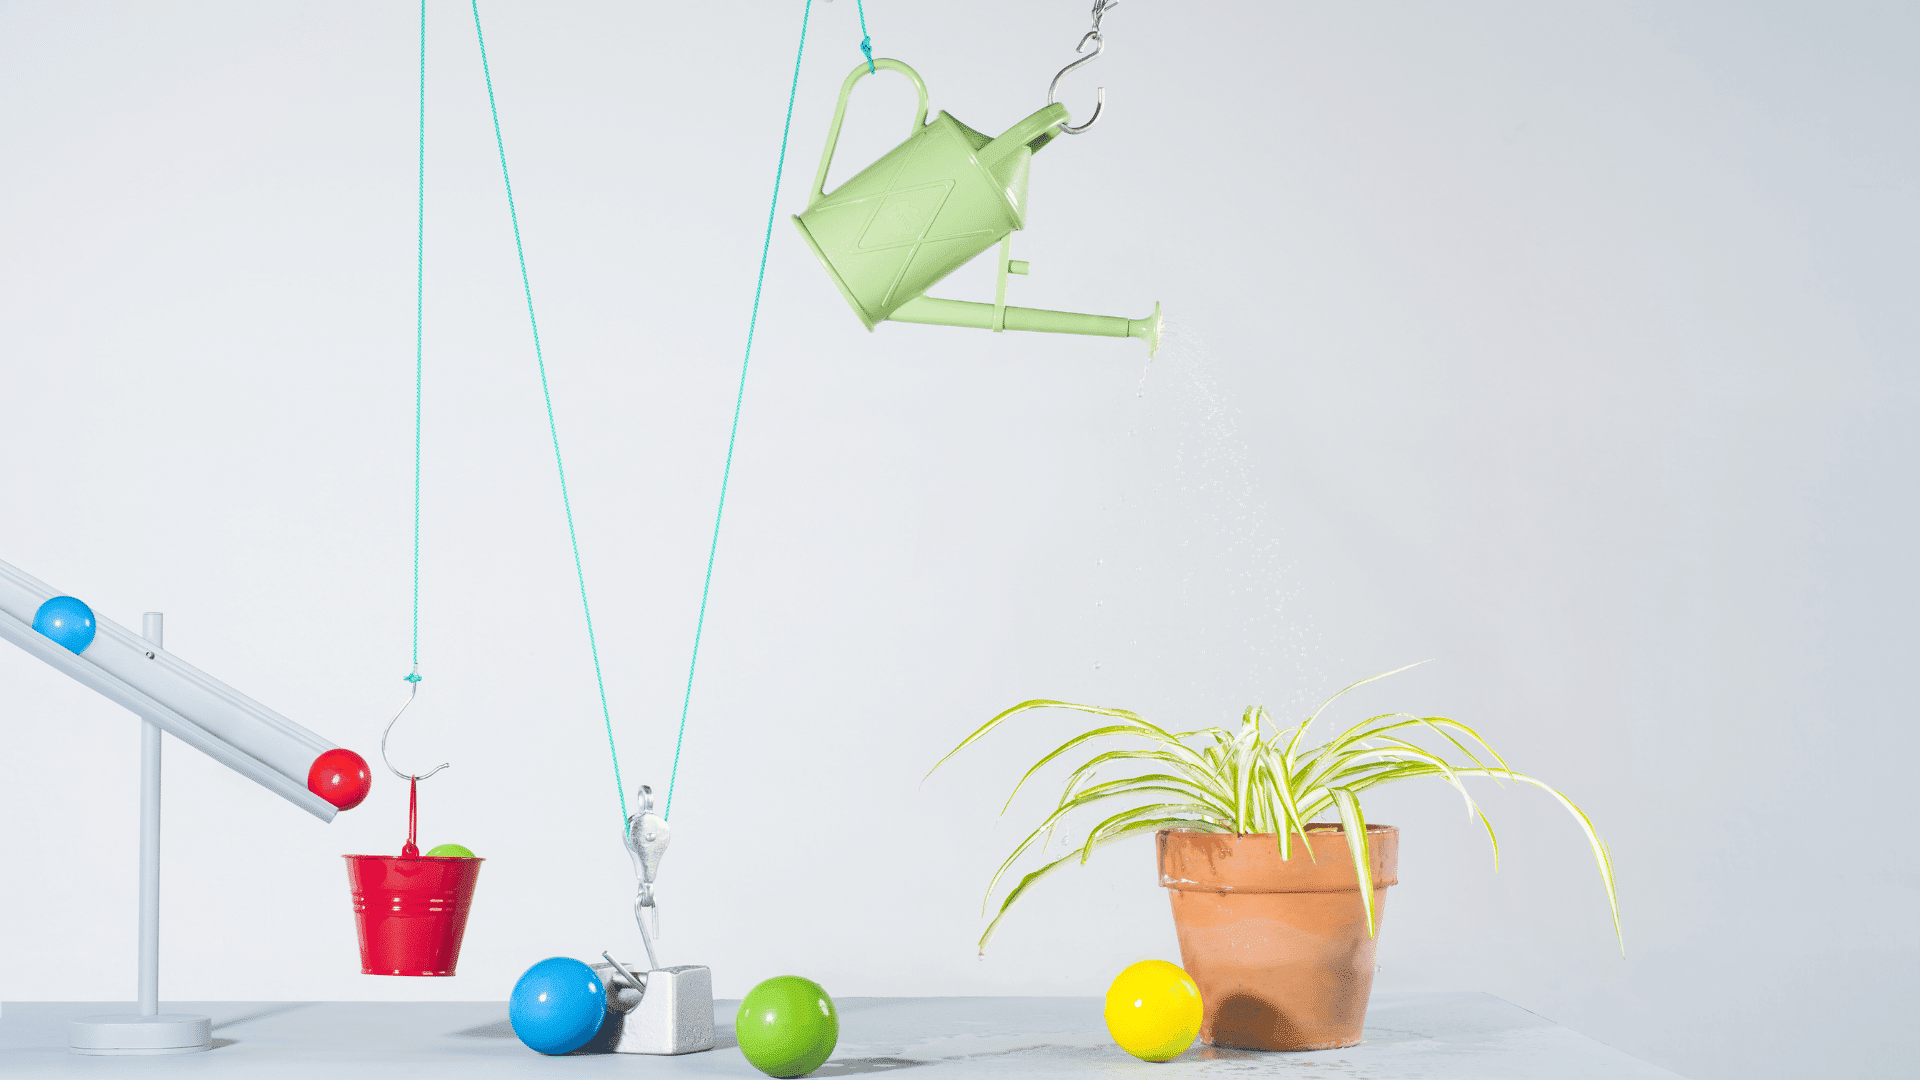
6. Water a Plant
Design a chain that tips a ball or weight into a cup of water, causing it to overflow into a plant pot. It’s simple, practical, and connects directly to everyday life.
Students learn about balance, timing, and cause-and-effect while building. It’s especially fun when used in a classroom to link creativity with care.
7. Feed a Fish
A rolling marble tips fish food into a tank. It shows how gravity and momentum work while keeping it playful. Since it involves live animals, it’s best done as a demo instead of a regular feeder. Still, it’s one of the most creative and eye-catching classroom ideas.
8. Open a Door
Set up a ball that hits a lever, pulling a string, and turning a doorknob. It’s tricky because the force has to be just right, but it’s a clever way to combine levers and pulleys.
The door opening at the end feels dramatic and makes a great finale.
9. Fill a Glass with Water
A bottle tips to pour into a glass after a chain of steps. It highlights force, balance, and precision. The tricky part is placing the glass exactly right, but that’s what makes it a fun challenge. When it works, the finish feels very satisfying.
10. Break an Egg
A marble knocks a lever or spoon that cracks an egg into a bowl. It’s funny, messy, and often used in competitions. This idea mixes momentum, levers, and gravity in one setup. The payoff is both entertaining and memorable, even if it doesn’t always work perfectly.
Advanced & Funny Rube Goldberg Ideas
These projects use many steps, combining humor and creativity. They’re great for videos, competitions, or anyone who enjoys a bigger challenge.
11. Make Breakfast
Create a machine that pours cereal, tips milk, or cracks an egg. These multi-step setups take more planning and space but combine ramps, pulleys, and levers. They’re great group projects, showing science in daily routines. The mix of humor and creativity makes this a favorite in competitions.
12. Brush Teeth with Toothpaste
Build a chain that squeezes toothpaste onto a brush and moves it toward a sink. It’s silly, like bringing a cartoon to life, but kids love it. The setup uses pulleys, levers, and energy transfer.
It’s not practical for real brushing, but it works perfectly as a science demo.
13. Change a TV Channel or Press a Remote
A marble or lever pushes a button on a remote to change the channel. It’s a clever mix of mechanics and electronics. Accuracy is key since the button must be hit just right.
The setup can be short or extended with dominoes, making it a fun challenge for older kids.
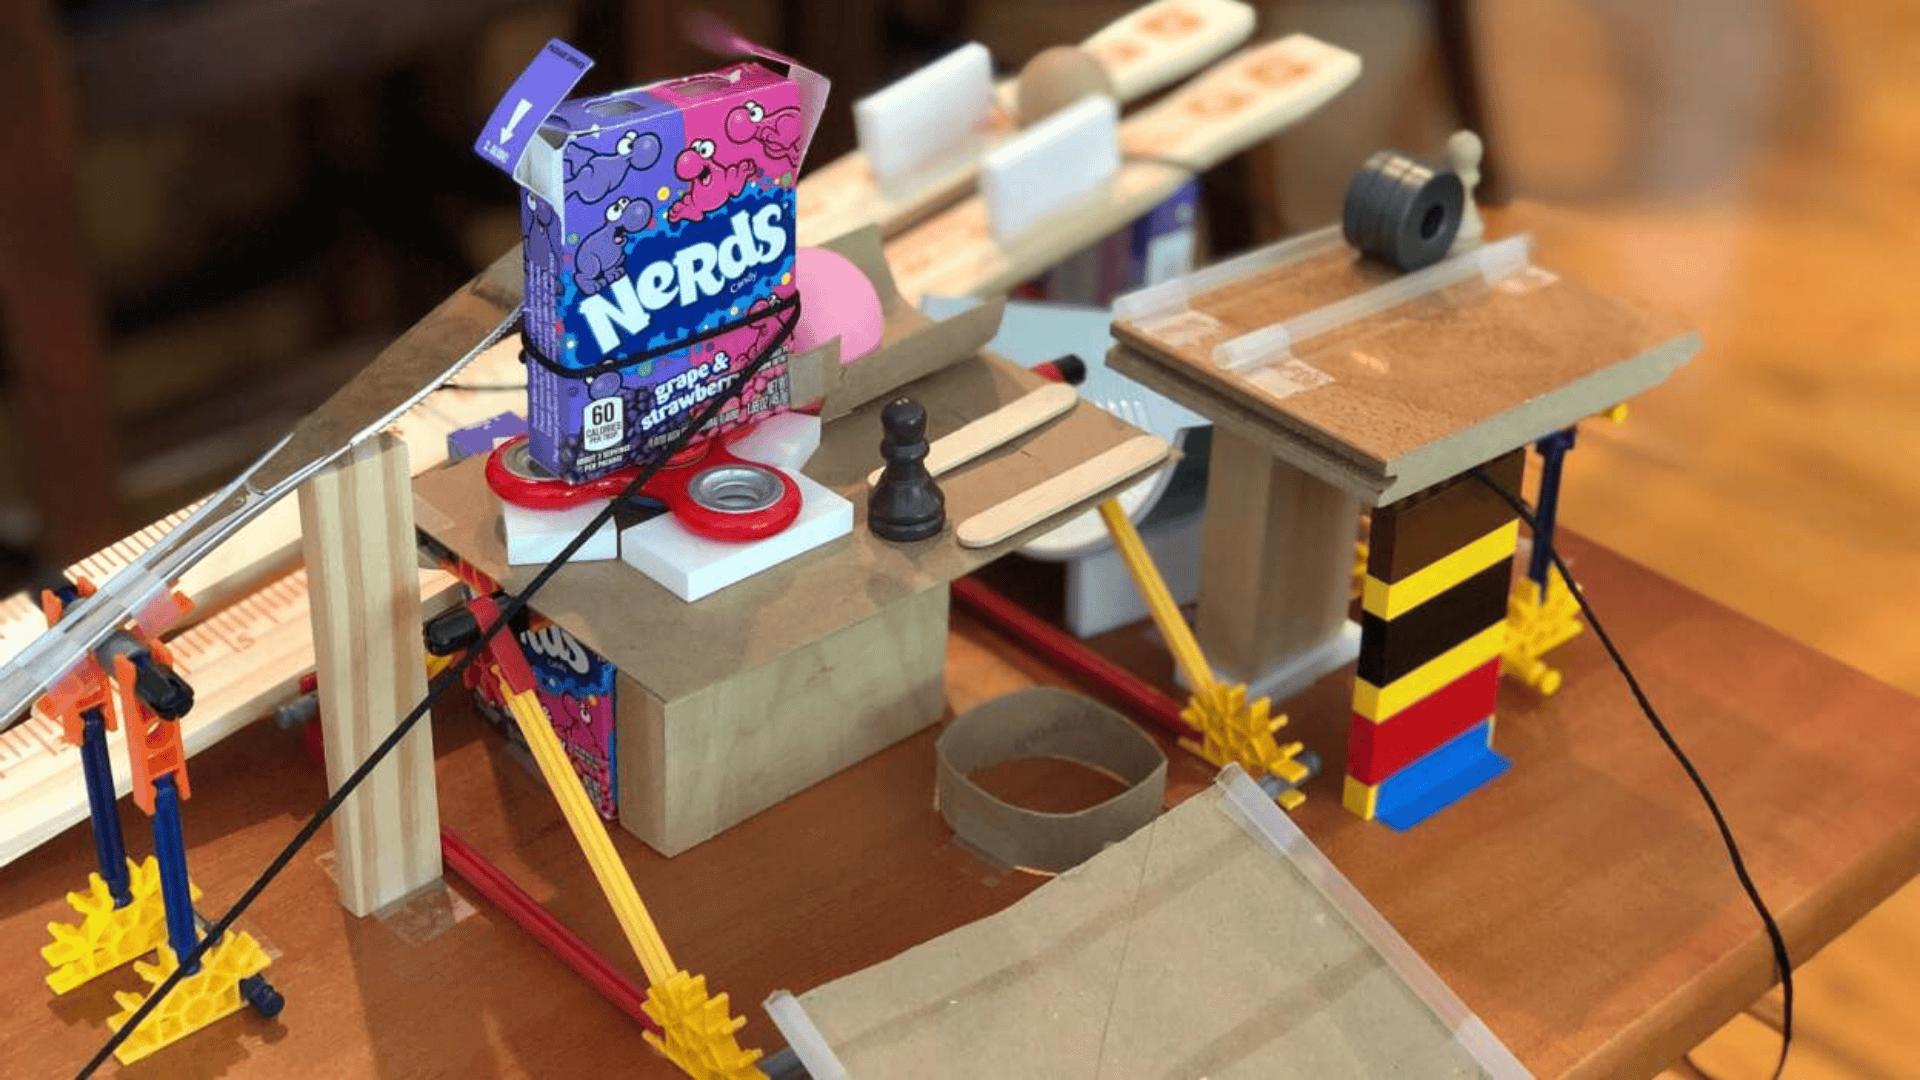
14. Dispense Candy
End the machine by releasing candy or gumballs from a container. A string, lever, or falling weight can trigger the dispenser. It’s popular in classrooms and parties because of the sweet reward.
The project demonstrates pulleys, balance, and timing while keeping students engaged and excited about science.
15. Shut a Door
Use a rolling ball or a weight to pull a string that closes a door. It combines pulleys, levers, and momentum.
The challenge is making the timing and strength just right. This project works well for groups, and the door shutting at the end feels like a proper grand finale.
Overall, Rube Goldberg machines make science a playful and creative experience. Even simple tasks become exciting when turned into chain reactions full of imagination.
How to Build Your Own Rube Goldberg Machine
Building your own Rube Goldberg machine is easier than it looks. You’re building a chain reaction that does one small job. All you need are everyday items, a clear task, and a fun chain of steps.
Materials
- Ball track: ruler, clothespins/pegs, cardboard boxes.
- Dominoes (or books/Jenga blocks).
- Post for spinner: paper-towel rod or potato masher (tape to stabilize).
- String + weight (padlock or metal nut).
- Release “latch”: flat spatula or pencil + die taped on top.
- Rolling can module: empty coffee can/jar, plastic fork (outside), metal fork (inside as weight), book (ledge).
- Small hold-down weight (coin, nut).
- Roll of tape (medium; swap to smaller if needed) + one domino as a pedestal.
- Cereal box, stack of books, folded paper (hinge), bowl, spoon, bottle cap.
- Tape (masking + double-sided), marker, scissors.
Step-by-Step Process
Step 1: Build the starter track + domino trigger
Make a shallow ramp with a ruler and clothespins on stacked boxes, aimed at a domino line. Keep the domino spacing approximately one width apart. End the line at the table edge with a small object that will drop and pull a string.
Step 2: Set up the spinner post + latch
Stand a paper-towel rod or potato masher upright, tying a string near the top and taping it. Create a latch under the hanging weight using a spatula or pencil, adding a die on top for a wider resting point.
Step 3: Link the trigger and tune the pull
Tie the table-edge falling object to the latch with another string. Add slack for more momentum when it pulls. Adjust the length so the weight hangs close to the table height, ensuring smoother action.
Step 4: Build the rolling-can module + release
Tape a plastic fork outside a coffee can, resting it on a book edge. Inside, tape a metal fork at the 2 o’clock position as an off-center weight. Place a hold-down weight on the fork, then position the spinner to knock it off.
Step 5: Create the transfer: tape-roll kicker – spoon lever
Place a tape roll on a domino pedestal so it rolls when tapped by the can. Raise it or use a smaller roll if sluggish. Tape a bottle cap to a spoon and position it so the rolling tape hits and lifts it.
Step 6: Hinge the cereal box + place bowl, then lock & test
Stack books for height and hinge the cereal box with folded paper so it tips toward the bowl. Adjust until cereal flows smoothly. Mark and tape positions of all items, test in sections, then run the full setup with guides if needed.
Keep safety first, especially with sharp items, heat, or water. Record the final run as proof that your design works.
For a more detailed walkthrough of the build, check out the full Rube Goldberg machine video tutorial below:
Classroom & STEM Project Guide
Rube Goldberg machines are perfect for hands-on learning. They bring science, teamwork, and creativity together in one activity. Here’s how teachers can utilize them in the classroom.
Ideas for Grade Levels
In the classroom, Rube Goldberg machines can be adapted to different grade levels to match skills and learning goals.
Elementary school students excel with simple setups, such as domino chains, balls rolling into cups, or bells ringing, where the focus is on fun, observation, and basic cause-and-effect relationships.
Middle school students can handle multi-step projects, such as watering a plant, popping a balloon, or opening a door, which gives them a chance to learn the concepts like momentum, gravity, and the six simple machines.
By high school, learners are ready for larger, more complex projects, such as building breakfast machines, candy dispensers, or door closers, which connect their work directly to physics, engineering, and design principles.
Tips for Teachers
- Safety First: Avoid sharp tools, fire, or breakable glass. Supervise closely.
- Group Work: Assign roles like designer, builder, tester, and recorder to keep teams organized.
- Assessment: Grade on creativity, teamwork, problem-solving, and presentation rather than only the success of the final run.
Example Lesson Plan Outline
- Introduction (10 min): Explain what a Rube Goldberg machine is, and show a short video.
- Planning (20 min): Groups choose a task and sketch their sequence.
- Building (40–60 min): Students use classroom-safe materials to assemble.
- Testing (20 min): Groups run machines, troubleshoot, and refine.
- Presentation (15 min): Each group shows their machine and explains the science behind it.
This type of project spans multiple grade levels and fosters lasting learning experiences. It encourages problem-solving while keeping science hands-on and fun.
Troubleshooting & Tips
Even the simplest Rube Goldberg machines can encounter problems. A few small fixes can make them more reliable and easier to run.
| Problem | Cause | Quick Fix |
|---|---|---|
| Domino spacing | Dominoes fall too soon or stop mid-chain | Keep gaps even, about one domino’s width. Test spacing and adjust as needed. |
| Marble speed | Marble too slow (stops) or too fast (jumps track) | Change ramp slope: steeper for speed, gentler to slow it down. Add guides if needed. |
| Trigger misfires | Levers, strings, or cups don’t react | Check alignment and balance. Add weight, shorten strings, or guide objects. |
| Unreliable sequence | Works once but not again | Test each step separately. Strengthen weak spots before connecting everything. |
| Objects off track | Marbles or balls roll away | Use tape, cardboard rails, or barriers to keep items in place. |
Reliability Tips:
- Test each section before linking the whole chain.
- Use simple guides to keep objects moving where you want.
- Run the machine multiple times, aiming for three consecutive successful runs.
- Keep spare materials nearby for quick fixes.
With testing, small adjustments, and practice, your machine will become more reliable. The key is to keep trying until each step runs smoothly.
Conclusion
Now you know some of the best Rube Goldberg machine ideas, from easy domino chains to bigger projects like breakfast makers.
What I love most is how these machines turn simple tasks into fun, creative experiments. You don’t need fancy tools: just everyday items and a bit of imagination.
You can use them to learn, teach, or simply play. If you build one, remember it’s not about perfection; it’s about enjoying what you create.
Now it’s your turn: pick one of these Rube Goldberg machine ideas, grab some supplies, and see what kind of chain reaction you can create! Don’t forget to share your experience in the comments below, I’d love to hear how it goes.