I’ve always thought bottle rockets were one of the most exciting ways to see science in action.
Instead of feeling like a toy, they act like a small lab experiment that shows you how pressure, thrust, and balance all work together.
In this blog, you’ll learn not only how bottle rockets work, but also how to build one step by step, what factors affect performance, and the safety checks you should never skip.
By the end, you’ll know how to design, launch, and fine-tune a rocket that flies higher and straighter each time. Let’s begin with the science that makes these rockets take off.
How Bottle Rockets Work: The Science Behind It
Newton’s Third Law states that every action has an equal and opposite reaction. When pressurized air forces water downward out of the bottle, that expelled water pushes the bottle upward. That simple push is what launches the rocket.
Pressure, drag, and thrust work together to determine height and speed. Pressurized air squeezes water out of the nozzle to create thrust; more water gives a stronger short impulse, and more air extends the push.
Drag (air resistance) slows the rocket, so a smooth, pointed shape helps convert thrust into altitude. Fins and weight balance keep the rocket straight.
The center of mass should sit ahead of the center of pressure; small forward ballast moves the mass forward while fins shift pressure aft.
With symmetric, rigid fins and a forward CM, the rocket tracks upward instead of tumbling.
Best 2-Litre Bottle Rocket Design: Step-by-Step Guide
Use the steps below to safely build, launch, and refine your 2-litre bottle rocket. Read each step fully, wear goggles, and keep bystanders well back.
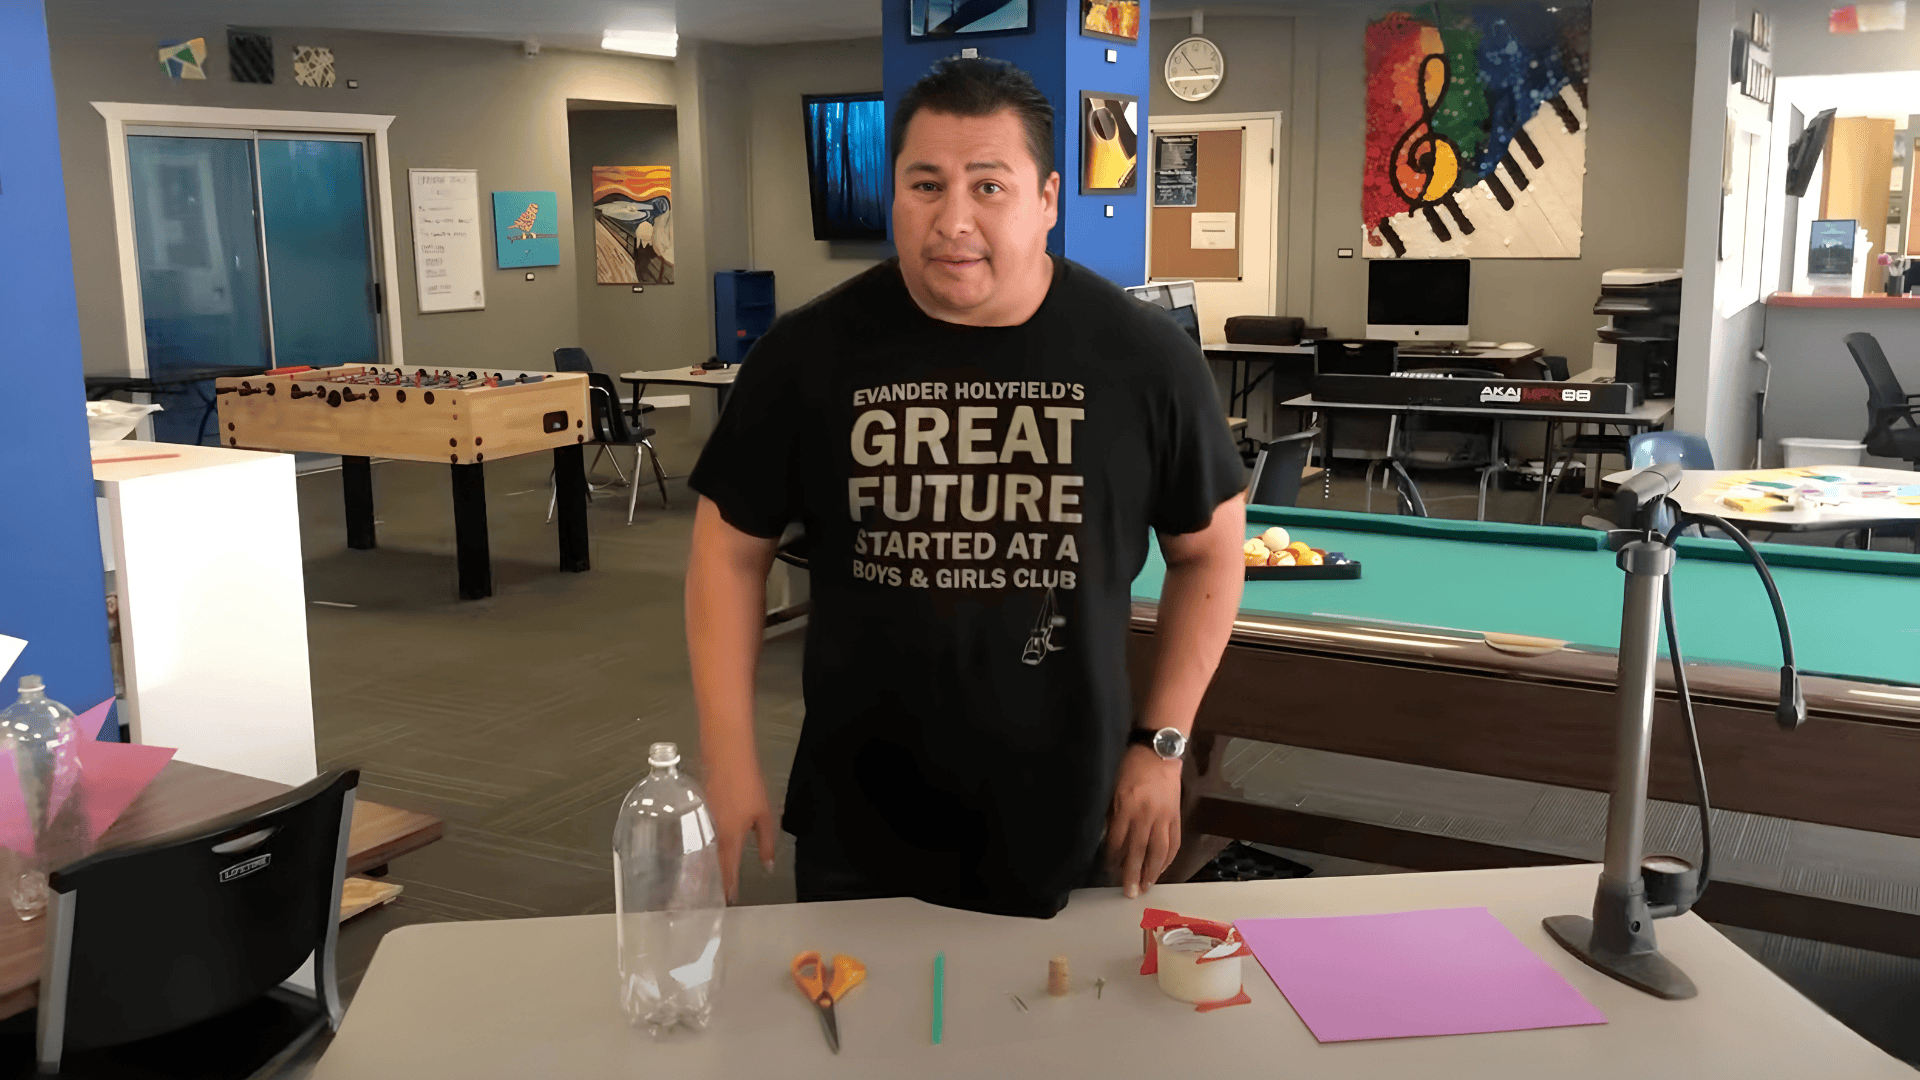
Materials & Tools
Gather the materials and tools required first, and then start to build:
- Bottles & structure: 1–2 empty 2-liter bottles (body and nose cone); cardboard or construction paper for fins/wings.
- Tools & fasteners: scissors/hobby knife, tape, something sharp for a small hole (awl/nail/heated needle).
- Pump & launcher: air pump with needle/valve adapter; PVC pipe or metal rod + plywood base for a guided launcher.
- Guidance & ballast: plastic straw (taped lengthwise as a guide), small clay or ball bearing for nose ballast (optional).
- Safety: safety goggles.
Follow these clear, easy steps to build, launch, and refine your 2-litre bottle rocket:
Step 1: Gather and Prep
Gather 1–2 clean 2-litre bottles, cardboard, tape, straw, scissors or a hobby knife, a pump with a needle adapter, launcher parts, and safety goggles. I rinse bottles; you should dry them before cutting and assembly.
Step 2: Make the Pump Hole and Seal
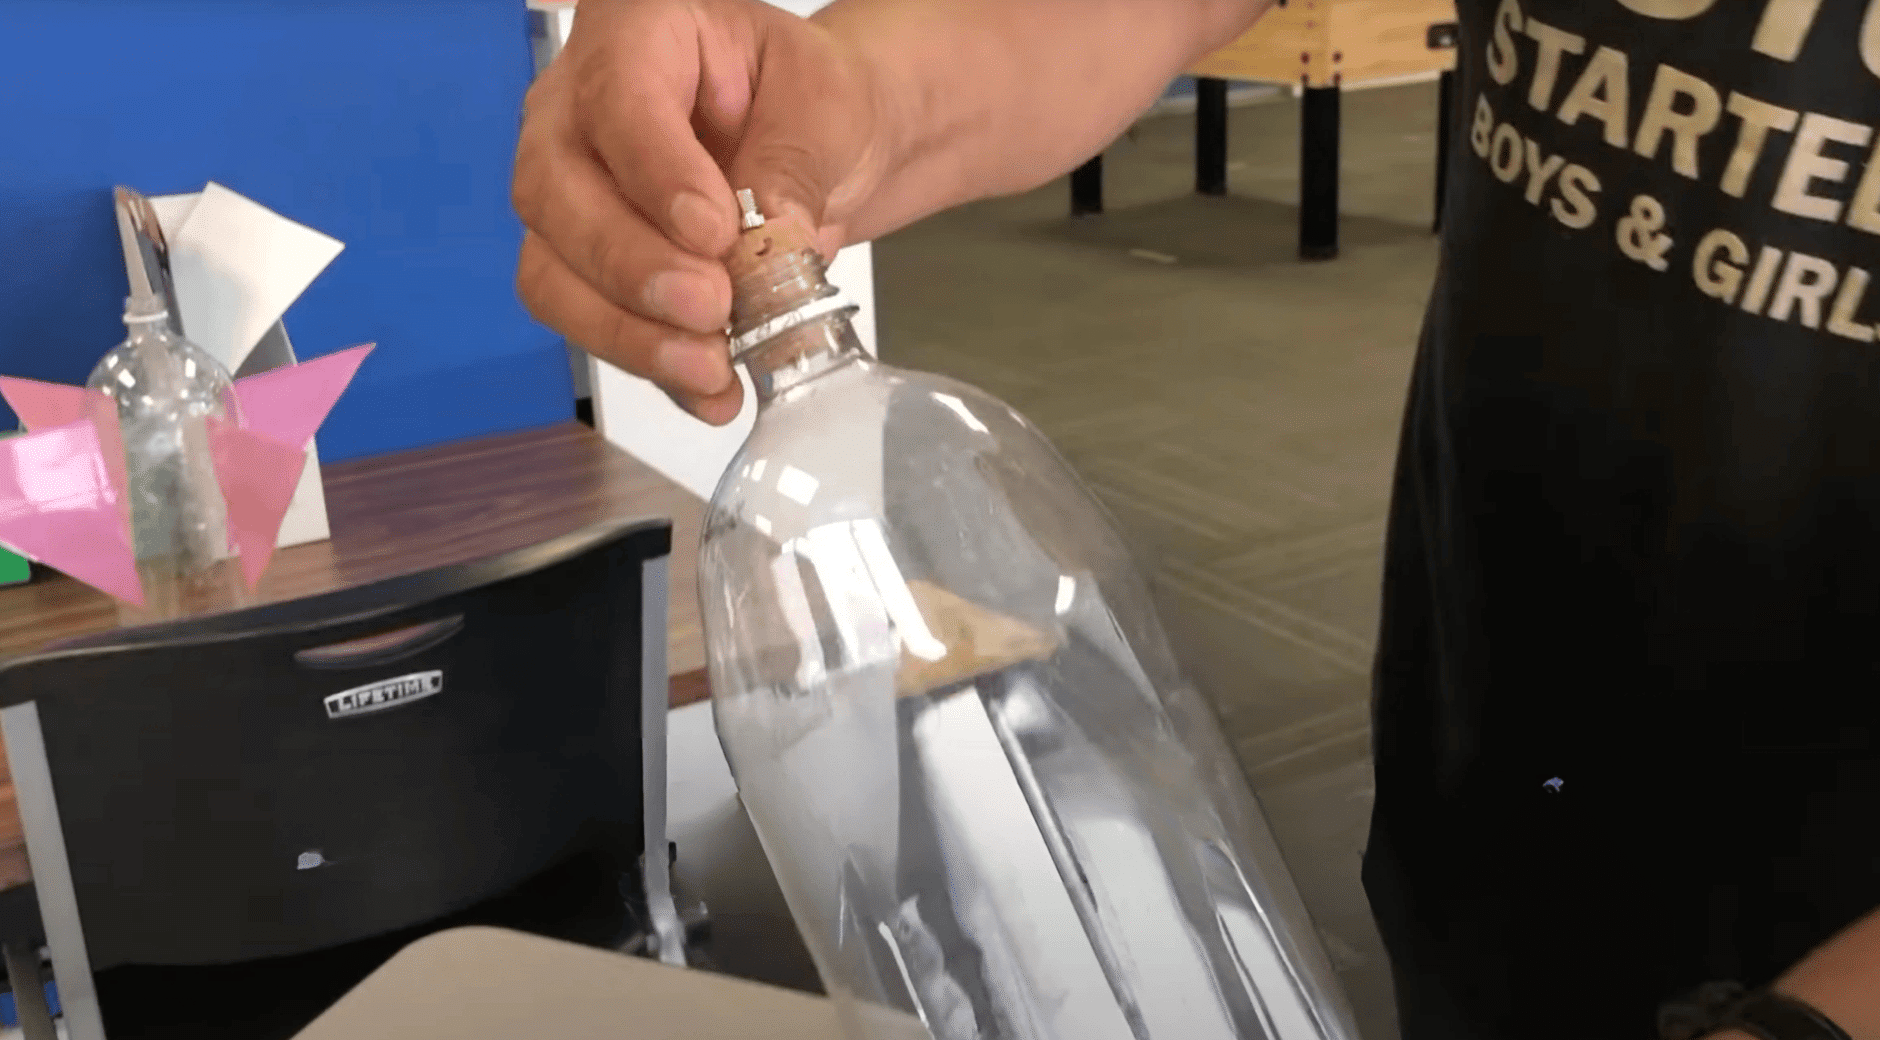
Start by warming a nail or use an awl to make a small hole near the bottle’s mouth. Insert the pump needle or valve so it fits snugly. Tape tightly around the entry to stop leaks.
Test the seal with soapy water and look for bubbles. Replace the tape if you see bubbles before pressurizing the bottle, and repeat checks each time.
Step 3: Attach Guide and Fins
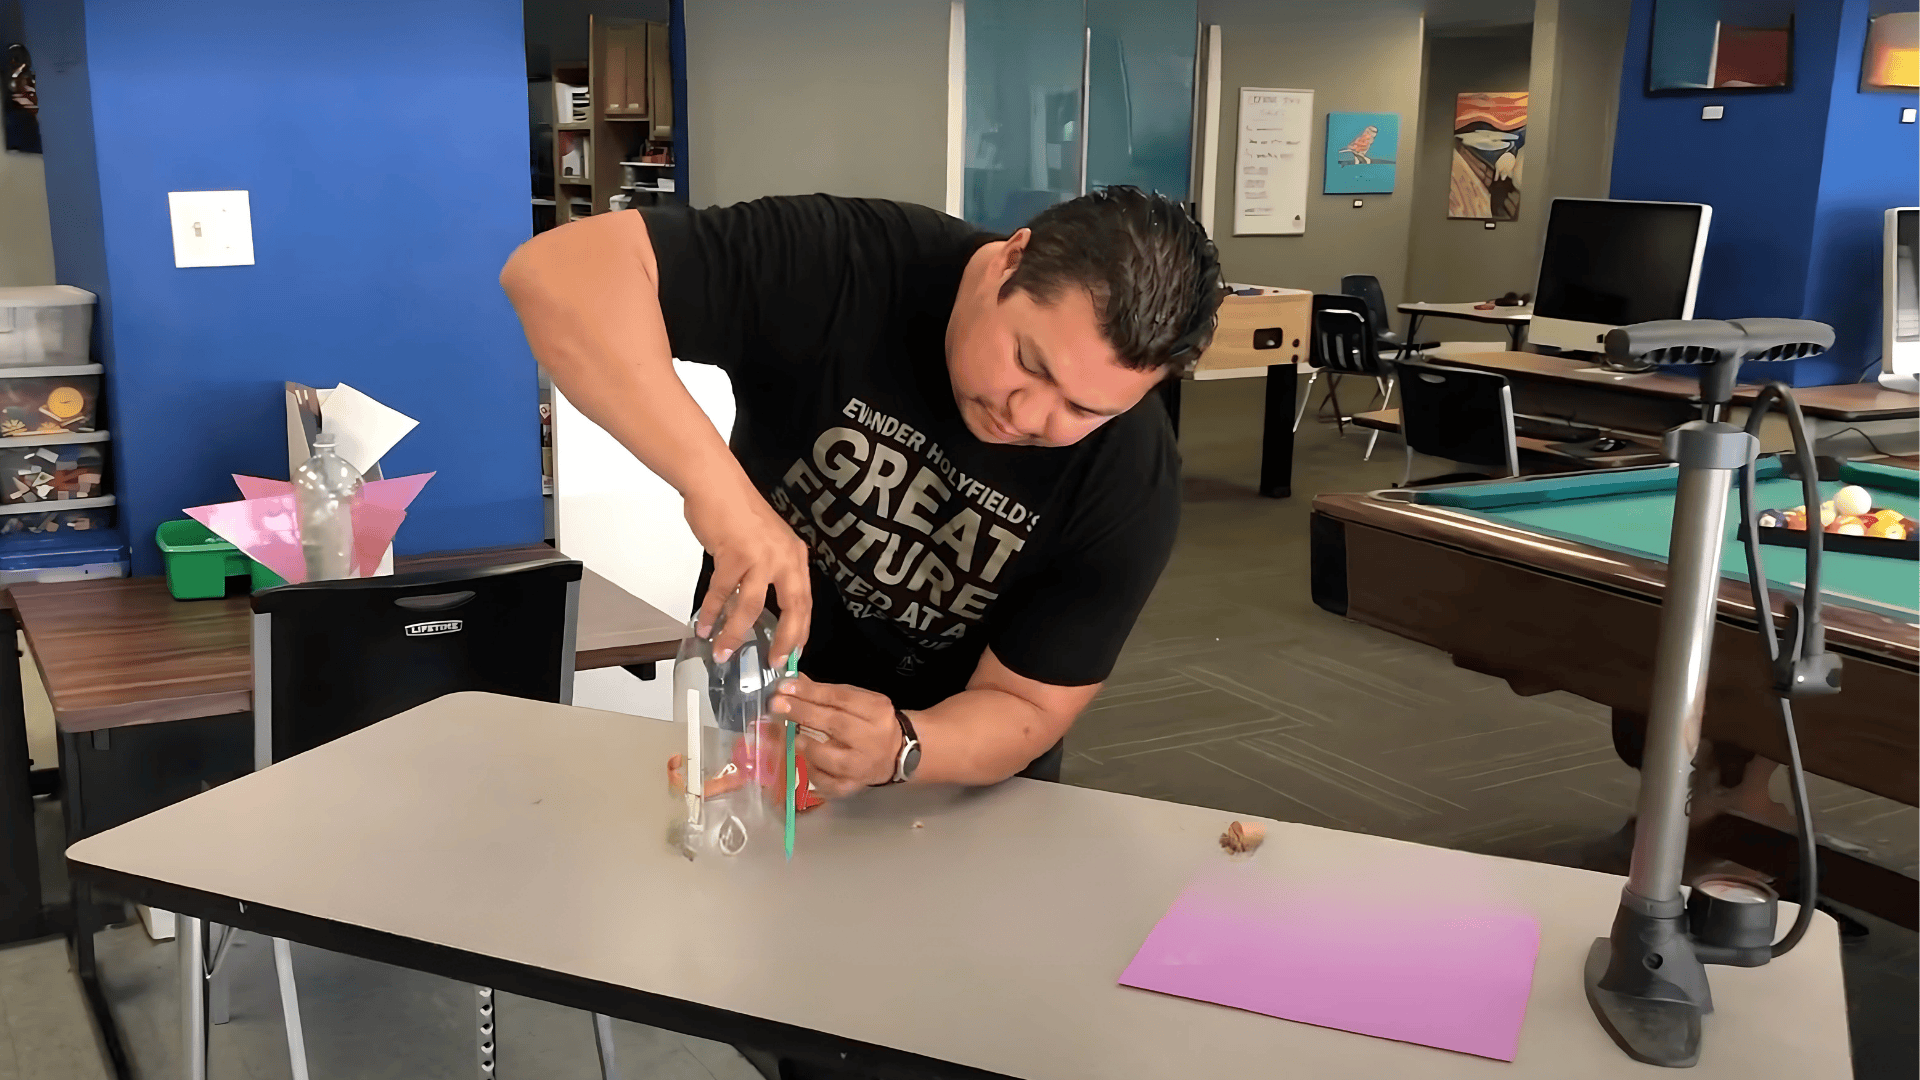
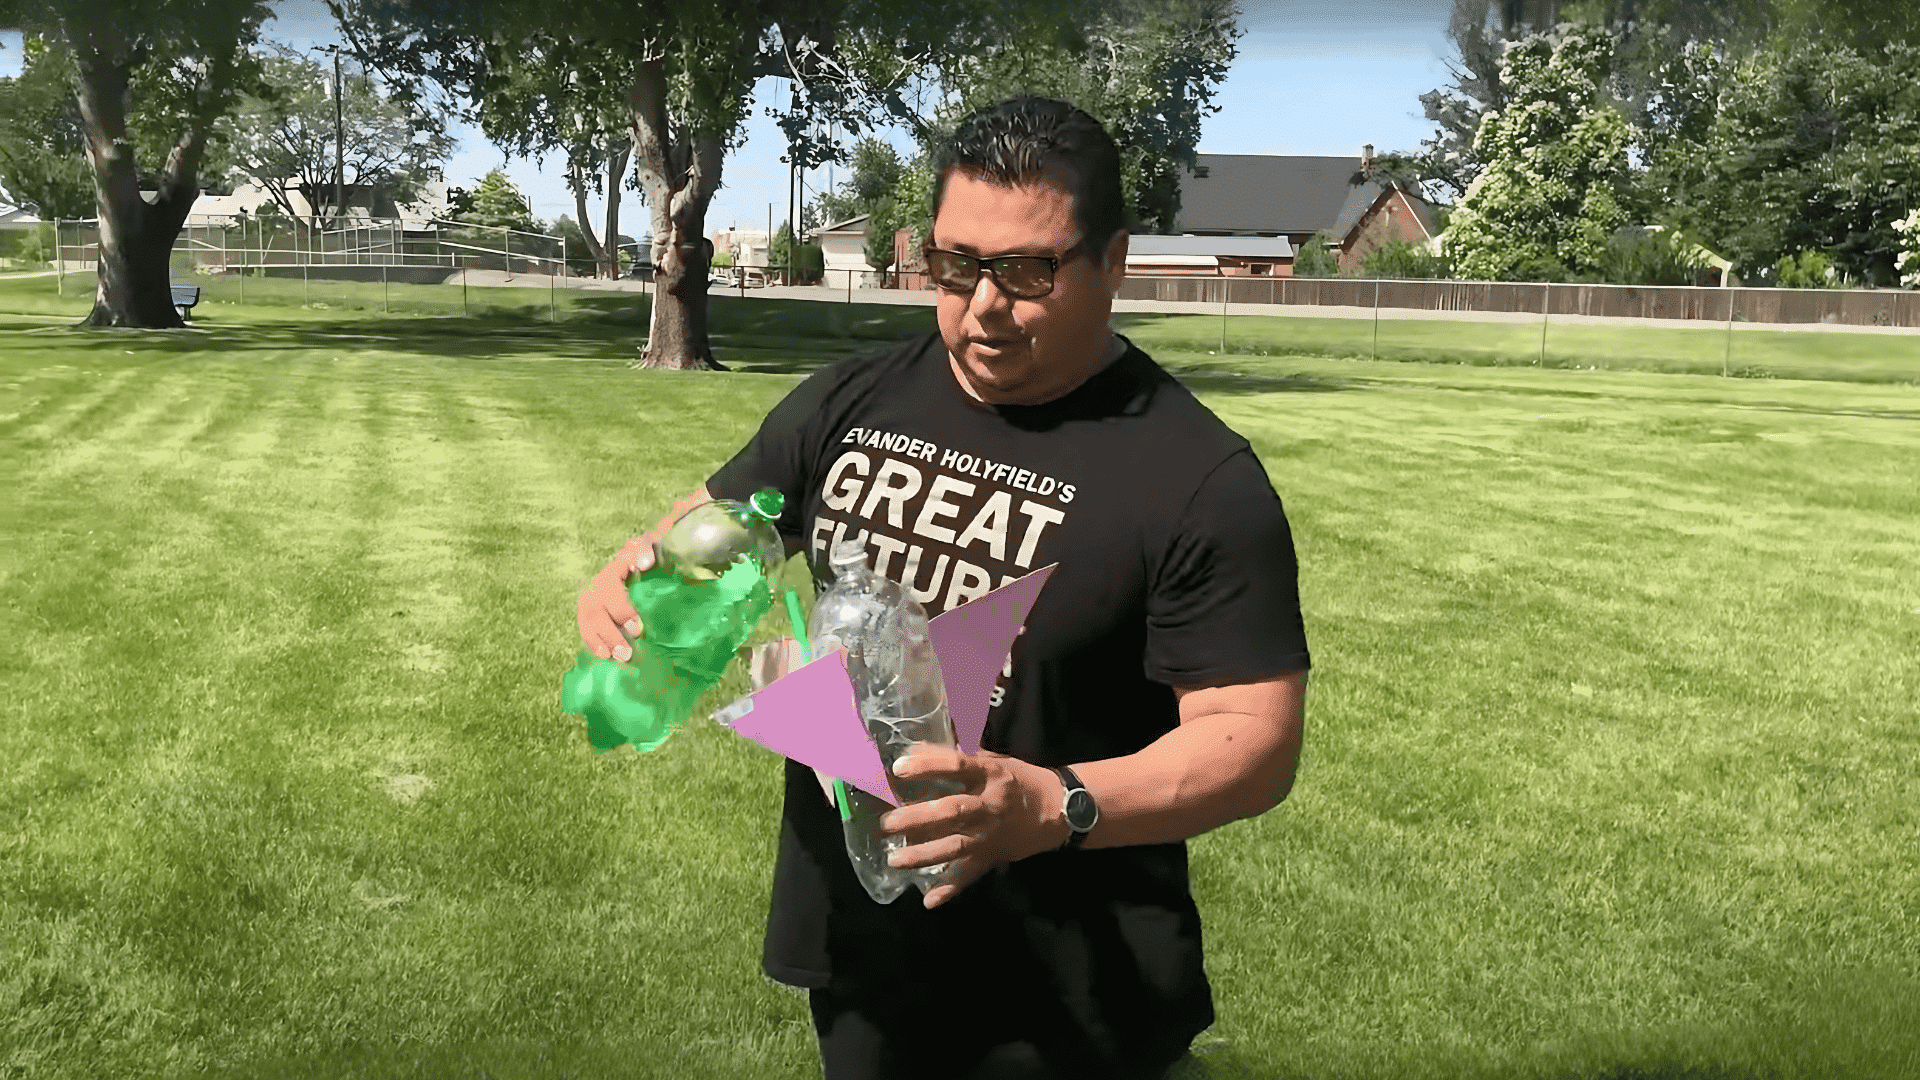
Tape a straw along the bottle so it will slide on the launcher rod. You should cut two or three fins from rigid cardstock and space them evenly near the bottle’s tail. Glue or tape fins firmly, keeping them aligned.
Check alignment by rolling the bottle; if it wobbles, adjust. Proper fins keep the rocket stable, flying straight.
Step 4: Add Nose Cone and Ballast
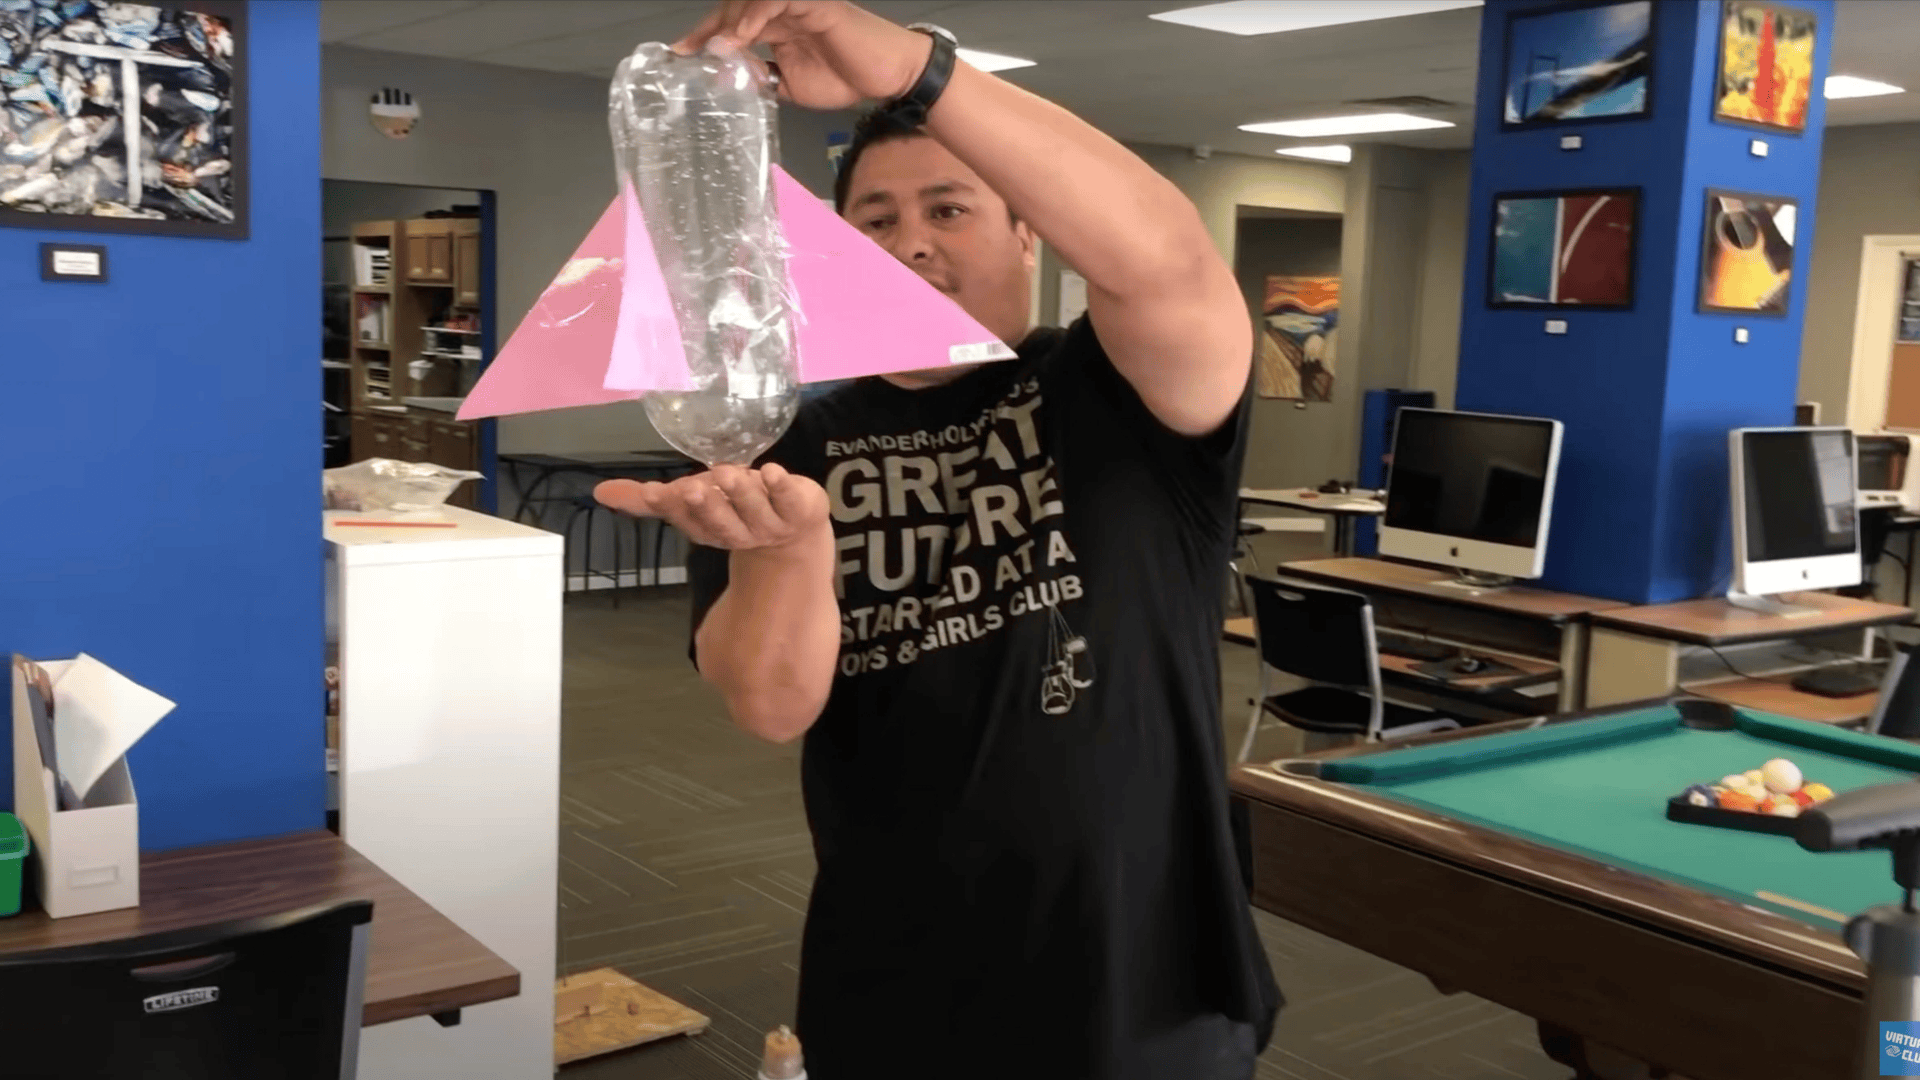
Make a lightweight nose cone from a second bottle top or rolled paper and tape it to the bottle’s mouth. You can add a small lump of clay or a ball bearing inside the cone to shift the center of mass forward.
Test by a short launch; if it still flips, add weight in small increments until flight stabilizes.
Step 5: Build and Set Up the Launcher
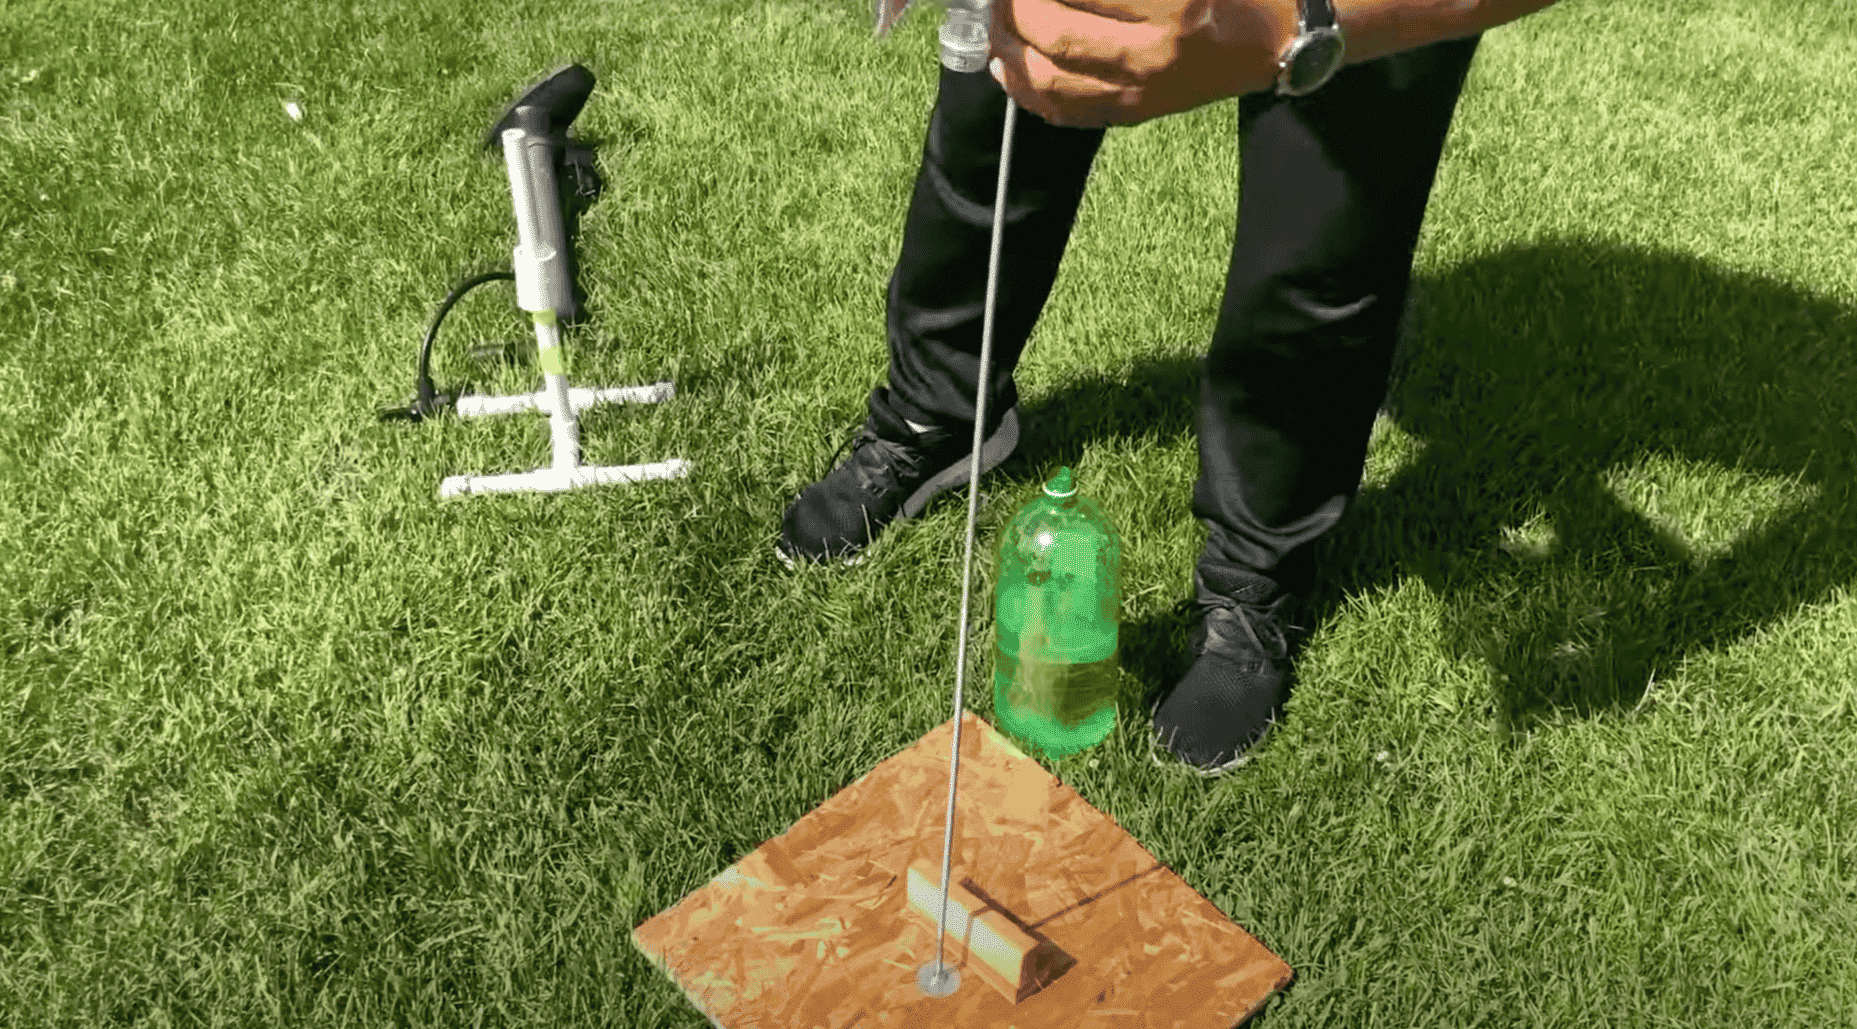
Construct a guided launcher by fitting a metal rod through a plywood block or using a PVC pipe on a wide base. You should secure the rod or pipe so it won’t tip.
Place the rocket’s straw guide over the rod, attach the pump needle, and double-check seals and alignment before you start pumping. Ensure the base stays level.
Step 6: Fill with Water and Safety Check
Pour water to about one-quarter to one-half full as a starting point. You should put on goggles, keep everyone back, and never stand over the rocket. Inspect the bottle for cracks.
Check that the launcher is secure and level. Only proceed to pump when seals are tight, test the needle seal, and ensure everyone is at a safe distance.
Step 7: Pressurize, Launch, Recover, and Iterate
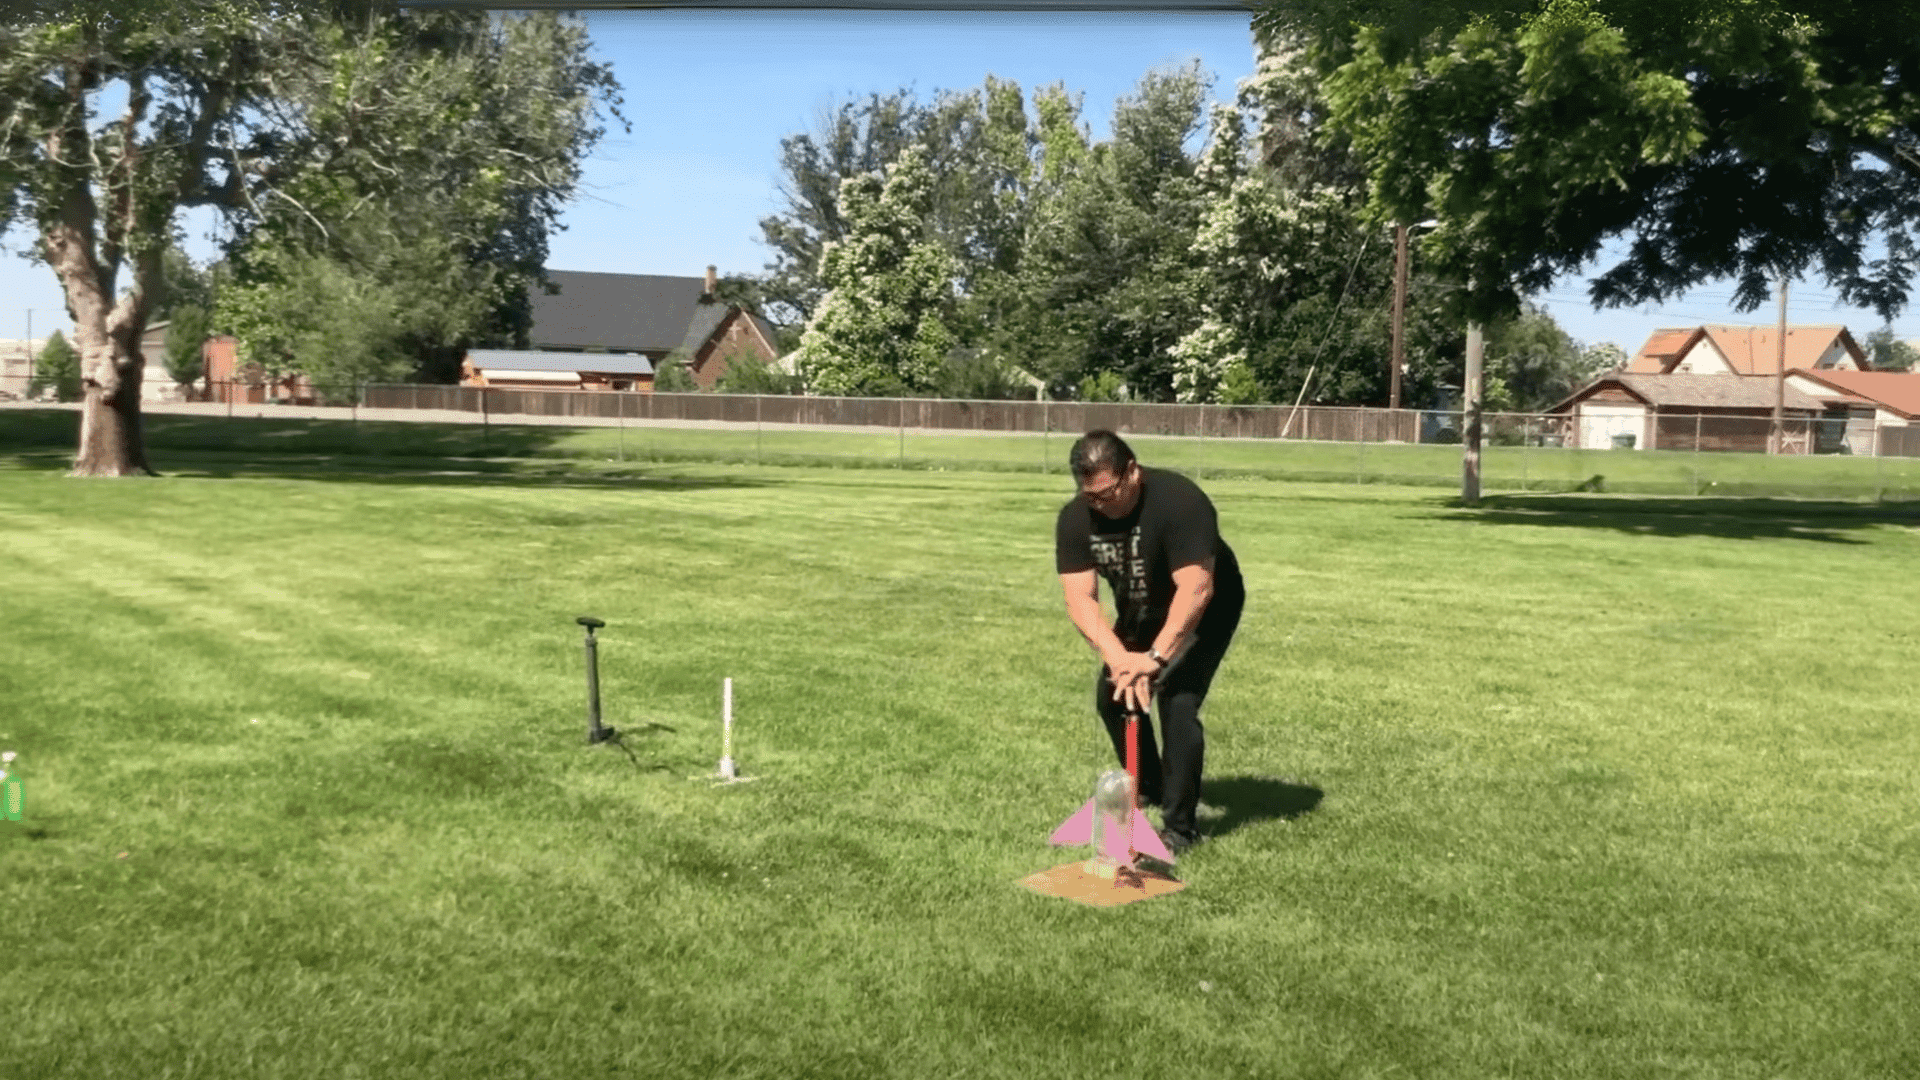
You should pump slowly to the chosen pressure and stop if the bottle shows stress. Call a clear countdown, then open the release so water ejects and the rocket lifts.
After landing, wait until pressure is gone, approach safely, inspect the bottle and launcher, adjust fins, water, or ballast, then test again.
For a more detailed walkthrough of the build, check out the full video tutorial below:
Performance Factors
Understand these four variables: water-to-air ratio, fins, nose cone, and ballast to tune flight height, stability, and hang time. Test one change at a time and record results.
- Water-to-air ratio: Fill about 25–50% of the bottle; start at ~33% less water gives longer thrust duration but lower mass, more water gives stronger initial thrust but higher mass.
- Fin design (shape & count): Straight fins are simple and stable; swept/curved fins can reduce drag; three fins lower drag and weight, four improve yaw/spin resistance, keep them symmetric and rigid.
- Nose cone shape: Pointed cones reduce drag for higher speeds, rounded cones resist damage at modest speeds, and parabolic/ogive cones balance drag reduction with strength, keeping cones lightweight and centered.
- Ballast (balance): Add small forward weight (start 5–15g) to move the center of mass ahead of the center of pressure; increase gradually until flipping stops, but avoid over-weighting, which lowers altitude.
Launching Safety Tips
Before you launch, set up a secure guided launcher and run a quick safety check. I’ll walk you through launcher options, safe PSI ranges, and a simple step-by-step launch procedure.
Build or buy launcher: Simple DIY metal rod through plywood or PVC pipe guide; secure base. Or buy a hobby/PVC launch kit with pressure release.
Safe PSI & common mistakes: Start low, 20–40 psi for beginners,40–60 psi for experienced users. Avoid cracked bottles, poor seals, overpressurizing, and leaning over the rocket.
Step-by-step launch procedure:
- Place the rocket on the guide and attach the pump needle; check seals.
- Ensure everyone is behind the safety line.
- Add water (start ~⅓ full) and verify launcher alignment.
- Pump slowly while watching the pressure gauge. Stop if you hear creaks or see deformation.
- At target pressure, call a countdown.
- Trigger release so the bottle ejects water and launches.
- Wait until it lands, then approach only after confirming no pressure remains.
- Inspect the bottle and launcher before repeating.
Door precautions: Use an open area away from people, buildings, and power lines. Spectators 15–30 m back. Don’t launch in strong winds; secure the launcher to the ground.
Conclusion
Building and launching a bottle rocket is more than just a fun project; it’s a hands-on way to understand the science happening all around us.
I’ve found that each launch teaches you something new, whether it’s how small design tweaks affect flight or how patience and safety make the process smoother.
When you step back, it’s not just about sending a bottle into the sky, but about experimenting, observing, and improving with each try.
If this sparked your interest, you’ll enjoy reading more of my blogs about practical projects, everyday science, and creative builds to keep your curiosity growing.