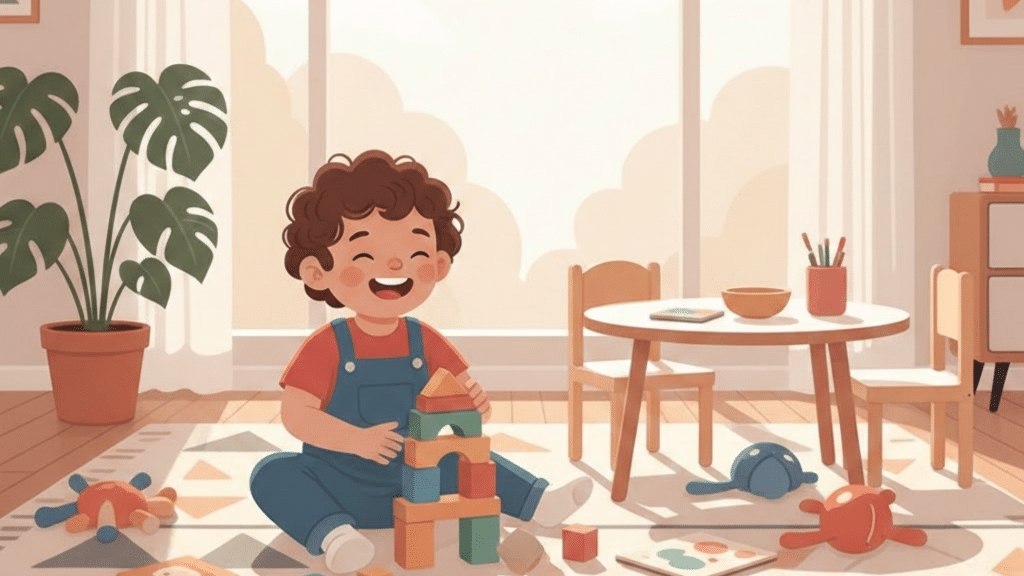
Keeping kids entertained with simple and affordable activities isn’t always easy. If you’re looking for fun ideas that don’t cost much, salt painting is a perfect option.
With just glue, salt, and watercolors, your child can make bright, textured art that feels almost magical to watch.
It’s quick to set up, and the best part is that kids have total freedom to play with colors and designs.
Salt painting also sneaks in a little science as they see how salt absorbs paint while creating sparkling, one-of-a-kind artwork.
In this blog, I’ll walk you through the materials, step-by-step instructions, and creative ideas so you can try salt art with your kids today.
What is Salt Painting for Kids?
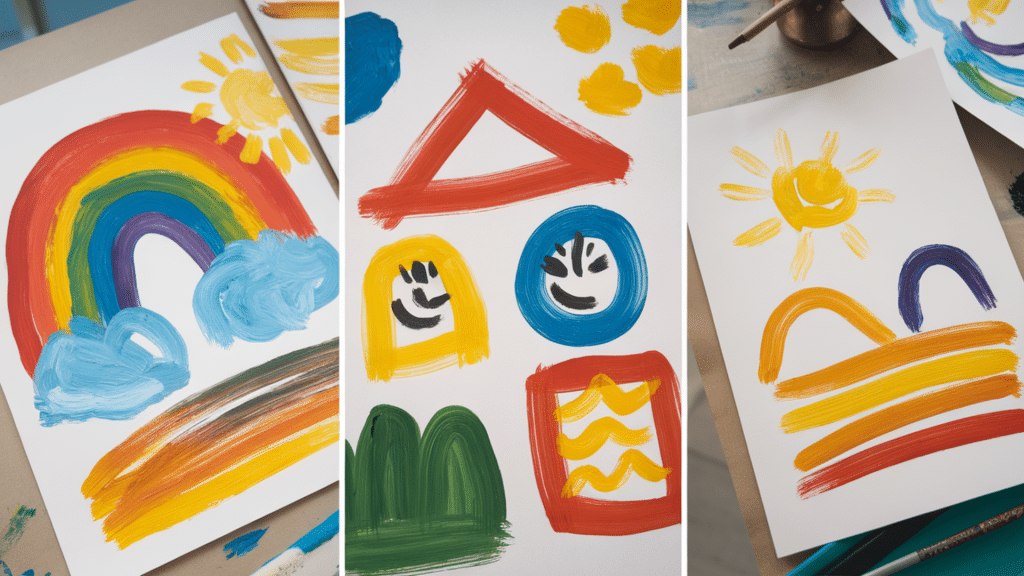
Salt painting is a hands-on art activity where kids draw with glue, sprinkle salt on top, and then add watercolor or food coloring. The salt quickly absorbs the liquid, causing the color to spread in unexpected and beautiful ways.
As the paint travels across the salt, it creates glowing, textured patterns that almost look like crystals forming right on the paper. This effect makes each design feel alive, changing as the colors mix and move.
This activity is also known as salt art for kids, and it’s a favorite because no two pieces ever look alike. Children are fascinated by the process, eagerly watching their designs transform into something completely unique.
The mix of sparkle, texture, and movement makes salt painting stand out from ordinary crafts. It feels like a little science experiment combined with art, keeping kids curious and engaged from start to finish.
Materials You’ll Need
Before you begin, it helps to gather all the supplies in one spot. Everything you need is simple, affordable, and often already at home.
- Thick paper, such as cardstock or watercolor paper
- White glue (a squeeze bottle is best)
- Table salt
- Liquid watercolors or food coloring
- Droppers or small paintbrushes
- A shallow tray or tub (optional, for shaking off extra salt)
With these simple materials, you can set up salt painting in minutes and be ready for a creative, hands-on activity with kids.
Step-by-Step Salt Painting Guide
Salt painting is easy to set up and fun to watch unfold. The best part is that kids can do most of the work themselves.
All you need is a little patience and some creativity, and the results will always surprise you. Follow these simple steps to get started:
Step 1 – Create Your Design
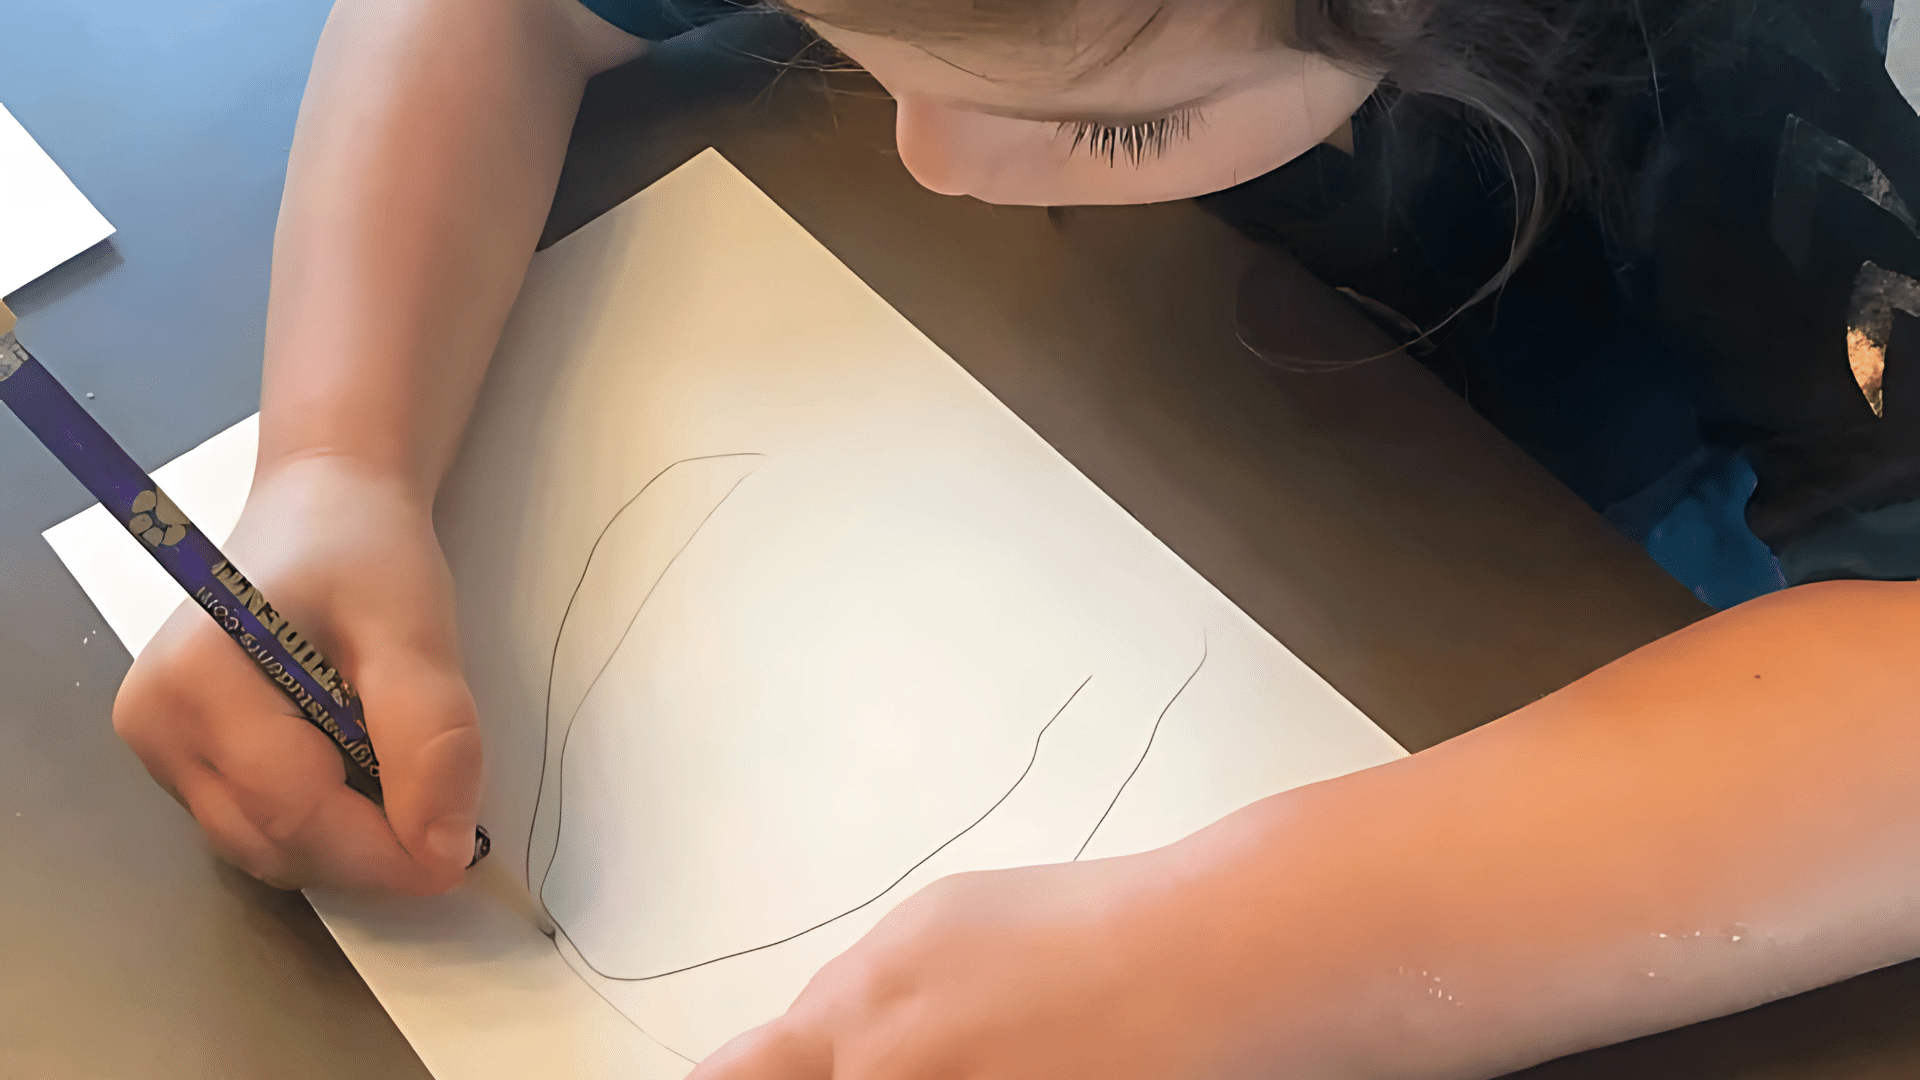
Start by sketching a picture with a pencil or go straight to drawing with glue. Simple shapes, such as hearts, stars, and swirls, are easy for kids to try.
Encourage older children to experiment with more detailed designs, such as animals, rainbows, or even their names. Keeping it simple helps younger kids feel successful.
Step 2 – Apply the Glue
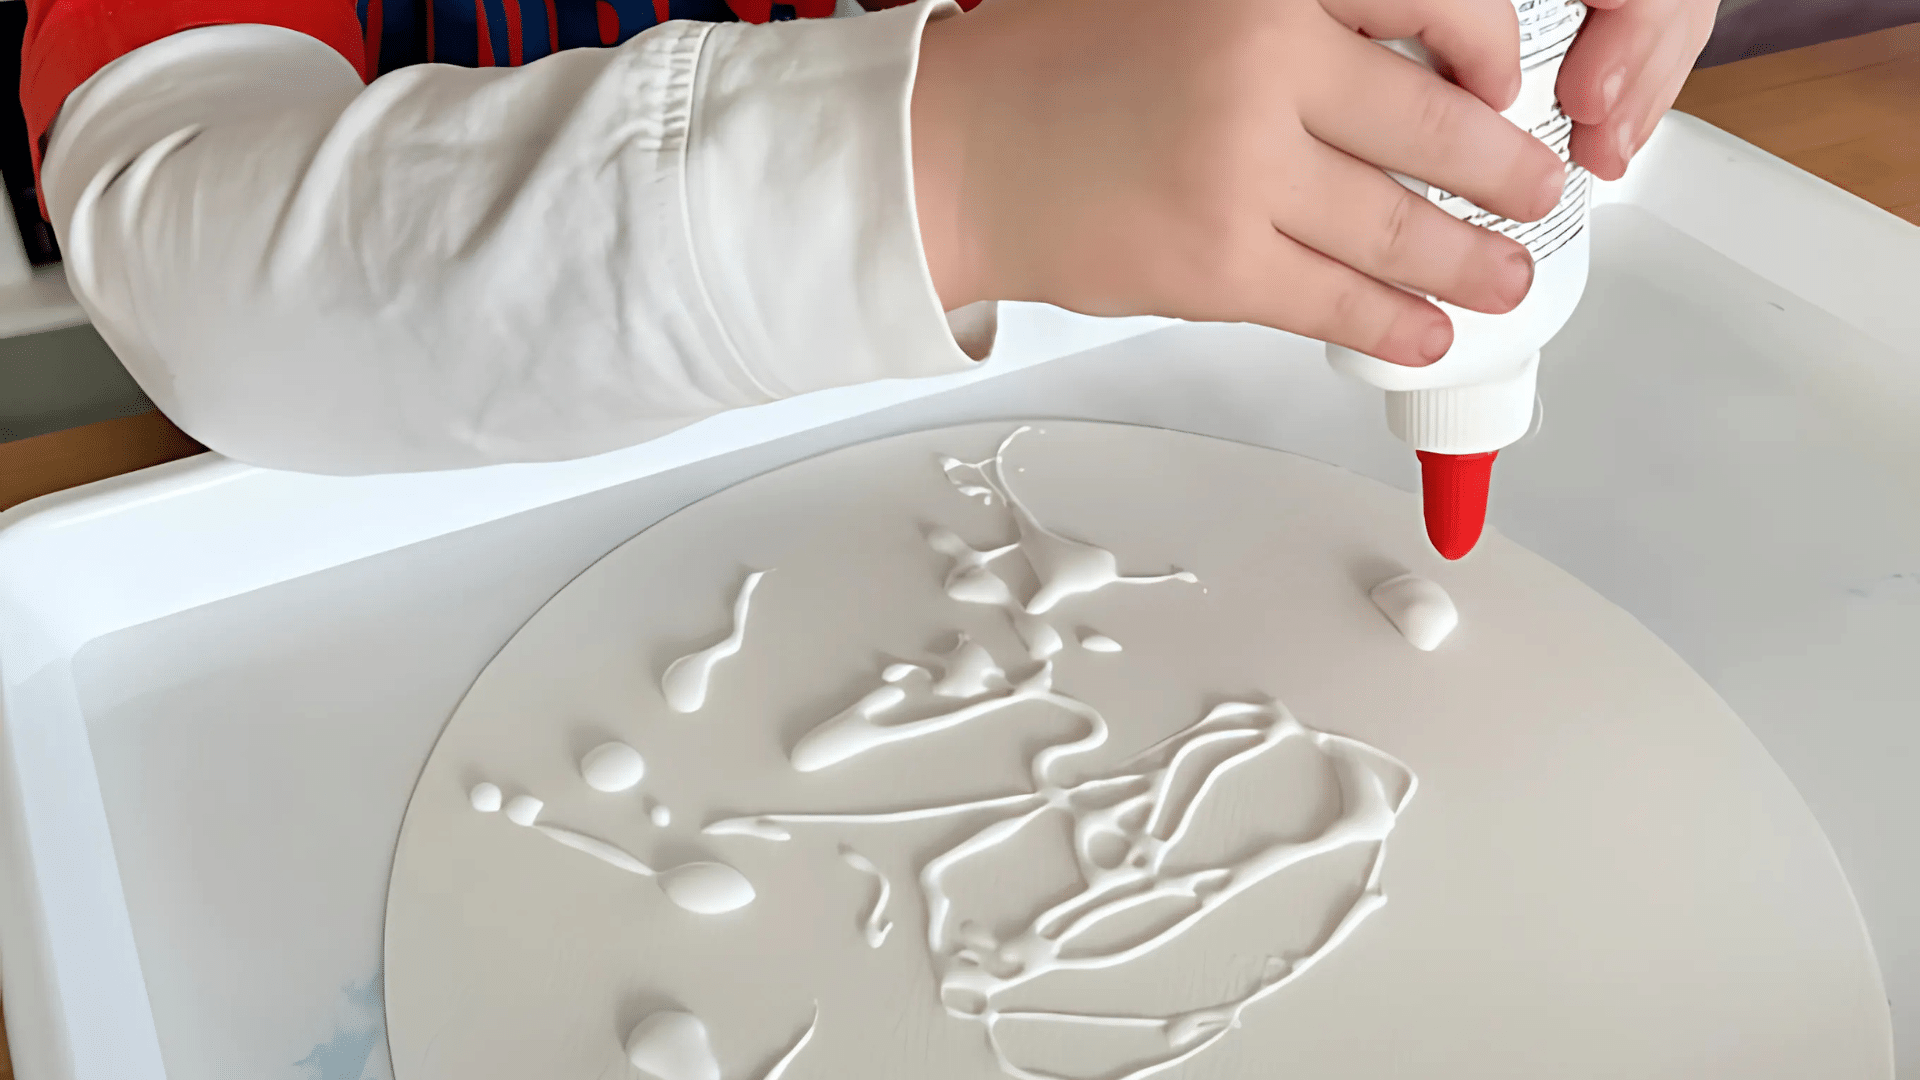
Use a squeeze bottle to trace over the pencil lines or create a new design freehand. Ensure the glue lines are thick and raised so that the salt can adhere.
Teach kids to press the bottle gently for better control. This step also develops fine motor skills as children learn to apply the glue carefully.
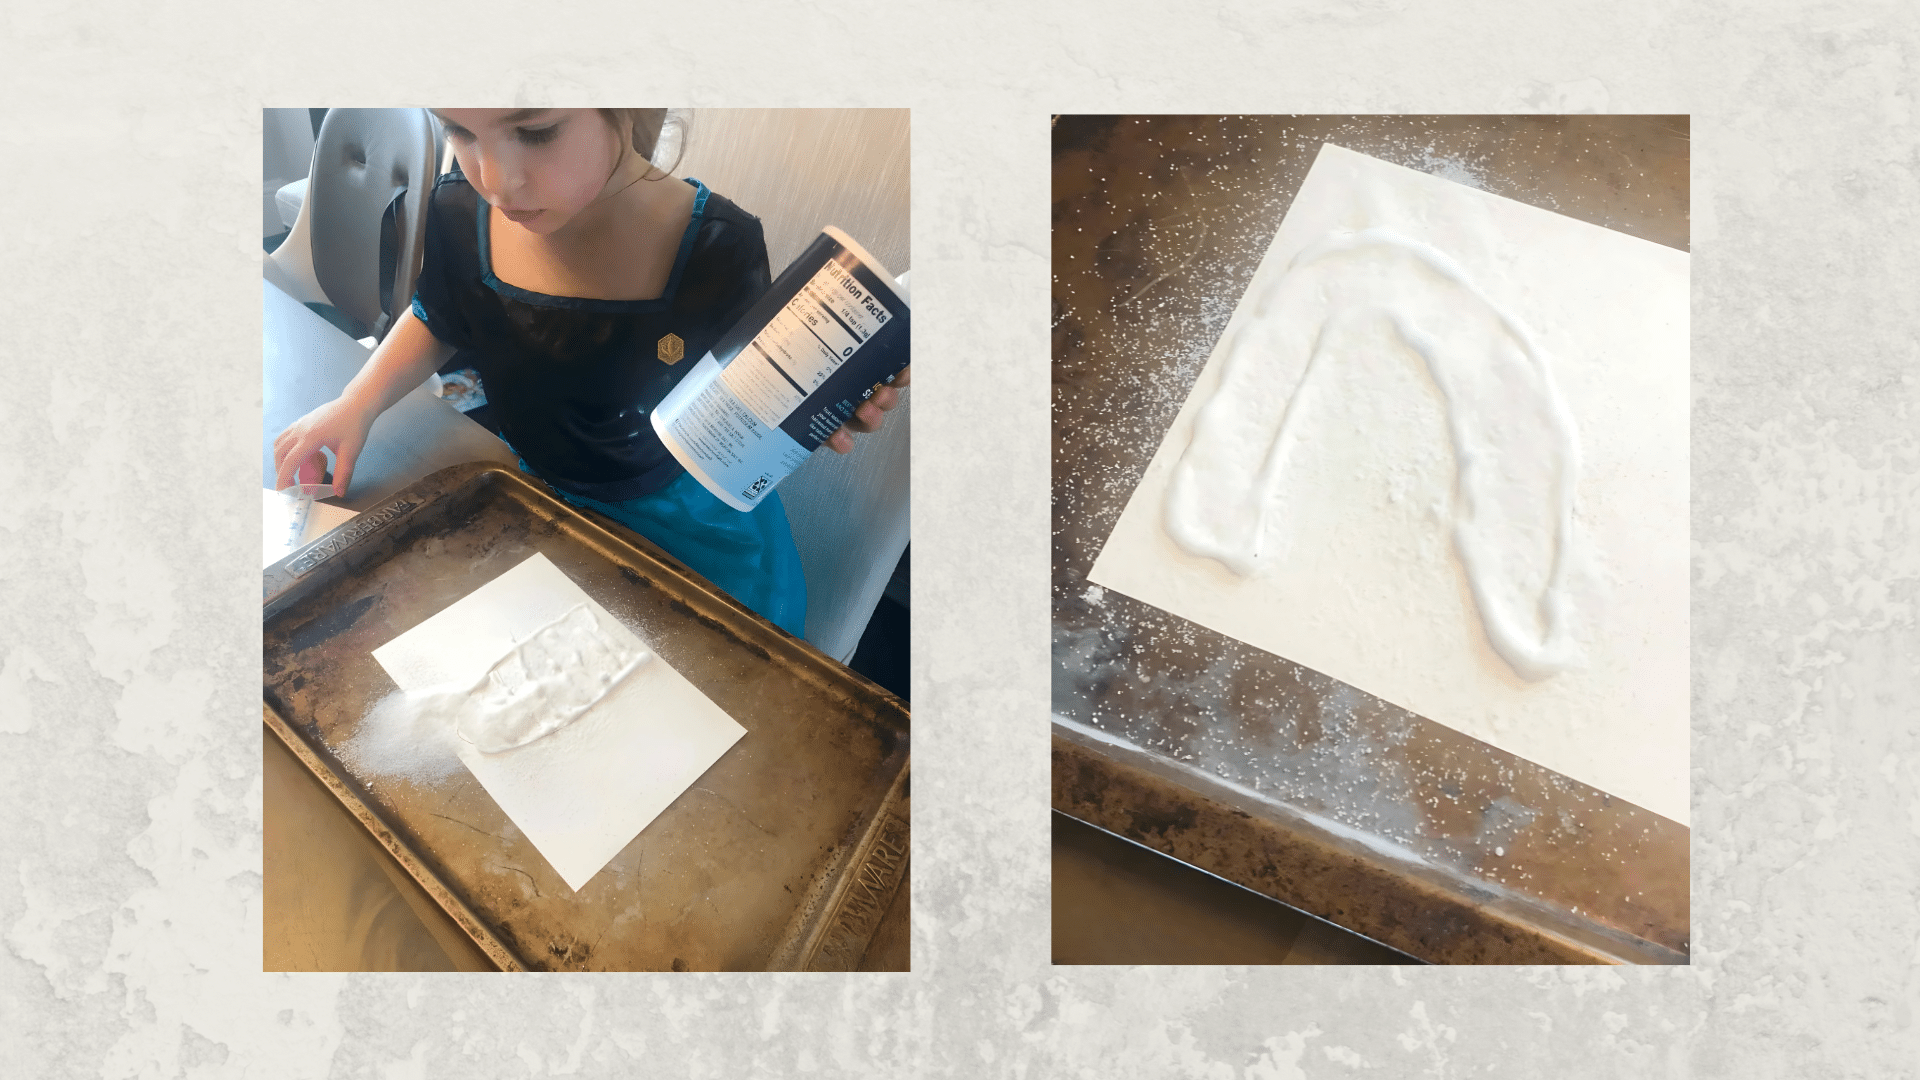
Step 3 – Sprinkle Salt

While the glue is still wet, cover every line with a generous amount of salt. Sprinkle until the glue looks fully coated in a bright, white layer.
For less mess, place the paper on a tray or baking sheet while sprinkling the contents. Kids often love this step because it feels like adding snow.
Step 4 – Shake Off Extra Salt
Hold the paper gently over the tray and shake it to remove loose salt. The leftover salt can be saved and reused for another painting later.
Remind children to shake slowly so the glue doesn’t run or smudge. It’s also fun to notice how the salt only sticks where the glue was placed.
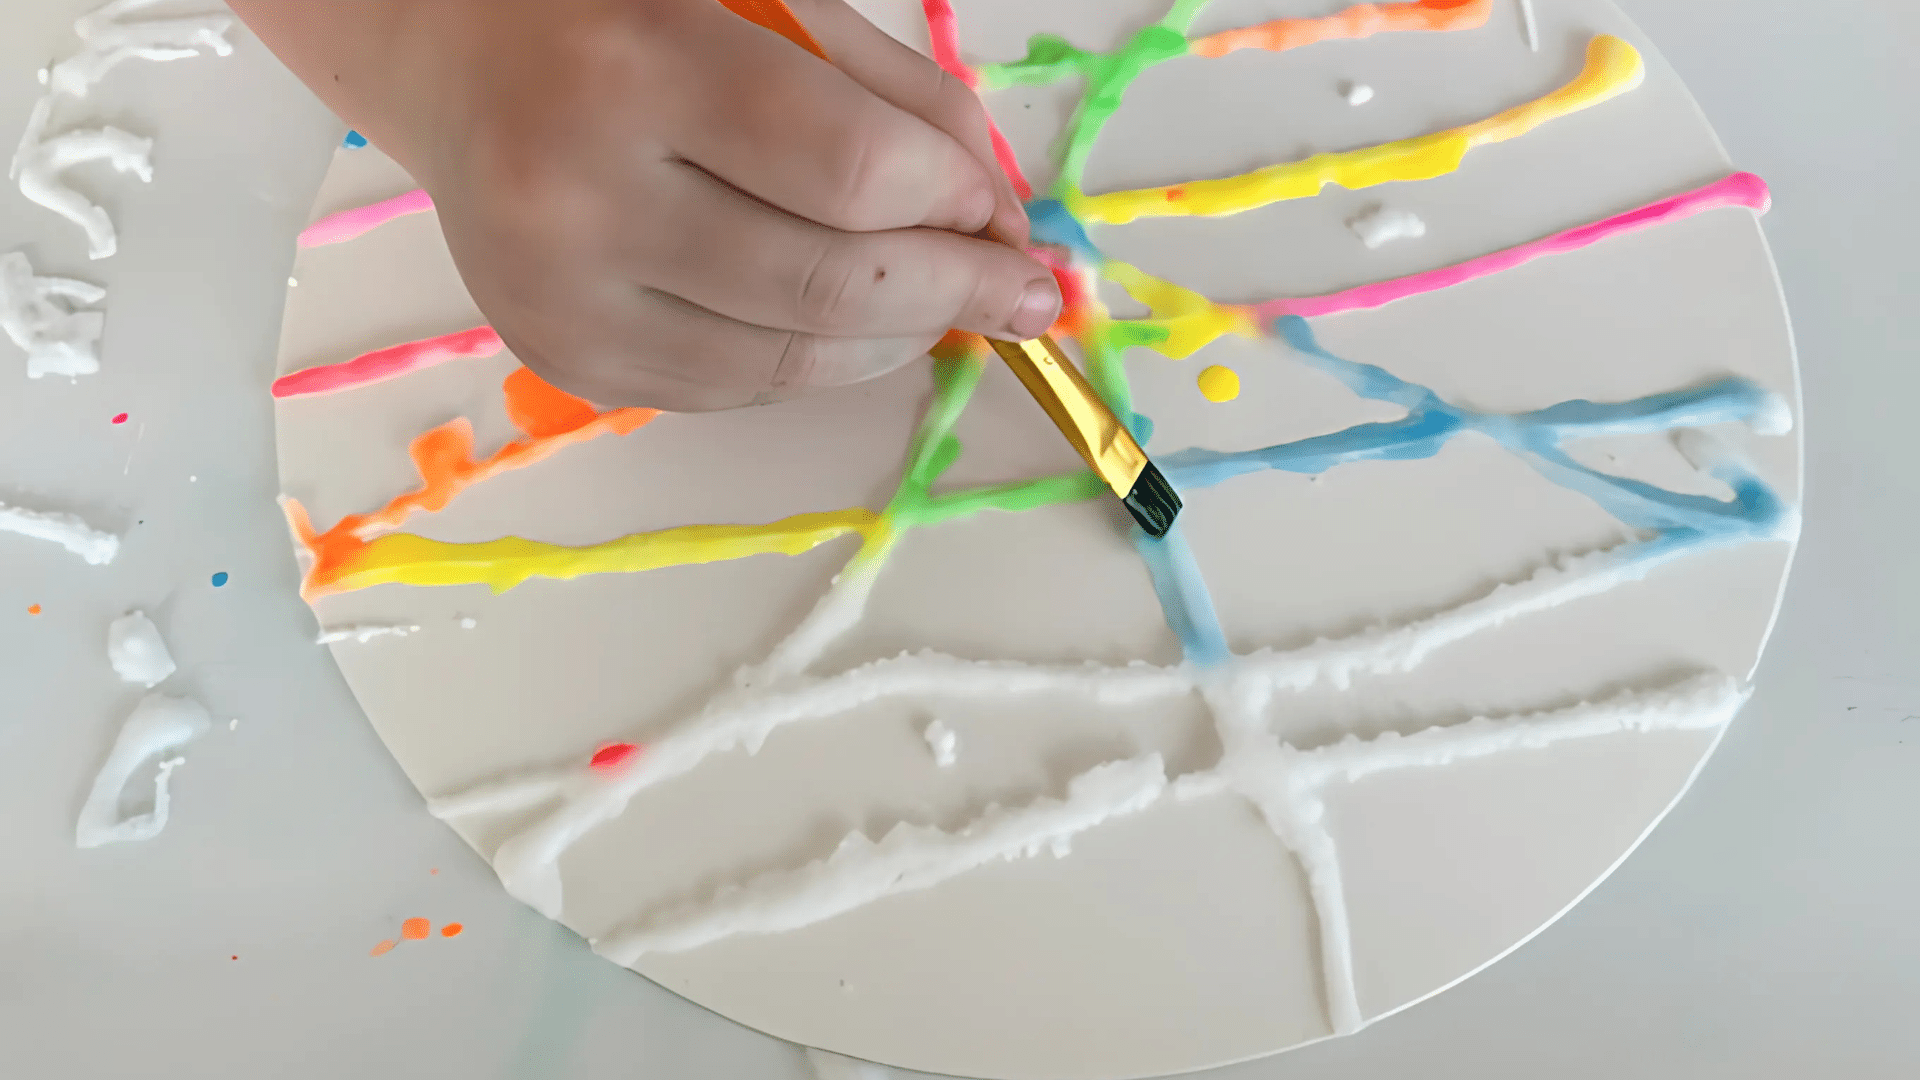
Step 5 – Add Color
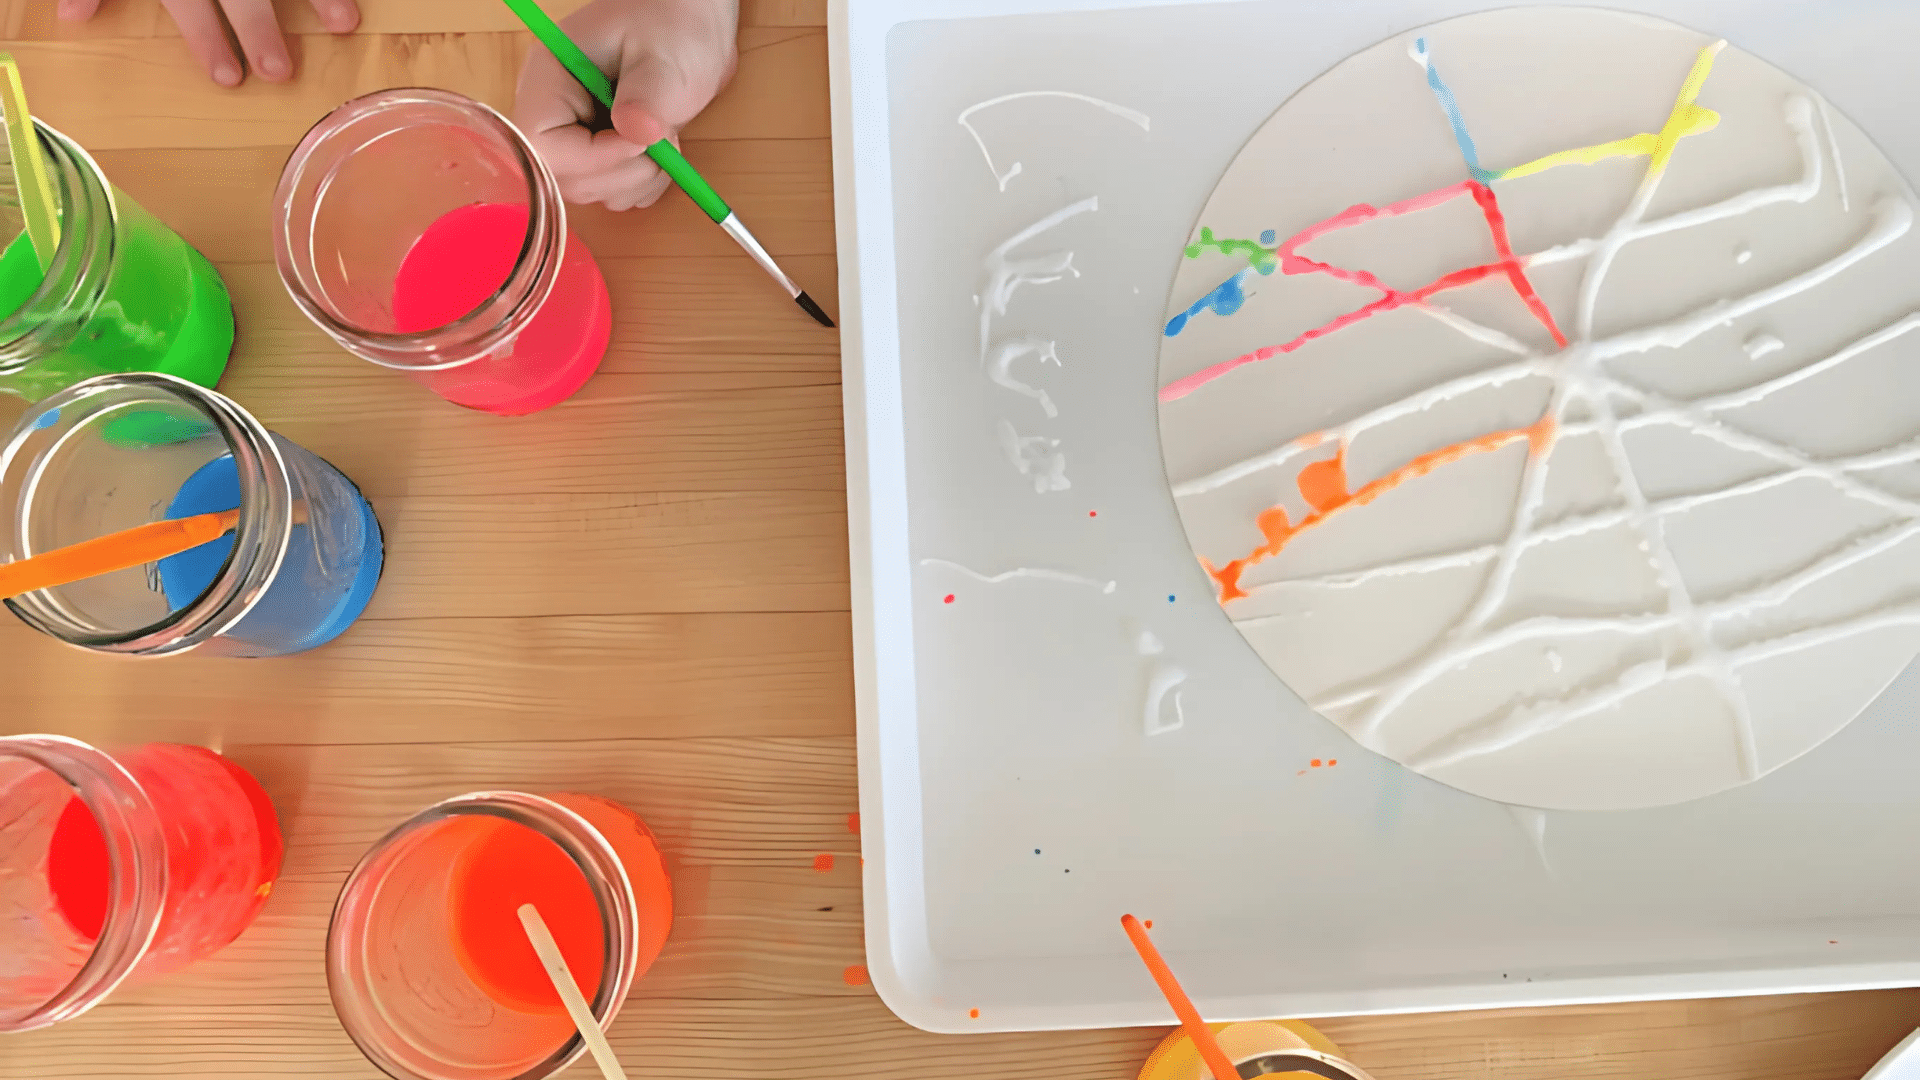
Dip a dropper or brush into watercolor paint and lightly touch it to the salt. The color quickly spreads and blends, creating a magical effect.
Droppers give kids more control over placement, while brushes work well if used gently. Encourage them to mix two colors and observe how they blend.
Step 6 – Let It Dry
Set the painting flat in a safe place so it doesn’t get bumped. Depending on the amount of glue and paint used, drying can take up to two days.
As it dries, the colors often fade slightly, resulting in a softer appearance. Some areas may sparkle, adding an extra touch of magic to the artwork.
The joy of salt painting is in watching colors travel across the lines. Each project looks completely different, making kids excited to try it again.
Fun Salt Art Ideas for Kids
Salt painting doesn’t have to look the same each time. With a few creative twists, kids can enjoy new designs every time they paint.
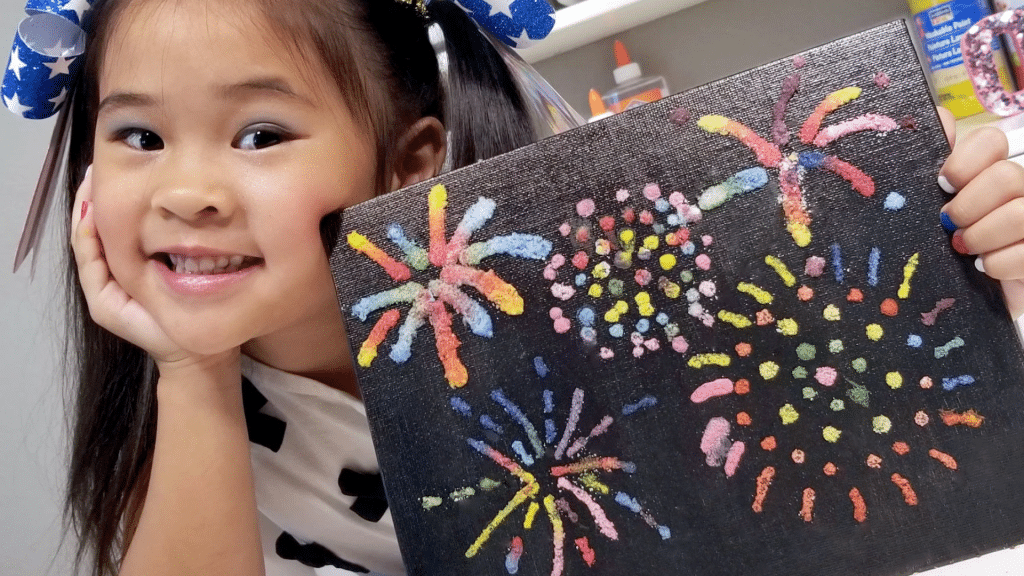
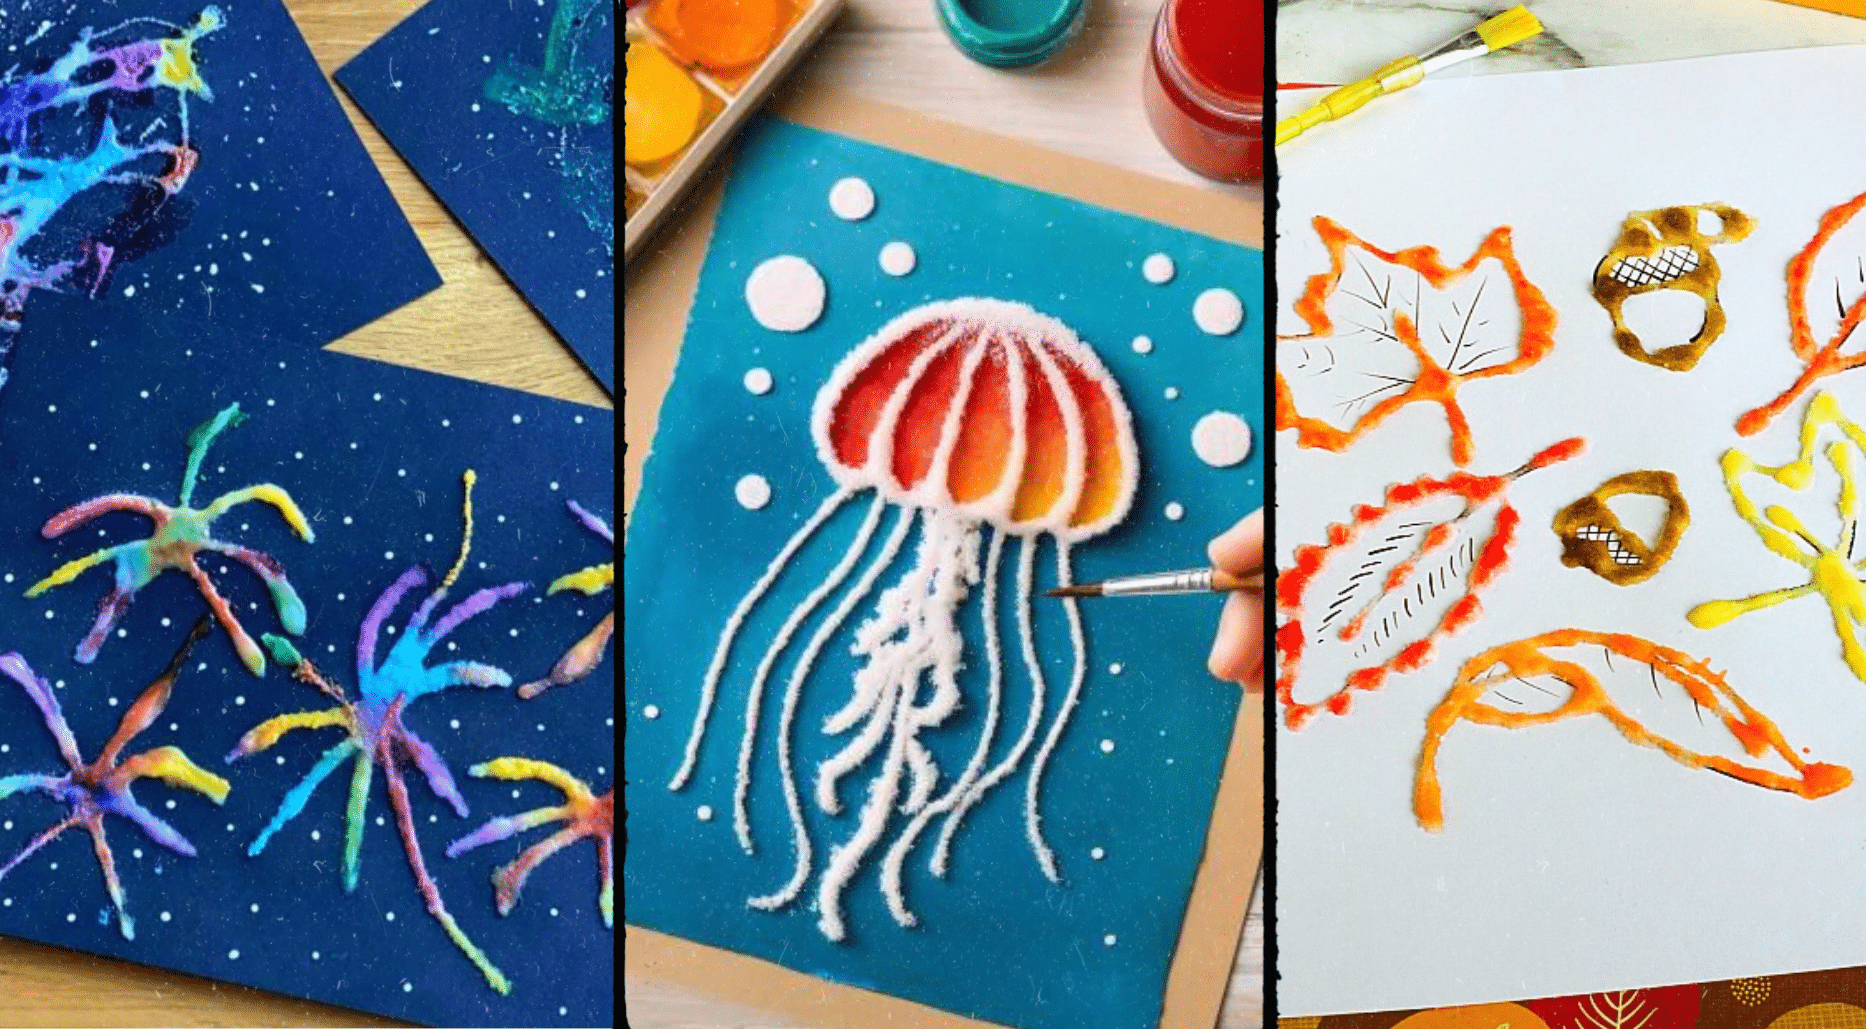
- Fireworks: Make bursts of glue lines that spread outward and fill them with bright colors. They look amazing for summer or holiday celebrations.
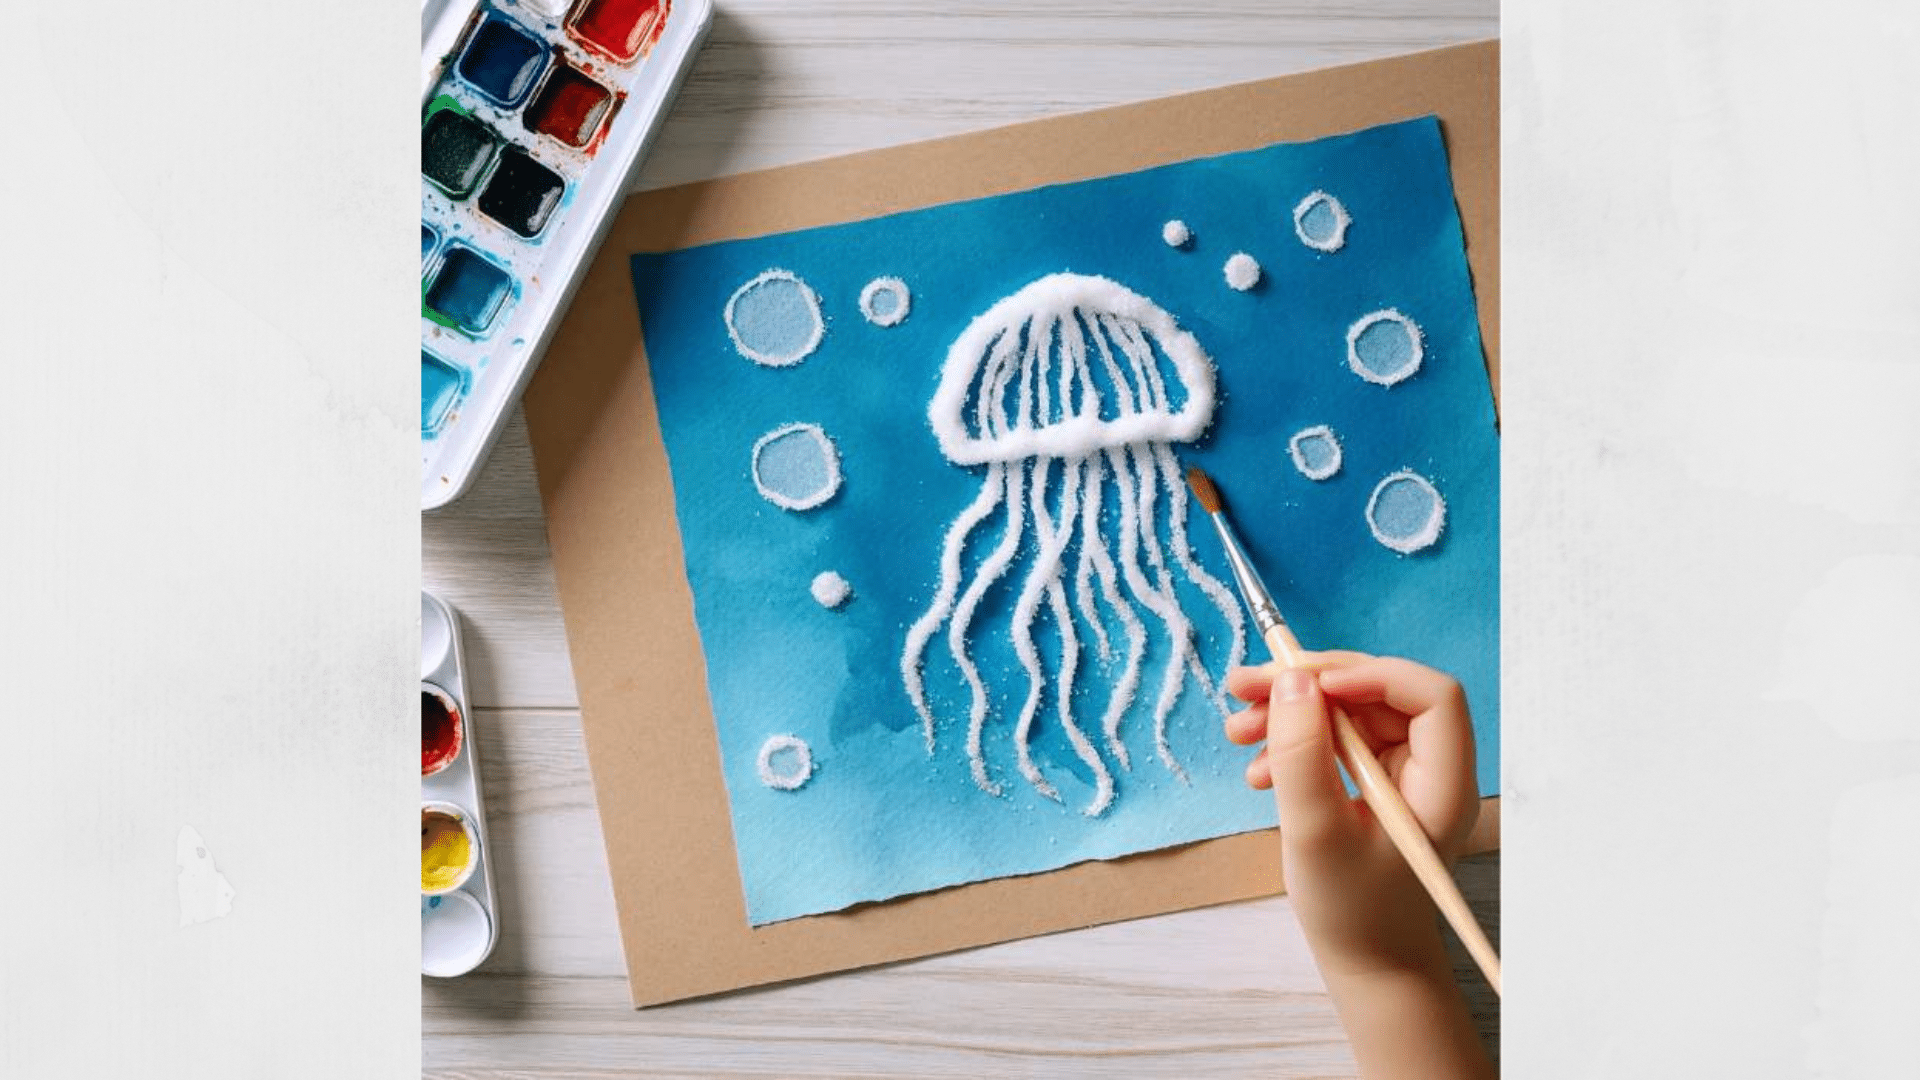
- Animals: Outline creatures like jellyfish, butterflies, or fish. The flowing colors bring the shapes to life in a playful and eye-catching way.
- Nature: Create rainbows, trees, or sunflowers. These designs let kids explore seasonal changes while working with vibrant shades.
- Shapes and Patterns: Try swirls, zigzags, or geometric lines. Simple patterns turn into bold, colorful salt art with just a touch of paint.
- Seasonal Themes: Hearts for Valentine’s, leaves for fall, or snowflakes for winter. Each season brings a fun reason to try a new design.
These ideas help kids stay inspired and excited. Every project feels new, turning salt art into an activity they’ll want to repeat again and again.
Tips for the Best Results
A few simple tricks can make salt painting easier to manage and even more fun for kids to enjoy.
Use thicker paper such as cardstock or watercolor paper. This keeps the artwork sturdy and prevents it from bending under the glue and paint.
Try dark-colored paper if you want the watercolors to stand out more. Bright shades pop beautifully against a darker background.
Choose droppers instead of brushes for applying color. Droppers give better control, while brushes can smear if they touch the glue and salt.
Always paint while the glue is still wet. The salt sticks better this way, and the colors spread more smoothly across the lines.
Remember that salt art is fragile once it dries. If you want to keep it longer, scrape the salt off to reveal a soft watercolor design underneath.
With these simple tips, kids will enjoy salt painting even more and create artwork that’s easier to handle and admire.
Conclusion
Salt painting for kids is a simple, affordable craft that sparks creativity and imagination. With just glue, salt, and watercolors, children can make bright, colorful designs while exploring textures.
It’s also a screen-free way to keep kids engaged and curious. Watching the colors spread across the salt feels magical and makes every project unique.
Whether you start with basic shapes or seasonal themes, salt art for kids is always a fun and exciting activity. Gather your supplies and try it today. You’ll love the joy it brings to your child’s imagination.