Building a Rube Goldberg machine for a school project sounds fun until your chain falls apart mid-run. Most students focus on making it look cool rather than making it work.
That’s where things go wrong. A reliable machine isn’t about having the most steps or the flashiest materials.
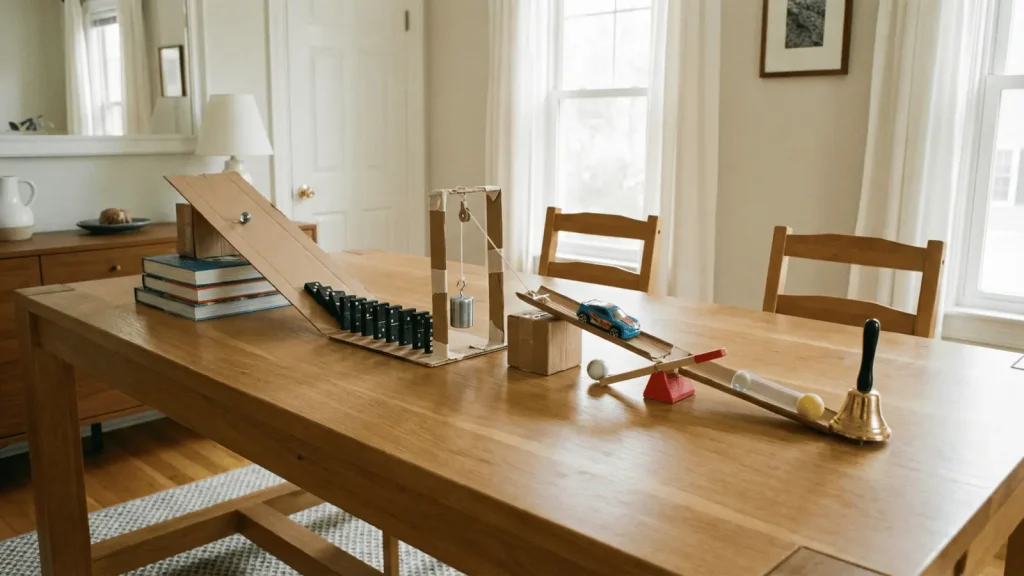
It’s about planning smartly, testing carefully, and connecting each part so it does exactly what it’s supposed to. This guide walks you through the full process, from picking your goal to fixing failures, so your machine runs clean every time it matters.
Define a Clear Final Action Before Building
Start by deciding what your machine will actually do at the end. Pick one simple, testable action: ring a bell, flip a switch, or drop an object. That’s it.
One outcome. Everything else in your build exists to make that one thing happen. When your goal is vague, your chain has no direction.
You end up adding steps that look interesting but don’t move energy toward a real finish. That breaks the logic of the whole machine.
Your final step also needs to be achievable with a basic force transfer, a push, a drop, or a roll. If it requires precision (like pressing a small button), plan for alignment early. Don’t leave that for last.
Map a Reliable Chain Reaction Before Touching Materials
Before you pick up a single object, map out your full chain on paper. Write it as a straight cause-and-effect sequence.
Each step should answer one question: what does this trigger next? If you can’t answer that for every step, the step doesn’t belong in the chain yet. Keep your step count between 5 and 8.
That range gives you enough complexity for a school project without creating too many failure points. More steps don’t mean a better machine; they mean more things that can go wrong.
Also, plan for direction changes early. Moving from horizontal to vertical (or vice versa) takes extra setup. If you ignore this during planning, you’ll hit it as a wall during building.
Avoid adding steps just because they look cool. If a step doesn’t cleanly transfer energy to the next, cut it.
If you’re still deciding what kind of machine to build, look at different machine setups based on difficulty levels so you can match your idea to your skill level.
Select Materials Based on Predictability, Not Availability
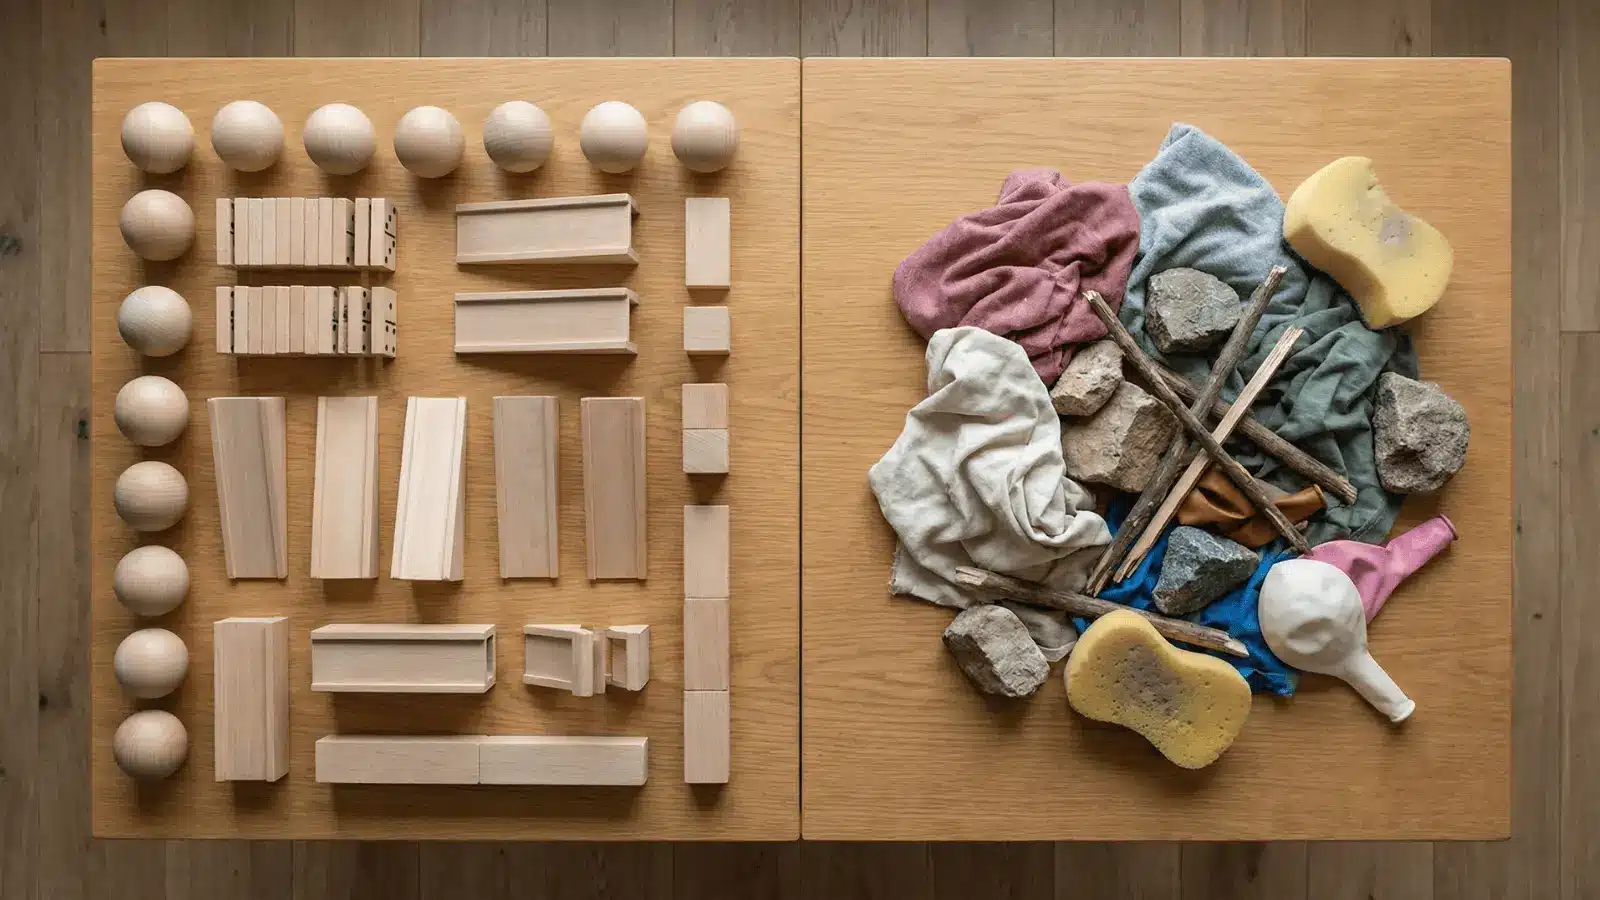
Don’t just grab whatever’s nearby. Choose materials that behave the same way every single time.
Good materials to use:
- Balls (consistent roll and impact)
- Dominoes (predictable tipping chain)
- Rigid surfaces and ramps (stable energy path)
- Solid, stable supports (no wobble or shift)
Materials to avoid:
- Soft or flexible objects absorb energy instead of passing it on
- Uneven surfaces, they create random, unpredictable motion
One mistake people make is using a lightweight object to trigger something much heavier. If the force isn’t enough, the step fails. Always check that your trigger object can actually move whatever comes next.
Build and Validate Each Step as a Standalone Mechanism
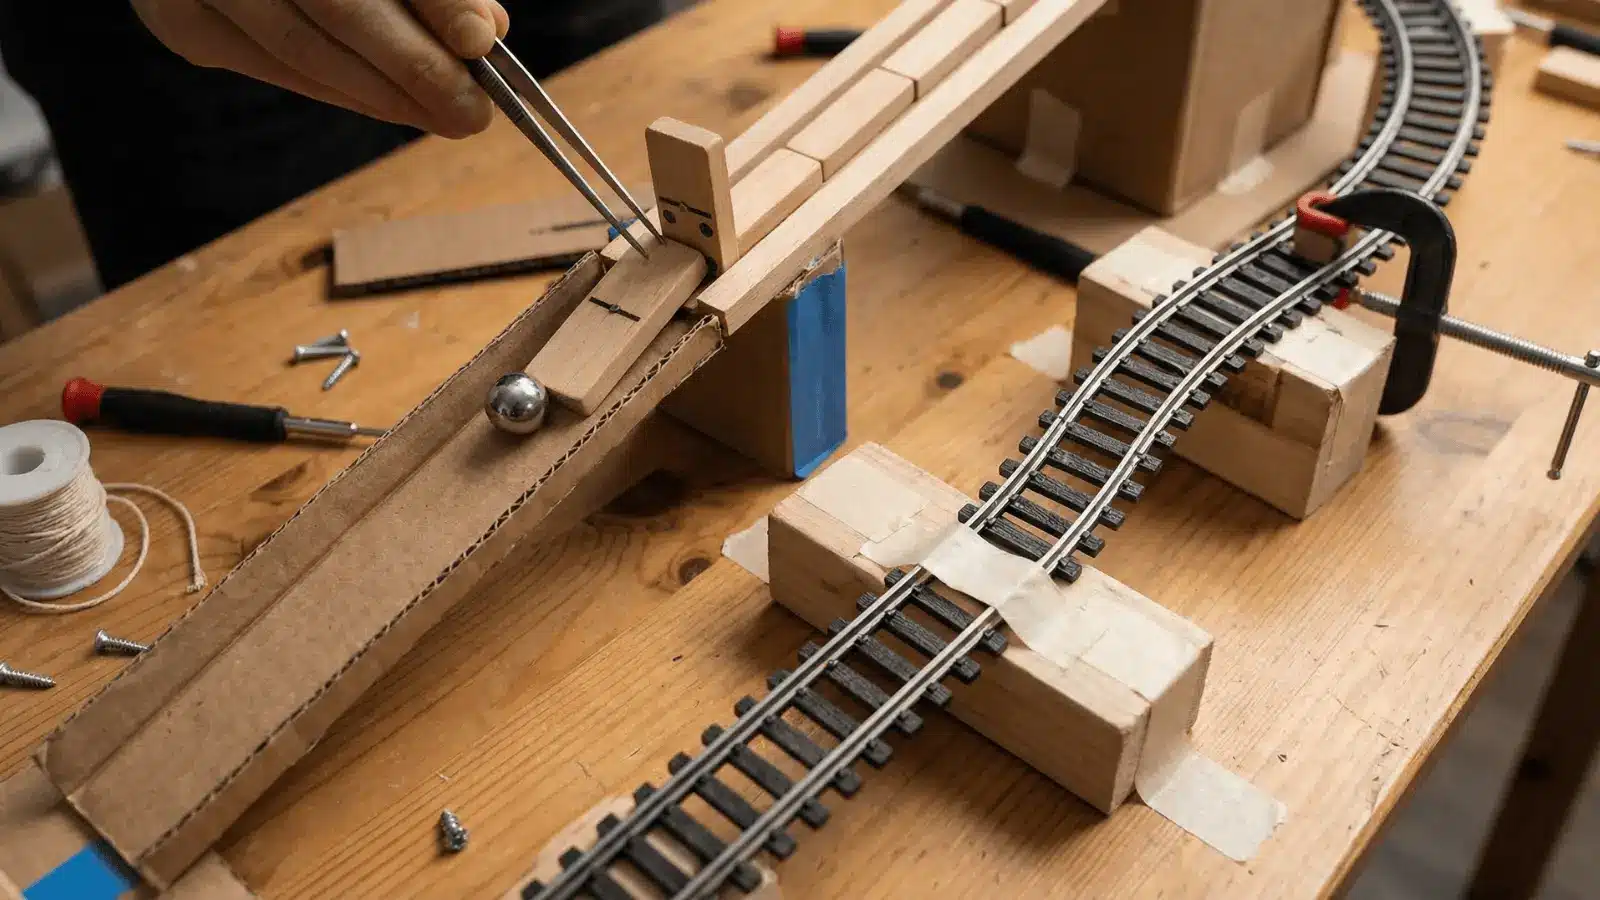
Don’t build the whole machine and then test it. That’s how compounded failures happen. Build one step. Test it. Make sure it works on its own. Then move to the next.
For each step, understand the basic motion type:
- Rolling into an impact
- Impact causing a tip
- Tipping pulling something
- Pulling triggers the next action
Find the minimum force needed for each step to trigger the next. If a step “almost works,” it will fail under full sequence conditions. Fix it before linking it.
Small inconsistencies might seem minor when steps are isolated. Across a 7-step chain, they multiply, and that’s when your machine breaks down at step 5 every single time.
Connect Steps without Losing Energy Between Transitions
Once individual steps work, connecting them is where most machines start losing reliability, which is why learning how to make each connection more reliable becomes critical at this stage.
Three things to check at every connection point:
- Alignment: Is the object positioned at the right angle and distance to hit its target cleanly?
- Timing: Does the sequence move at the right speed? Too fast, and it skips the trigger. Too slow, and the chain stalls.
- Friction: Are there rough surfaces or long transitions eating up energy before it reaches the next step?
After multiple steps, chains experience what’s called an energy drop; each transfer loses a little, and by step 6 or 7, there might not be enough left to complete the action. Watch for this during test runs.
When you spot a weak connection, make small targeted fixes:
- Raise or lower a ramp to change speed or impact force
- Shift the impact point so the collision is center-to-center
- Add a guide or barrier to keep motion on track
Diagnose and Fix Failure Points During Full Runs
When your full chain doesn’t complete, don’t rebuild everything. Find the exact point of failure and fix just that.
Weak Trigger Points
This happens when one step doesn’t deliver enough force to start the next. Increase the height of a falling object, add weight, or adjust the angle to create more impact.
The fix is almost always about generating more force at the transfer point.
Misalignment Between Steps
Off-center collisions and spacing errors are the most common causes of mid-chain failures. Reposition the objects and make sure your base surface is stable and flat.
Even a slight surface tilt can redirect motion enough to miss the trigger.
Friction and Energy Loss
Rough surfaces slow objects down before they reach their target. Shorten the travel distance where possible and switch to smoother surfaces.
This is especially important for rolling objects; even a slightly rough ramp can kill momentum.
Inconsistent Results Across Runs
If your machine works once and then fails, the setup is shifting between runs. Secure every component so nothing moves after the chain completes.
Also, standardize your starting trigger, release it the same way every time, so the first step gets the same force each run.
Optimize for Consistency Over Complexity
A machine that runs clean three times in a row beats one that works once and impresses no one. Target at least 2–3 successful back-to-back runs before you consider your build complete.
If you can’t hit that, something in the chain is still unstable. When a step keeps failing, replace it; don’t add another step around it. More steps don’t fix a weak link. They just delay it.
The last step fails most often. It receives the least energy and carries the most pressure. Make sure your final action requires the least force in the chain, not the most.
Finally, don’t trade reliability for visual appeal. A machine that looks complex but breaks is worse than a simple one that works every time. Judges notice consistency.
Final Pre-Submission Validation Checklist
Before you call it done, run through this:
- Every step triggers the next without any manual help
- No step depends on luck, guesswork, or random motion
- The final action completes cleanly and visibly
- All components stay in position between runs
- The chain works even with minor environmental variation (slight vibration, small surface shifts)
If any of these fail, the machine isn’t ready. Go back to the section that covers that issue and fix it before submission.
Conclusion
Building a reliable Rube Goldberg machine for a school project comes down to three things: smart planning, step-by-step testing, and fixing what breaks instead of adding more complexity.
Keep your chain tight, your materials predictable, and your goal clear. Use the checklist before submission to make sure everything runs without help.
If you follow this blog, you won’t just build a machine that works once; you’ll build one that works every time. Start simple, stay consistent, and let the chain do the rest.
Frequently Asked Questions
How do I make my Rube Goldberg machine more reliable?
Focus on alignment at every connection point, reduce friction on rolling or sliding surfaces, and test each step alone before linking the full chain.
Why does my machine work once but fail after that?
Parts shift slightly after each run. Secure every component so nothing moves, and always release the starting trigger the same way each time.
What is the hardest part of building a Rube Goldberg machine?
Keeping energy transfer consistent from step to step is the biggest challenge, especially as the chain gets longer and small losses start adding up.
How many steps should I include for a school project?
Stick to 5–8 well-functioning steps. A clean, reliable short chain will always score better than a longer one that breaks halfway through.