


Bored hands need something to do, and buying the same spinner everyone else has isn’t exactly exciting. But DIY fidget toys? Now that’s a different story.
A handful of rubber bands, some cardboard, maybe a balloon- that’s really all it takes. And the best part is everything gets made exactly how you like it.
Some of these take just a few minutes, and some you’ll want to make over and over. Go ahead and scroll- something down there is about to become your new obsession.
How DIY Fidget Toys Beat Store-Bought Options
Store-bought fidget toys can be fun, but making your own adds an extra level of creativity. You can choose the colors, materials, sizes, and textures that work best for you.
DIY fidget toys are also budget-friendly since many projects use everyday household items. Instead of purchasing multiple toys, you can create several different options with supplies you already have.
Another benefit is that these projects are simple enough for beginners. Most can be completed in a short amount of time and don’t require special crafting experience.
From squeeze toys and sliders to spinners and folding designs, there’s something for every preference. Once you’re ready, gather your supplies and start creating.
DIY Fidget Toys You Can Make at Home
The ideas below use simple materials and clear instructions, making them suitable for beginners and experienced crafters alike:
1. DIY Paper Infinity Cube

A paper infinity cube is a compact fidget toy that folds continuously in different directions. Despite its unique design, it’s surprisingly simple to make using a few basic craft supplies.
Supplies:
| Item | Quantity | Notes |
|---|---|---|
| Cardstock or thick paper | 8 strips | Consistent sizing is essential |
| Tape | As needed | Clear tape works best |
| Scissors | 1 pair | For cutting even strips |
| Ruler | 1 | To measure uniform lengths |
Step-by-Step Guide:
- Cut and fold: Measure and cut eight equal cardstock strips with a ruler, then fold each one firmly in half.
- Build sections: Tape two folded strips together to form a square, then repeat until you have four identical sections.
- Connect everything: Arrange the four sections in order and join them with tape while keeping each section able to fold independently.
- Test the motion: Fold the cube in different directions and adjust tape placement wherever movement feels stiff.
- Decorate: Customize with markers or colored tape, then fold repeatedly to loosen the joints and smooth out movement.
2. DIY Balloon Stress Ball
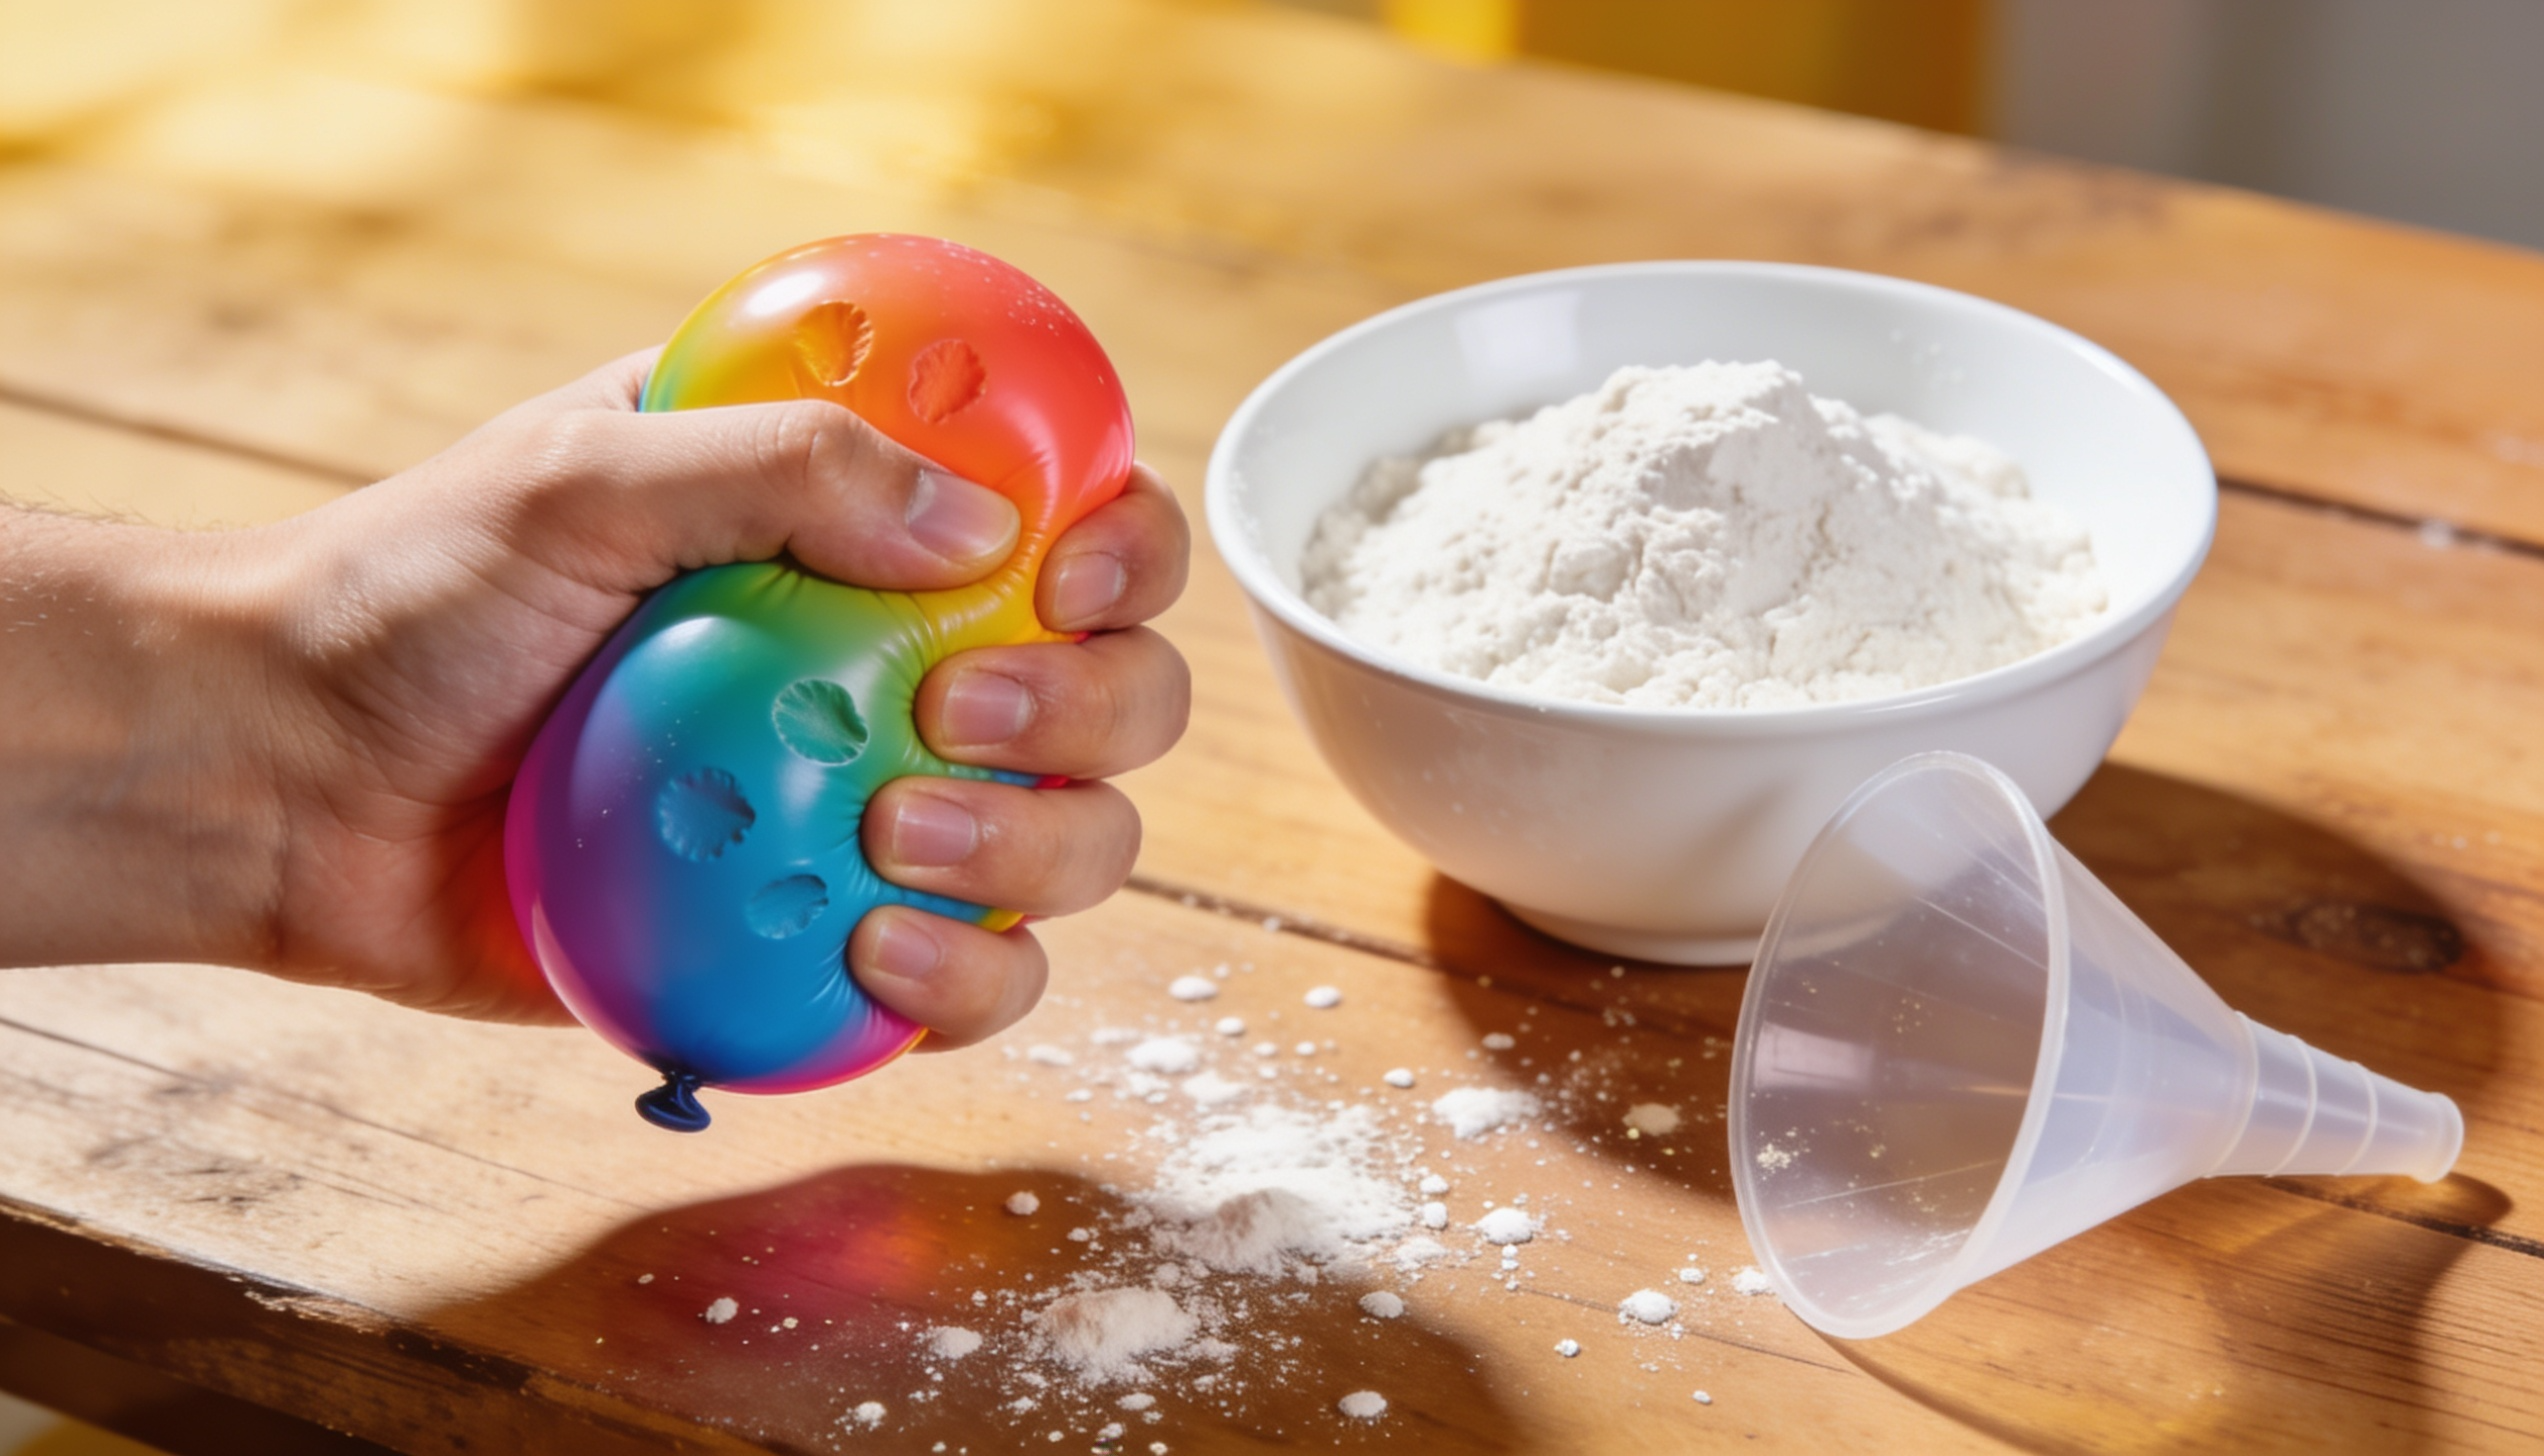
A balloon stress ball is one of the easiest homemade fidget toys to make. It’s soft, squeezable, and can be customized with different fillings to create the texture you like best.
Supplies:
| Item | Quantity | Notes |
|---|---|---|
| Balloon | 1–2 | Stretch before filling to prevent tears |
| Flour, rice, or cornstarch | 1 cup | Each filling gives a different texture |
| Funnel | 1 | Prevents spills during filling |
| Spoon | 1 | For scooping the filling material |
Step-by-Step Guide:
- Stretch the balloon: Work the balloon with your hands several times before filling to make it more pliable.
- Fill it up: Use the funnel to slowly spoon in your chosen filling until the balloon feels firm but still squeezable.
- Tie it off: Squeeze out any trapped air, then tie a tight knot close to the opening to secure the contents.
- Add a second layer: Stretch a second balloon over the first, covering the knot for added durability and leak protection.
- Test and decorate: Squeeze the ball to check firmness, then draw a face or pattern on the outside with a permanent marker.
3. DIY Popsicle Stick Clicker

A popsicle stick clicker is a simple fidget toy that creates a satisfying clicking sound and movement with every press. It’s small enough to carry in your pocket and only takes a few minutes to put together.
Supplies:
| Item | Quantity | Notes |
|---|---|---|
| Popsicle sticks | 2 | Standard craft size works well |
| Plastic bottle cap | 1 | Creates the clicking mechanism |
| Rubber bands | 2 | One for each end of the sticks |
| Glue (optional) | As needed | For extra stability if needed |
Step-by-Step Guide:
- Position the cap: Place the bottle cap evenly between the two popsicle sticks near one end so it sits as the central clicking mechanism.
- Secure with rubber bands: Wrap a rubber band snugly around each end of the sticks to hold the cap firmly in place.
- Test the click: Press the top stick down and release it, listening for a clean, consistent snap on every press.
- Fine-tune: Shift the bottle cap slightly toward the center or tighten the rubber bands if the click feels weak or inconsistent.
- Decorate: Personalize with paint, stickers, or markers; let everything dry fully before use.
4. DIY Bead-and-String Fidget

A bead-and-string fidget is a simple toy that lets you slide, twist, and move beads between your fingers. It’s lightweight, portable, and can be customized with different bead sizes and colors.
Supplies:
| Item | Quantity | Notes |
|---|---|---|
| String or cord | 12–15 inches | Sturdy cord slides better than thin thread |
| Beads | 10–15 | Mix sizes and textures for variety |
| Scissors | 1 pair | For trimming and finishing the ends |
Step-by-Step Guide:
- Thread the beads: Cut a comfortable length of cord and slide beads onto it one at a time, mixing colors or sizes as you go.
- Tie into a loop: Bring both ends together, tie a firm double knot to close the loop, and trim any excess cord.
- Test movement: Slide the beads around the loop to confirm they glide freely, without bunching or catching.
- Adjust size: Untie and re-knot if the loop feels too large or too small to use comfortably in your hand.
- Customize: Swap in wooden, plastic, or silicone beads for different textures; larger beads are generally easier for younger users.
5. DIY Marble Mesh Fidget
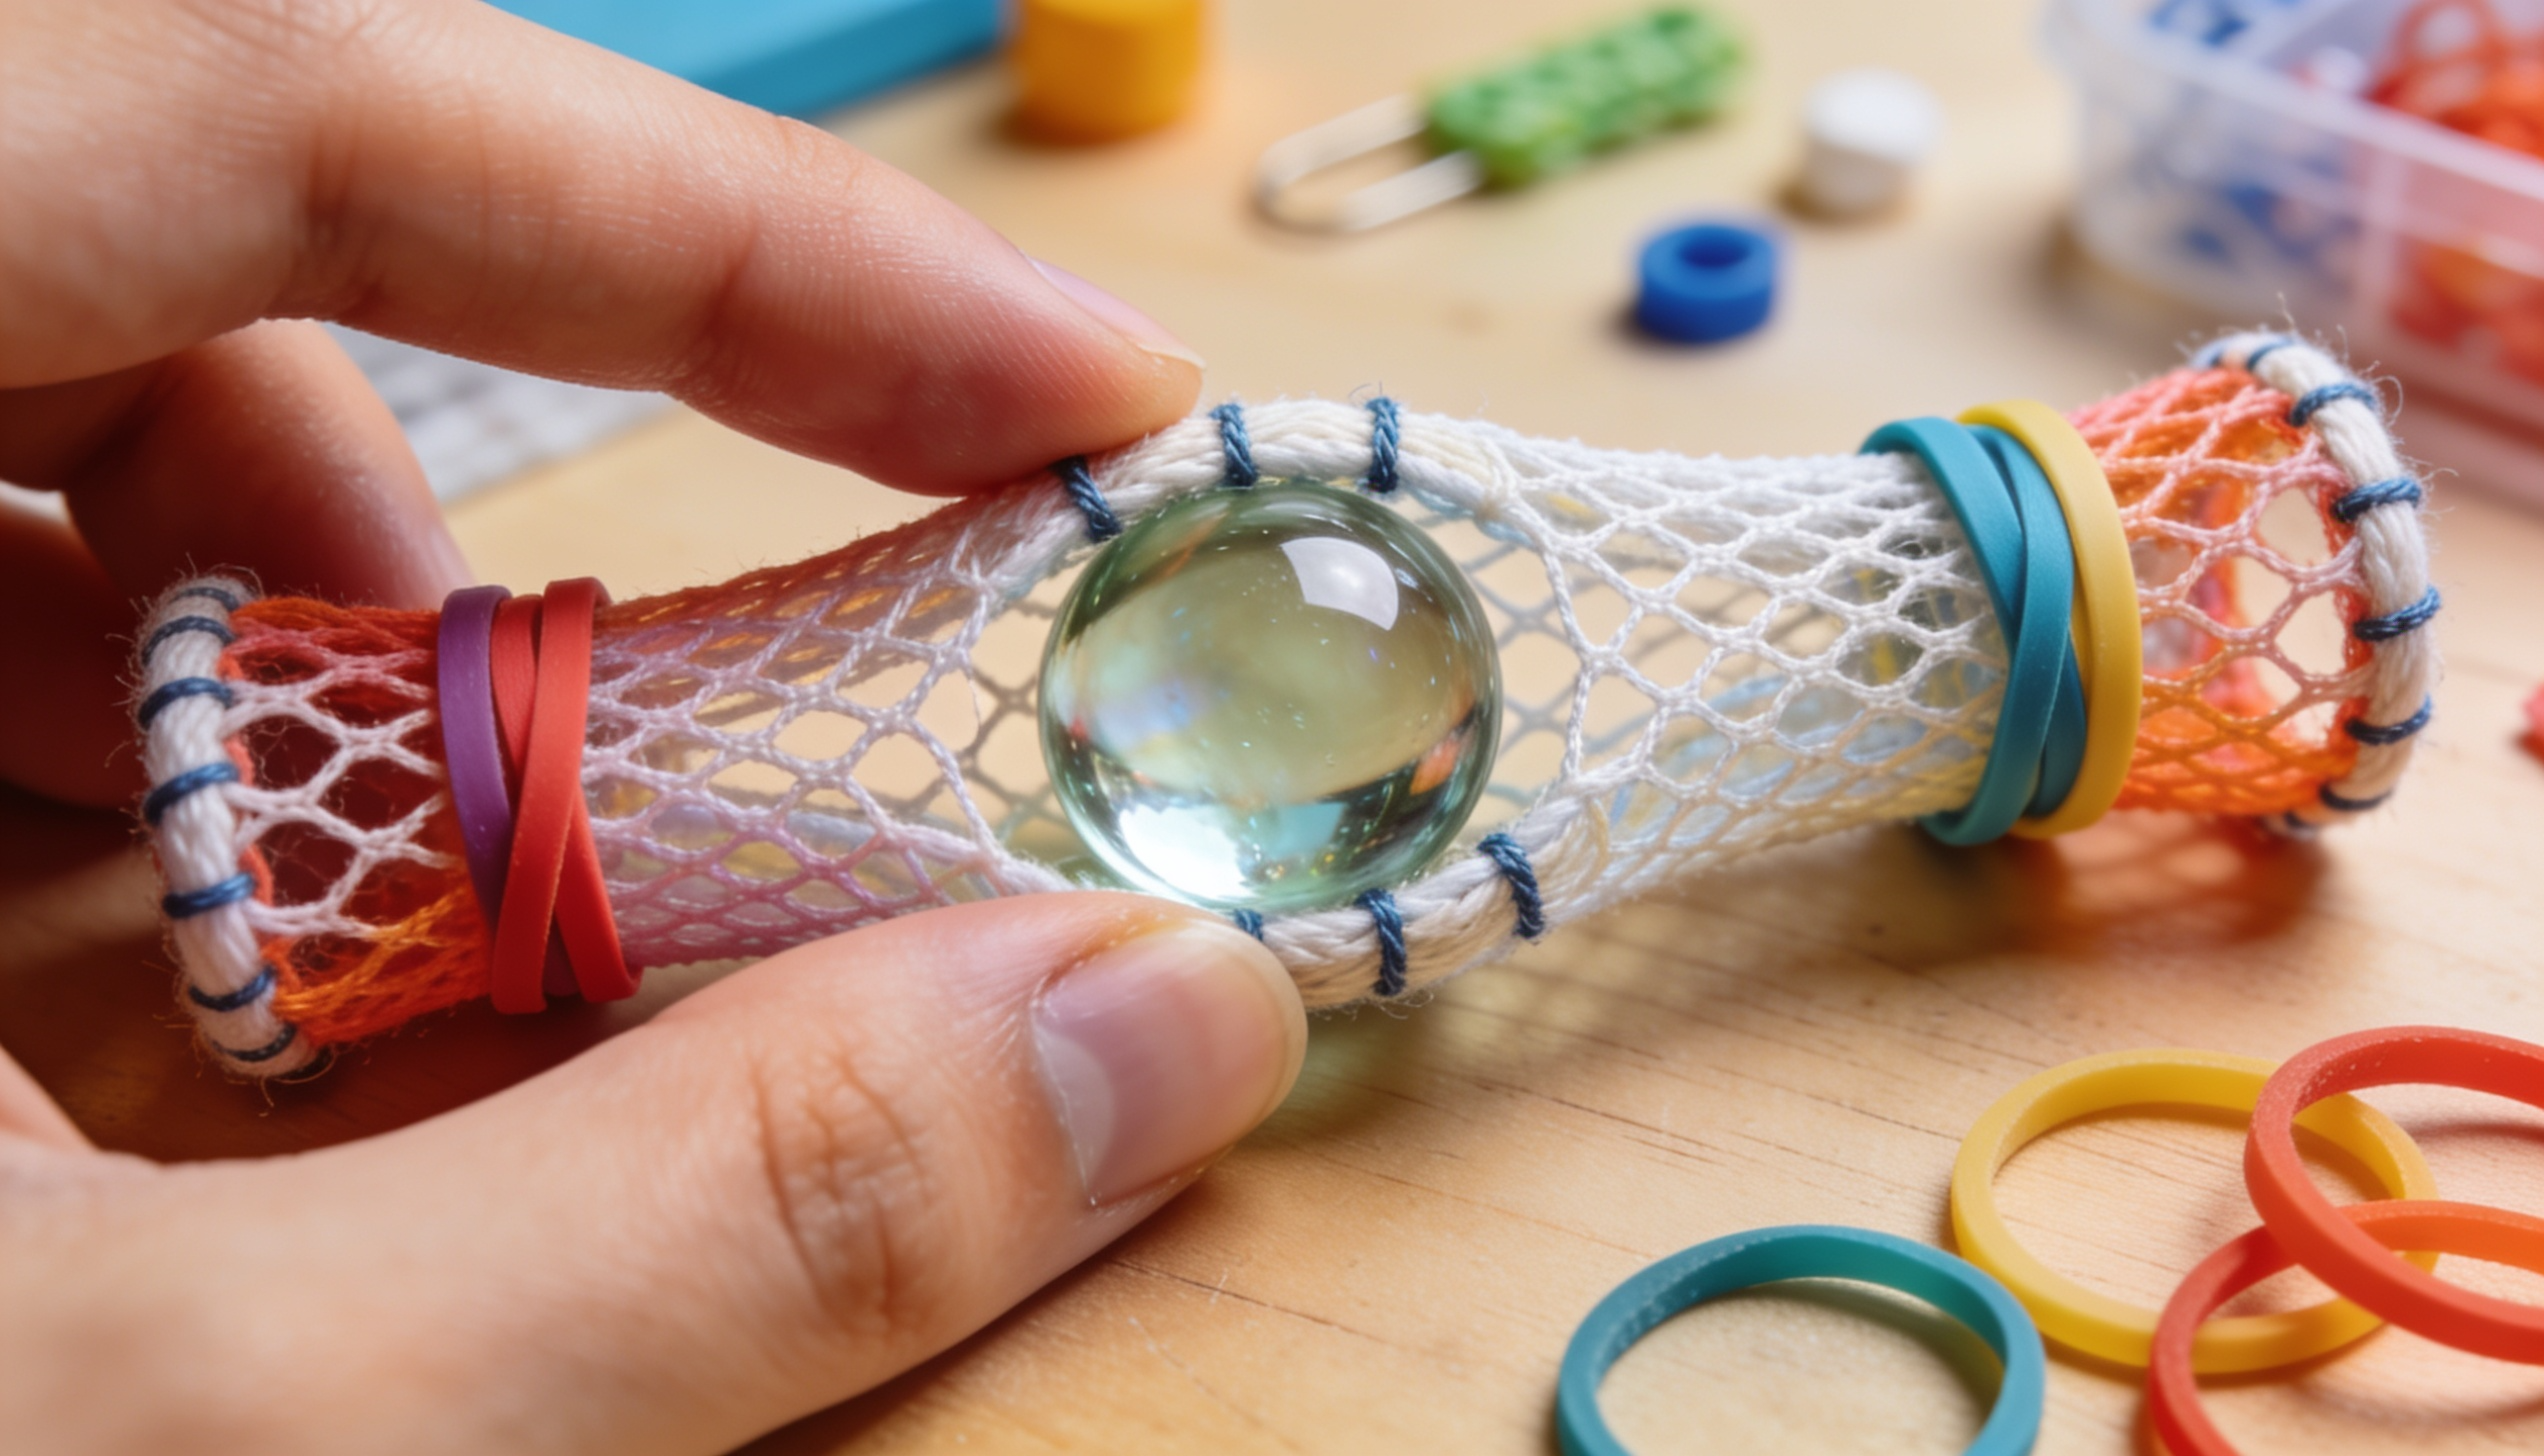
A marble mesh fidget offers a smooth sliding motion that many people find relaxing. The marble moves back and forth inside a mesh sleeve, creating a simple but satisfying sensory experience.
Supplies:
| Item | Quantity | Notes |
|---|---|---|
| Mesh tubing | 1 piece | Should be slightly longer than the marble |
| Marble | 1 | Standard glass marble works best |
| Rubber bands or zip ties | 2 | One to seal each end |
| Scissors | 1 pair | For trimming excess tubing |
Step-by-Step Guide:
- Prepare the tubing: Cut a piece of mesh tubing slightly longer than the marble and check for any damaged sections before assembling.
- Insert the marble: Slide the marble into the center of the tubing and roll it back and forth to confirm it moves without resistance.
- Seal both ends: Secure each end tightly with a rubber band or zip tie, leaving enough room for the marble to travel freely.
- Check the roll: Push the marble from end to end with your fingers and adjust the closures if the motion feels uneven or restricted.
- Trim and finish: Clip any excess mesh near the sealed ends and do a final inspection before use.
6. DIY Cardboard Spinner

A cardboard spinner is a fun homemade alternative to store-bought spinners. With a few simple materials and careful assembly, you can create a toy that spins smoothly and keeps your hands occupied.
Supplies:
| Item | Quantity | Notes |
|---|---|---|
| Cardboard | 1 piece | Medium thickness works best |
| Toothpick or pencil tip | 1 | Acts as the spinning axle |
| Marker | 1 | For drawing the shape and decorating |
| Scissors | 1 pair | For cutting out the spinner shape |
| Glue | As needed | To secure the toothpick if needed |
Step-by-Step Guide:
- Draw and cut: Outline a circular or multi-armed shape on cardboard with a marker, cut it out cleanly, and smooth any rough edges.
- Find the center: Locate the exact midpoint of the shape and make a small hole through it using a toothpick.
- Insert the axle: Push the toothpick through the hole and add a small drop of glue if it needs to be secured more firmly.
- Balance it: Give the spinner several test spins and trim small amounts from the heavier side until rotation is even.
- Decorate: Add colors, patterns, or stickers, keeping the design as symmetrical as possible for the best spin performance.
7. DIY Straw Slider Toy
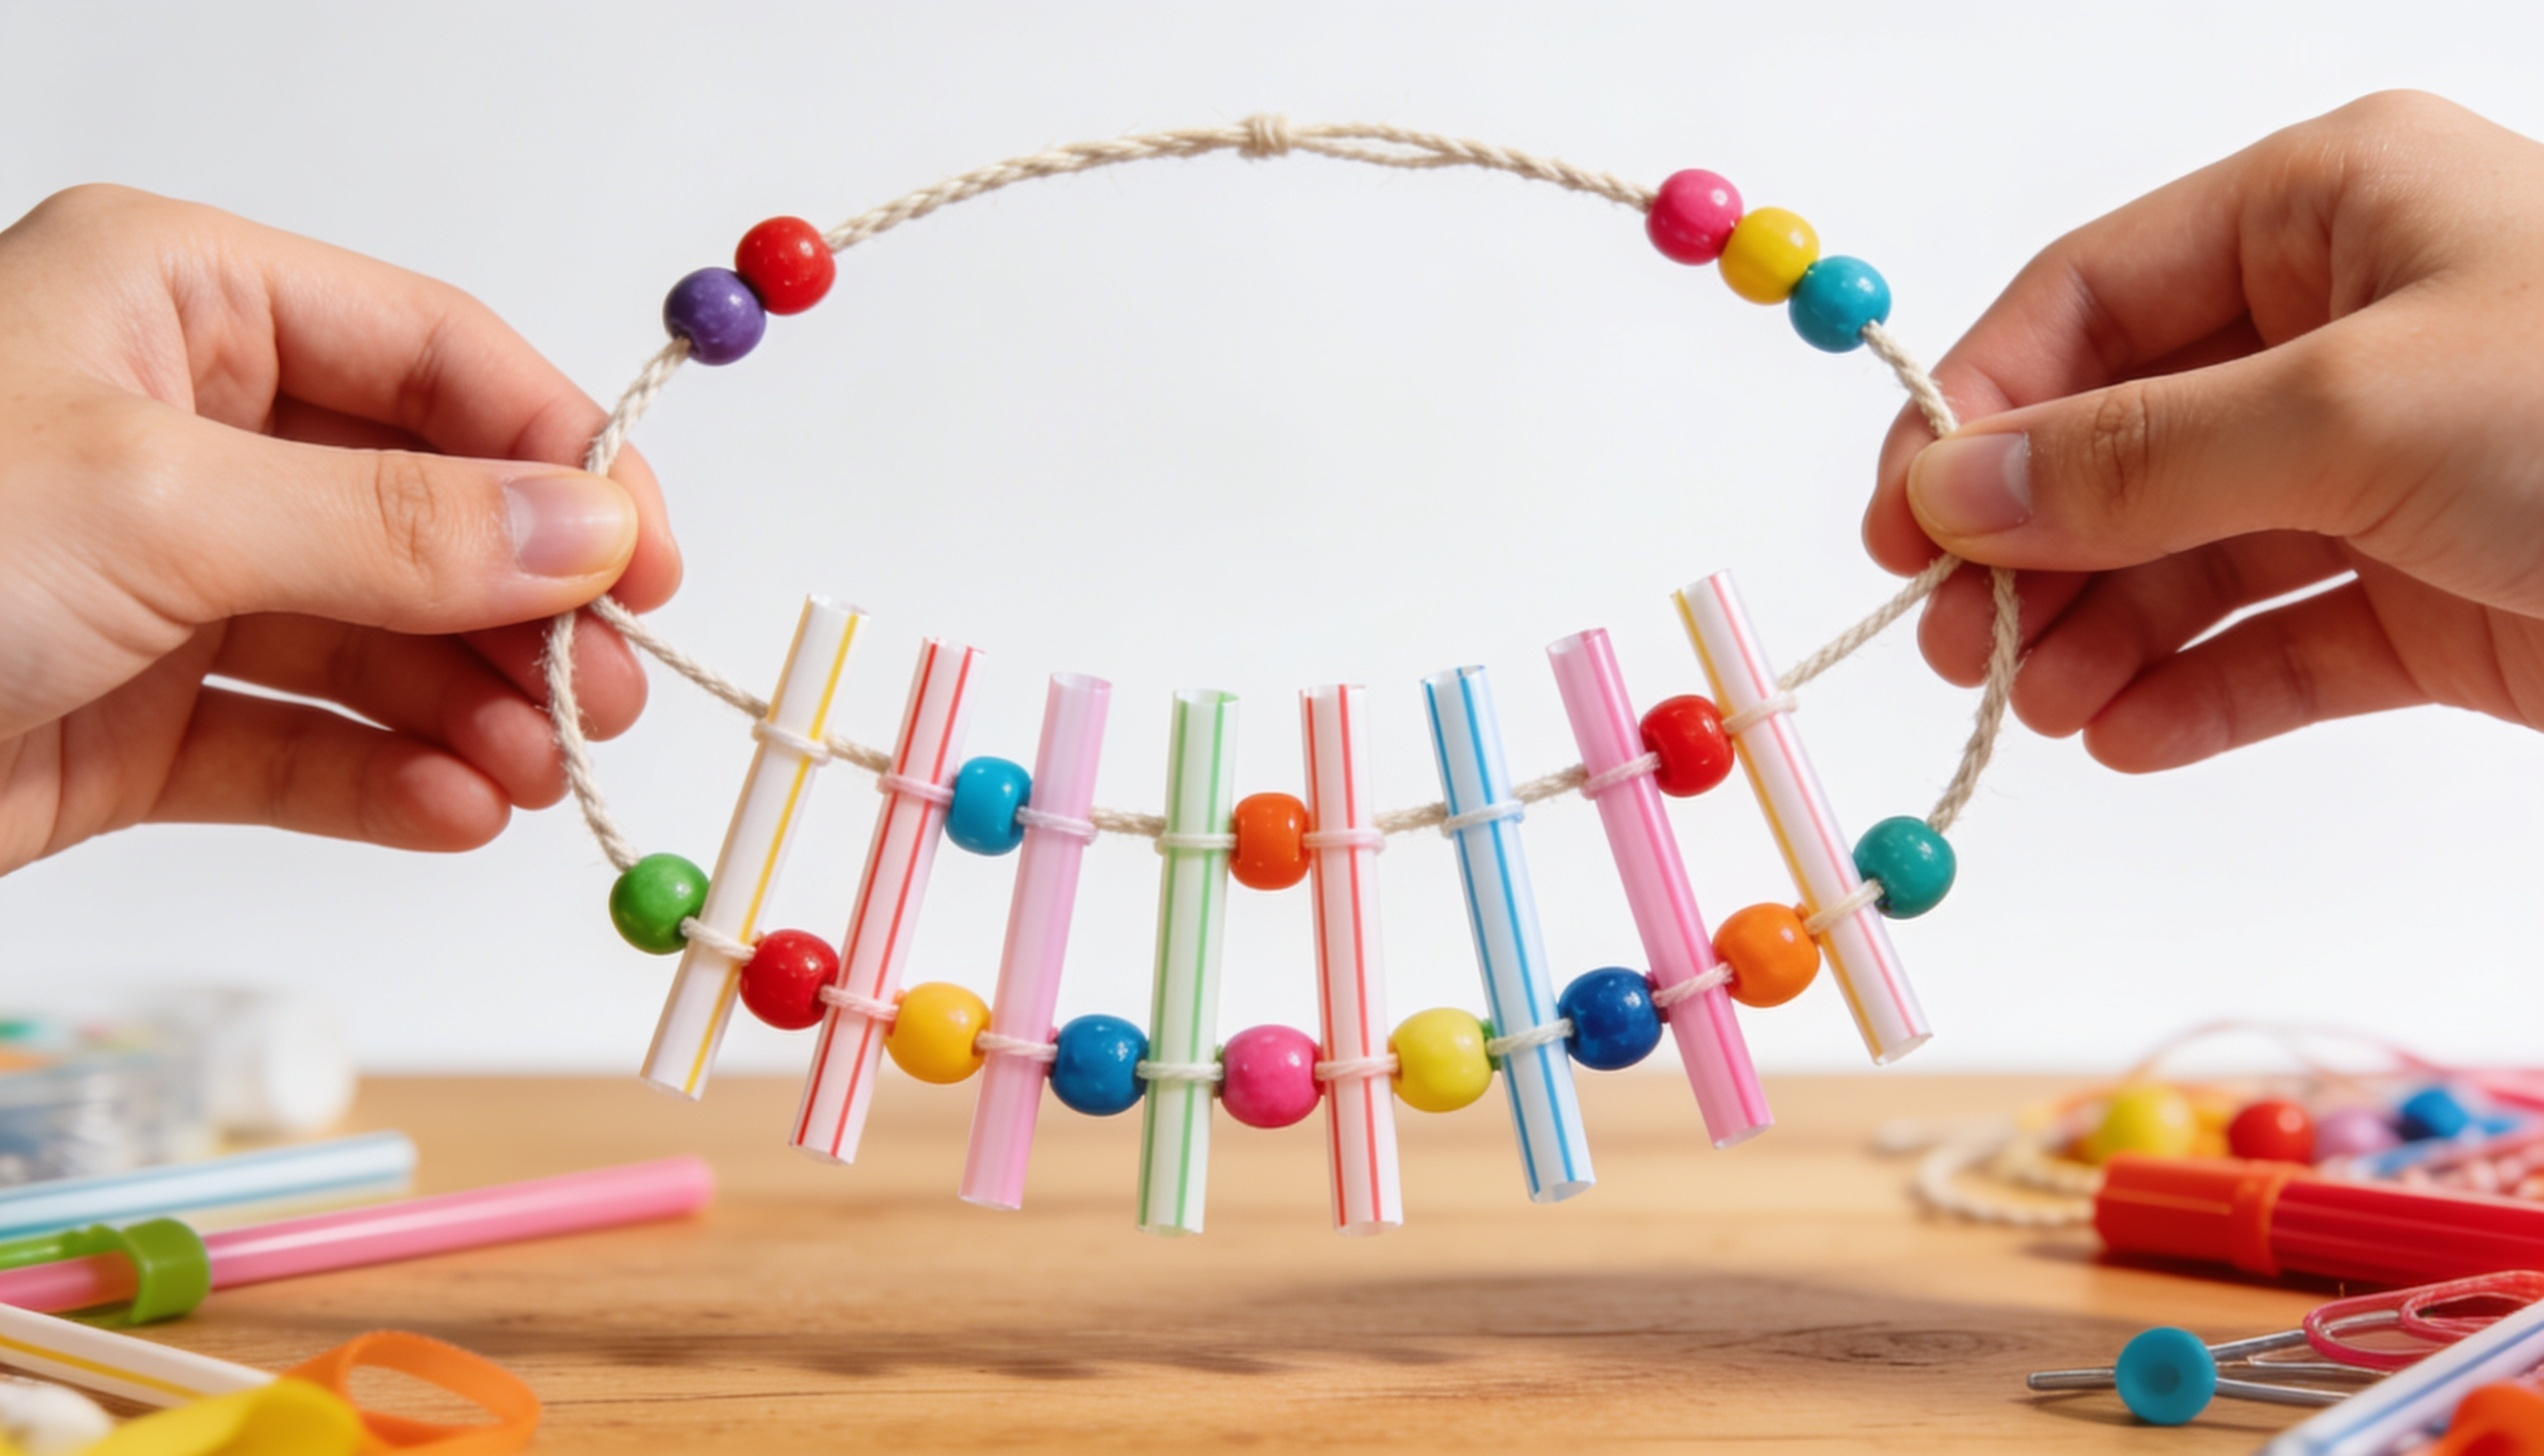
A straw slider toy provides a smooth back-and-forth motion that can keep your fingers busy for long periods. It’s lightweight, inexpensive, and simple enough for beginners to make.
Supplies:
| Item | Quantity | Notes |
|---|---|---|
| Drinking straws | 2–3 | Cut into equal-length segments |
| String or cord | 1 piece | Long enough to hold all pieces comfortably |
| Beads | 4–6 | Adds texture variation between straw segments |
| Scissors | 1 pair | For cutting straws and trimming string |
Step-by-Step Guide:
- Cut the straws: Trim drinking straws into several small, equal-length segments to serve as the sliding elements of the toy.
- Thread onto cord: Alternate straw segments and beads along the string until all pieces are arranged in your preferred order.
- Tie the loop: Bring both ends of the cord together, tie a secure knot, and confirm straw sections still slide freely.
- Test sliding: Move the straw pieces back and forth between your fingers and adjust spacing if anything feels crowded or stuck.
- Customize: Experiment with different bead colors, straw lengths, or cord thicknesses to find the feel you like most.
8. DIY Paper Chain Fidget

A paper chain fidget is a flexible toy that can be twisted, folded, and moved repeatedly. It’s an excellent option if you want a project that uses simple materials and allows plenty of room for creativity.
Supplies:
| Item | Quantity | Notes |
|---|---|---|
| Colored paper | Several sheets | Thicker paper holds its shape longer |
| Tape or glue | As needed | Tape is faster; glue gives a cleaner finish |
| Scissors | 1 pair | For cutting uniform strips |
| Marker (optional) | 1 | For decorating individual links |
Step-by-Step Guide:
- Cut the strips: Trim several paper strips to the same length and width so every chain link connects consistently.
- From the first loop: Bend one strip into a circle and seal the overlapping ends with tape or glue to create the starting link.
- Add more links: Thread each new strip through the previous loop before sealing it, checking every connection is firm before moving on.
- Test flexibility: Twist, fold, and bend the finished chain in multiple directions to confirm all links hold without popping open.
- Decorate: Draw patterns on individual links or alternate paper colors to give the chain a more vibrant, personalized look.
9. DIY Rubber Band Finger Fidget
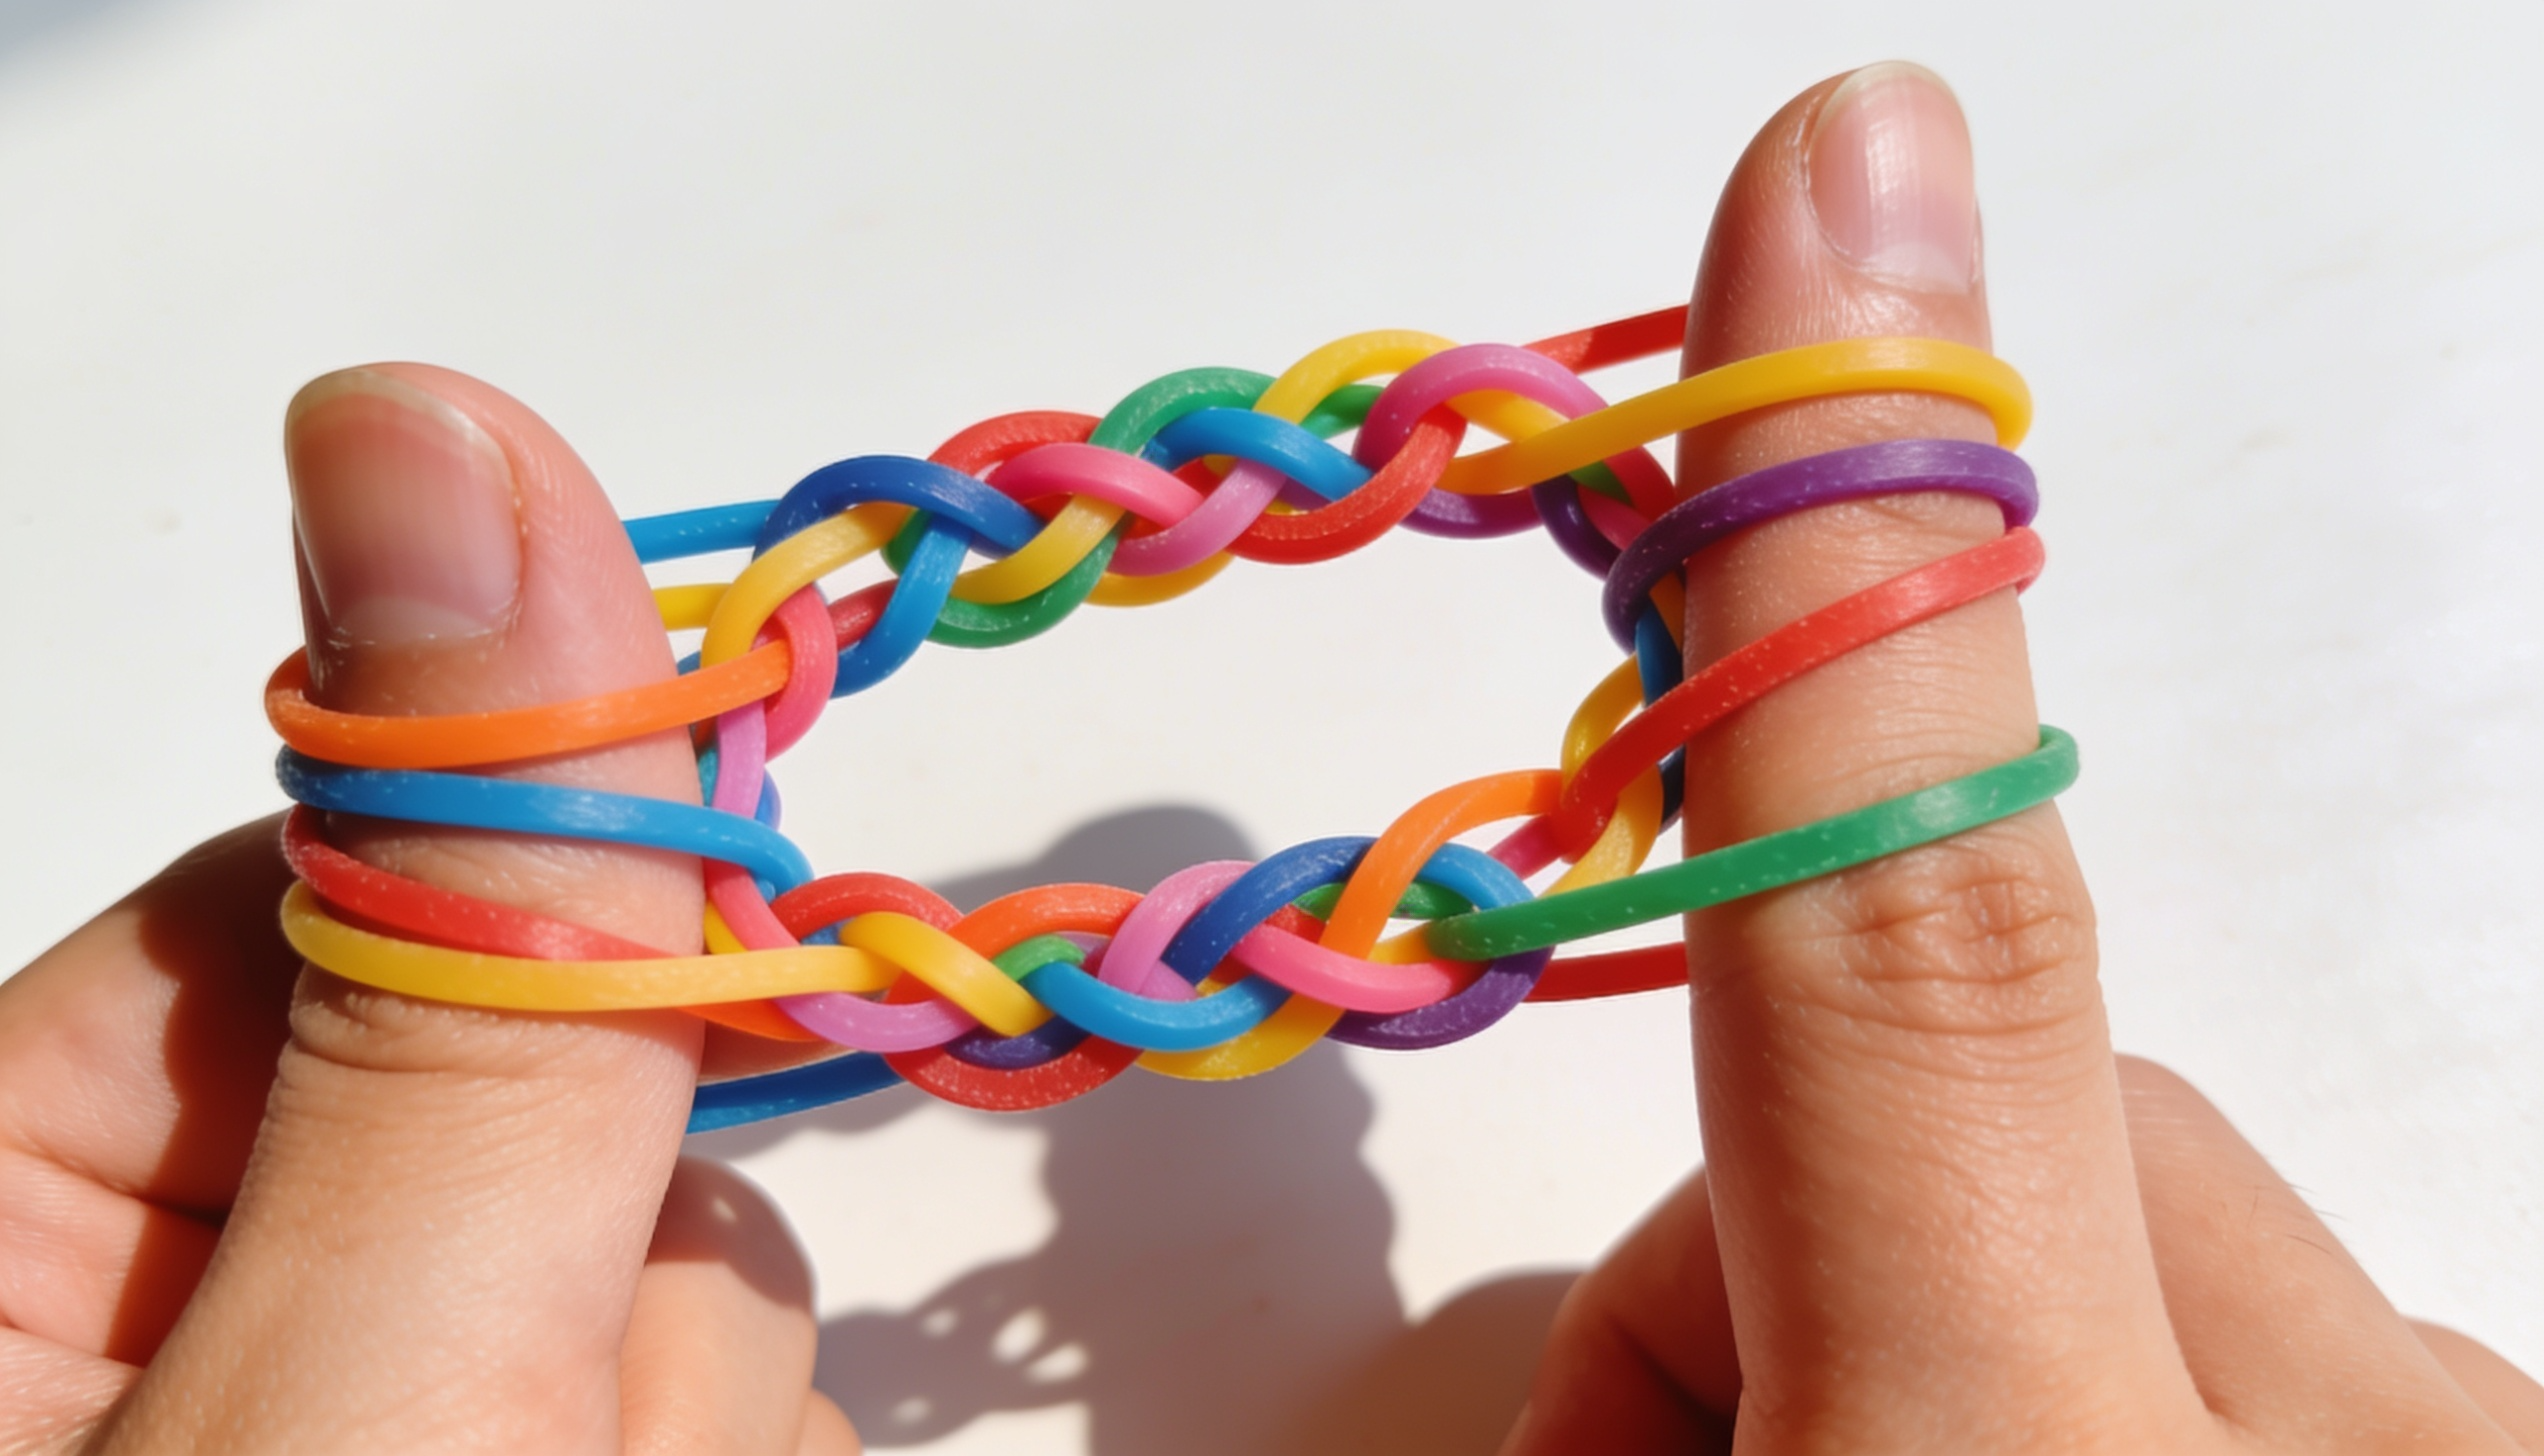
A rubber band finger fidget is one of the simplest toys you can make at home. It’s compact, portable, and ideal for keeping your hands occupied when you need a quick distraction.
Supplies:
| Item | Quantity | Notes |
|---|---|---|
| Rubber bands | 5–10 | Choose bands of a similar size |
| Scissors (optional) | 1 pair | Only needed if trimming is necessary |
Step-by-Step Guide:
- Inspect the bands: Check each rubber band for cracks or wear and discard any that look likely to snap during use.
- Link them together: Loop each band through the previous one, then pull it through itself to form a secure chain.
- Close the loop: Connect the last band back to the first, then gently tug the ring all the way around to confirm no links slip apart.
- Watch movements: Stretch, roll, and twist the loop between your fingers to find which motions feel most satisfying.
- Adjust fit: Add or remove bands until the loop sits comfortably around two or three fingers, neither too tight nor too loose.
10. DIY Sensory Bottle
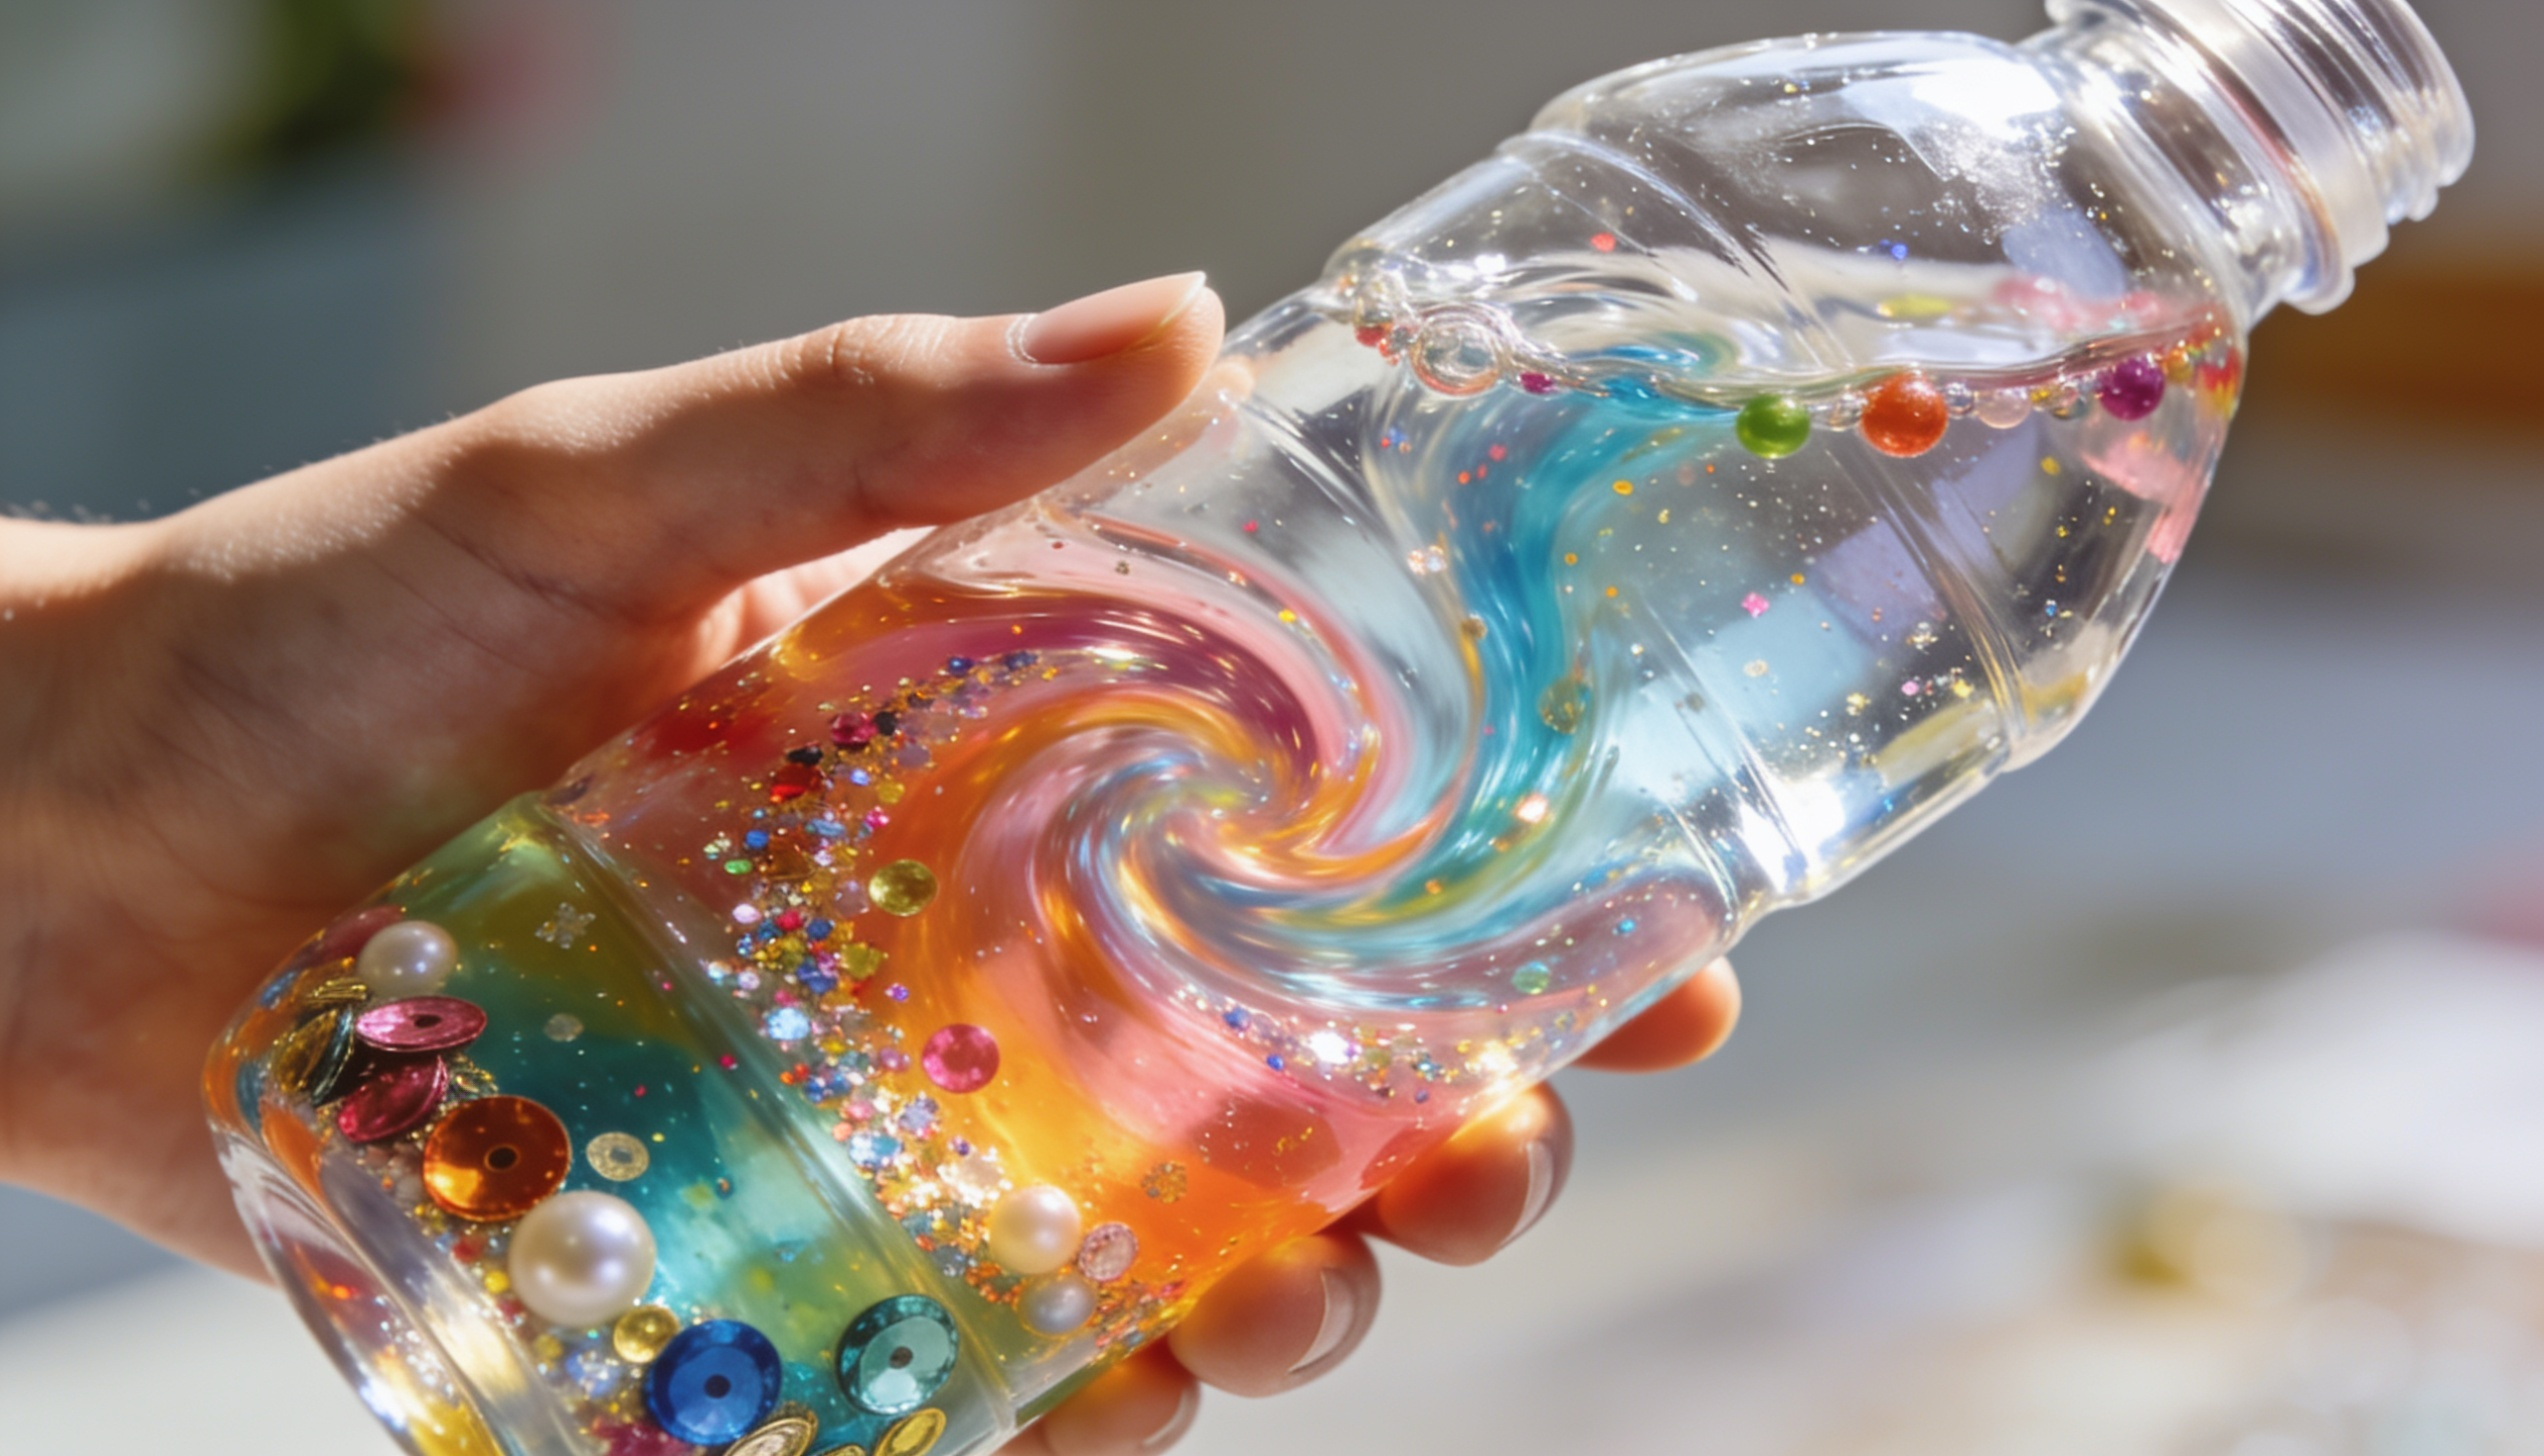
A sensory bottle combines movement, color, and texture in a single handheld fidget toy. Watching the contents swirl and settle can be both entertaining and calming.
Supplies:
| Item | Quantity | Notes |
|---|---|---|
| Clear plastic bottle | 1 | Transparency is essential for the full effect |
| Water | As needed | Fills most of the bottle |
| Glitter | 1–2 tablespoons | Fine glitter moves more slowly and dramatically |
| Small beads or sequins | Handful | Adds varied movement and texture |
| Food coloring | A few drops | Choose a shade that complements your glitter |
| Glue | As needed | Applied around the lid to prevent leaks |
Step-by-Step Guide:
- Prepare the bottle: Rinse and completely dry the bottle before adding anything to prevent cloudiness or mold from forming over time.
- Add decorative elements: Pour in glitter, beads, and sequins, mixing different shapes and sizes for more unpredictable movement when shaken.
- Fill with colored water: Add water leaving a small gap at the top, drop in food coloring, and swirl gently until the color is evenly distributed.
- Seal securely: Screw the lid on firmly, then run a thin line of glue around the seam to prevent leaks during regular use.
- Shake and enjoy: Tilt, rotate, and shake the bottle to watch the contents drift through the liquid; the slow settling is the whole sensory payoff.
Final Thoughts
There you have it: ten DIY fidget toys that prove you don’t need to spend much to keep your hands busy. A little cardboard, some rubber bands, maybe a spare balloon, and just like that, you’ve got something genuinely fun to use.
The part that makes it special is that none of these are set in stone. Swap out colors, try different fillings, mix up the materials. Make it yours. And once you’ve built one, it’s pretty hard to stop at just that.
So grab whatever’s handy and start making; your hands will thank you for it.
Frequently Asked Questions
Can Diy Fidget Toys Be Used as Gifts?
Yes, they can be personalized and given as thoughtful handmade gifts.
How Can I Make My Diy Fidget Toys Last Longer?
Store them properly and repair loose parts as soon as you notice them.
What’s the Best Way to Store Homemade Fidget Toys?
Keep them in a small box, pouch, or drawer to stay organized.
Can I Use Recycled Materials for Diy Fidget Toys?
Yes, many projects can be made using cardboard, plastic bottles, and other reusable materials.
How Can I Create My Own Fidget Toy Design?
Experiment with different materials, shapes, and movements until you find a design you like.


