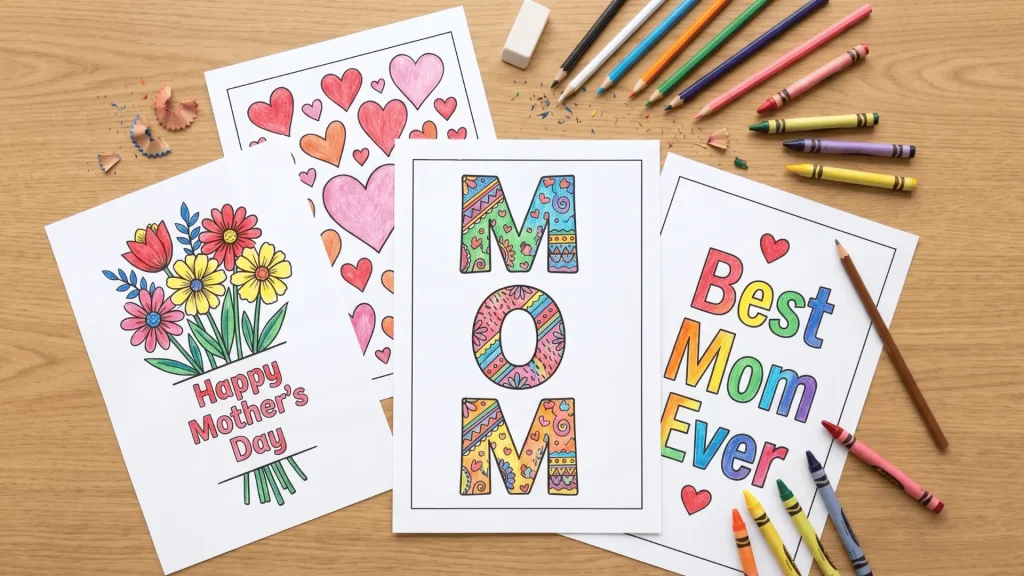
Go check your recycling bin right now, no seriously, go look. That empty bottle, those crushed cereal boxes, the sad pile of newspapers? Yeah, those are recycled art projects waiting to happen.
Your kids don’t need a craft store haul to make something incredible. They just need a little glue, some paint, and whatever’s been sitting around collecting dust. And trust us, the results are going to surprise you.
From caterpillars made out of egg cartons to rockets built from paper towel rolls, there’s a recycled art project here for every kind of kid.
Let’s get into it.
Do Recycled Art Projects Help Kids Develop Real-World Skills?
Yes, because recycled art projects do more than keep kids entertained. They help build skills they can use throughout life. When children turn everyday items into creative projects, they learn how to solve problems, think creatively, and make decisions.
For example, they may figure out how to turn a cardboard box into a rocket ship or use bottle caps to create a colorful design. These activities also strengthen fine motor skills through cutting, gluing, and painting.
As an added benefit, kids learn that materials can have a second purpose instead of being thrown away. This encourages resourcefulness, creativity, and environmental awareness from an early age.
Recycled Art Projects for Kids to Make Using Everyday Materials
Turn your household waste into wonderful art! Simple recycled art projects teach children creativity, sustainability, and resourcefulness.
1. Cardboard Tube Animals

Toilet paper rolls are perfect for recycled art projects; they help kids explore animal shapes, practice painting, and build basic sculpting skills using materials straight from the recycling bin.
Materials Required:
| Material | Quantity | Source |
|---|---|---|
| Cardboard tubes | 2–3 | Toilet/paper towel rolls |
| Tempera paint | 3–4 colors | Craft store |
| Googly eyes | 4–6 | Craft store or old toys |
| Craft glue | 1 bottle | Any stationery shop |
| Scissors | 1 pair | Home |
How to Make It:
- Coat each tube in your chosen animal color
- Let the paint dry completely before continuing
- Glue googly eyes firmly onto the tube front
- Draw the nose, mouth, and whiskers with a marker
- Cut ear shapes from spare cardboard pieces
- Attach ears and tail using craft glue
- Twist pipe cleaners into legs and secure
2. Plastic Bottle Bird Feeder
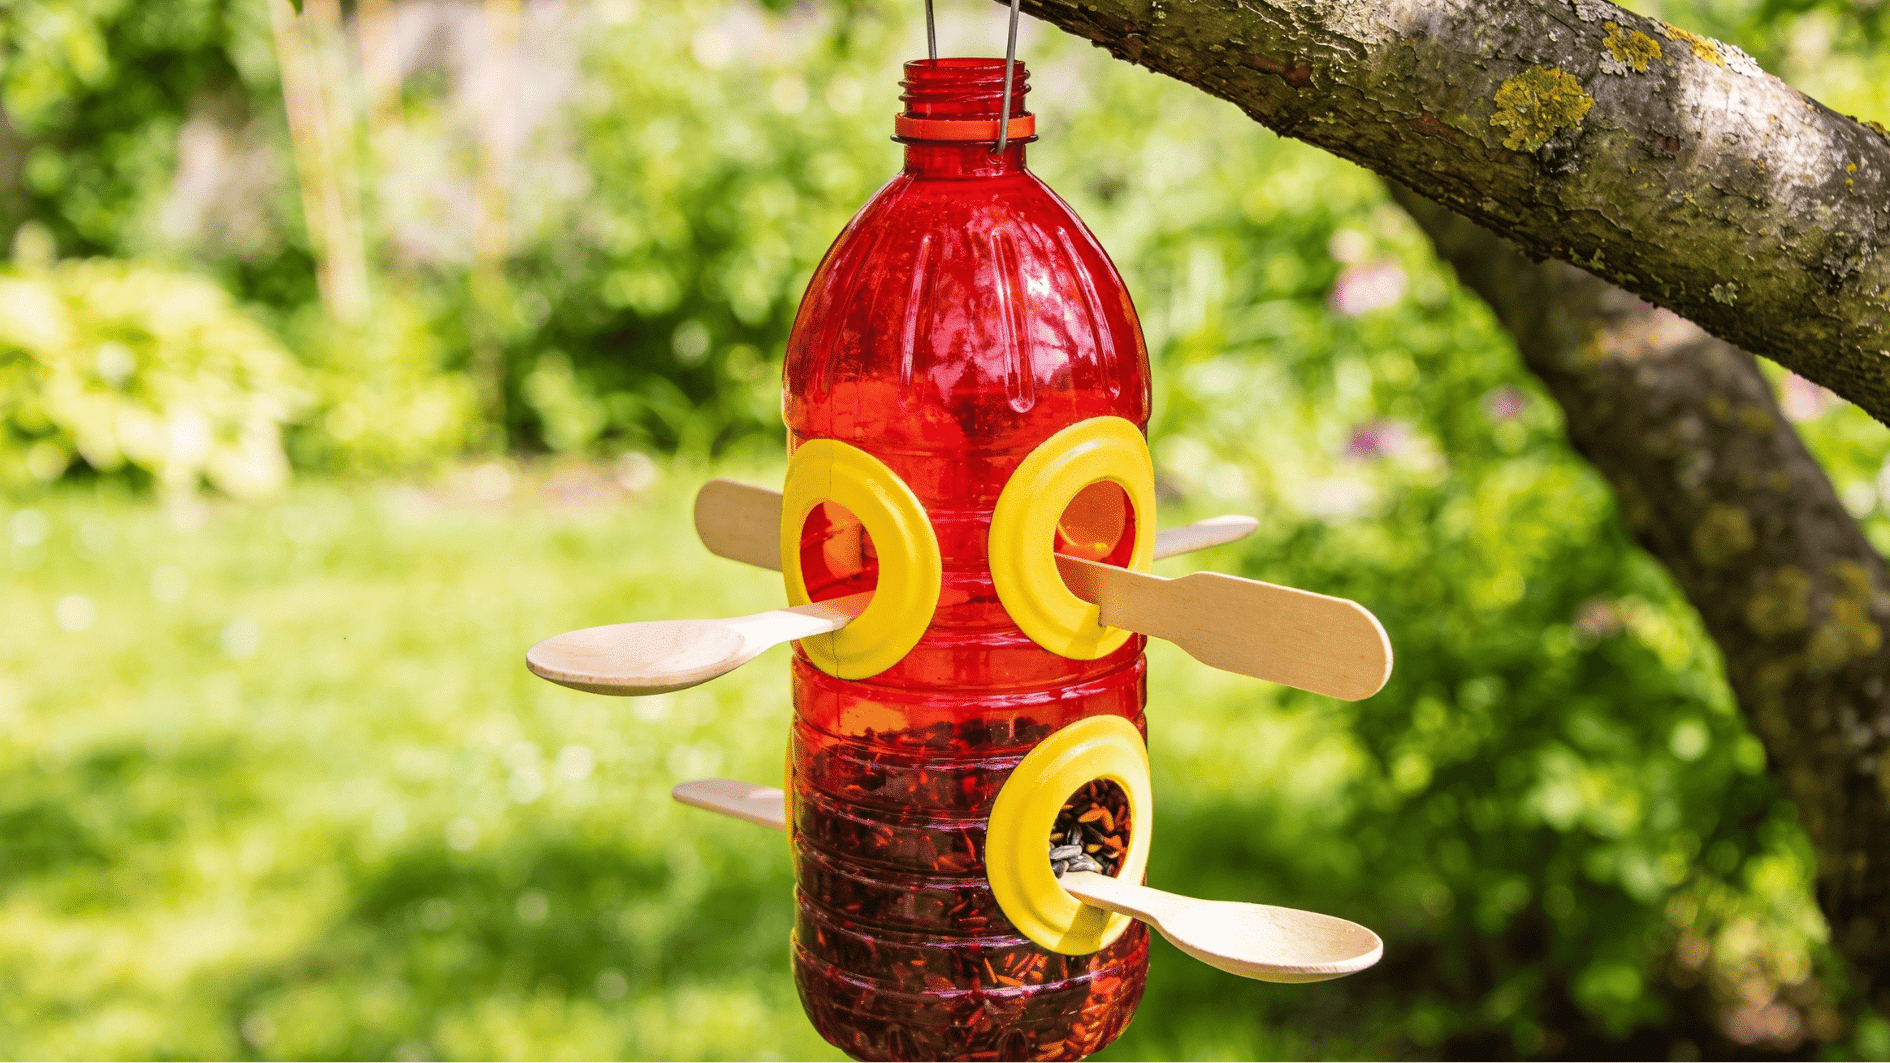
This is one of those recycled art projects that go beyond the craft table; it teaches kids about wildlife care, responsible plastic reuse, and the joy of watching birds visit something they built themselves.
Materials Required:
| Material | Quantity | Source |
|---|---|---|
| Plastic bottle (1L) | 1 | Used water bottle |
| Wooden spoons | 2 | Old kitchen drawer |
| Twine or rope | 30 cm | Home or craft store |
| Acrylic paint | 2–3 colors | Craft store |
| Craft knife (adult use) | 1 | Home |
How to Make It:
- Pierce two sets of holes near the bottle bottom
- Push one wooden spoon through each pair of holes
- Cut small oval feeding windows above each spoon
- Sand all rough edges for safe little hands
- Paint the bottle in bright, cheerful colors
- Let the painted bottle dry fully overnight
- Thread twine through the cap and hang outdoors
3. Egg Carton Flowers

Egg cartons are one of the most underrated crafting materials around; this project shows kids how a little paint and imagination can turn everyday packaging into a vibrant, textured garden of flowers.
Materials Required:
| Material | Quantity | Source |
|---|---|---|
| Cardboard egg carton | 1–2 | Used grocery packaging |
| Watercolor/poster paint | Assorted | Craft store |
| Green pipe cleaners | 6–8 | Craft store |
| Glitter glue | 1–2 tubes | Craft store |
| Hole punch | 1 | Home or school |
How to Make It:
- Cut individual cups out of the egg carton
- Snip petal notches all around each cup rim
- Paint every flower cup in bold, bright colors
- Add glitter glue dots while the paint is wet
- Leave all flowers to dry overnight completely
- Punch a small hole in each cup’s bottom
- Push the pipe cleaner through and bend to secure
4. Magazine Collage Portrait

Tearing and layering old magazines into portraits makes for brilliant recycled art projects that sharpen fine motor skills, color recognition, and compositional thinking, all while clearing out the paper pile at home.
Materials Required:
| Material | Quantity | Source |
|---|---|---|
| Old magazines/newspapers | 4–5 | Home recycling pile |
| Cardboard base sheet | 1 | Old cereal box |
| White craft glue (Mod Podge) | 1 bottle | Craft store |
| Flat paintbrush | 1 | Home |
| Scissors | 1 pair | Home |
How to Make It:
- Sketch a simple face outline on cardboard
- Tear magazine pages into varied strip sizes
- Sort all torn pieces by color groups
- Brush Mod Podge onto a small cardboard section
- Press and overlap torn pieces onto the glue
- Layer pieces forward, filling in face features
- Seal the finished piece with a final coat
5. Tin Can Wind Chimes
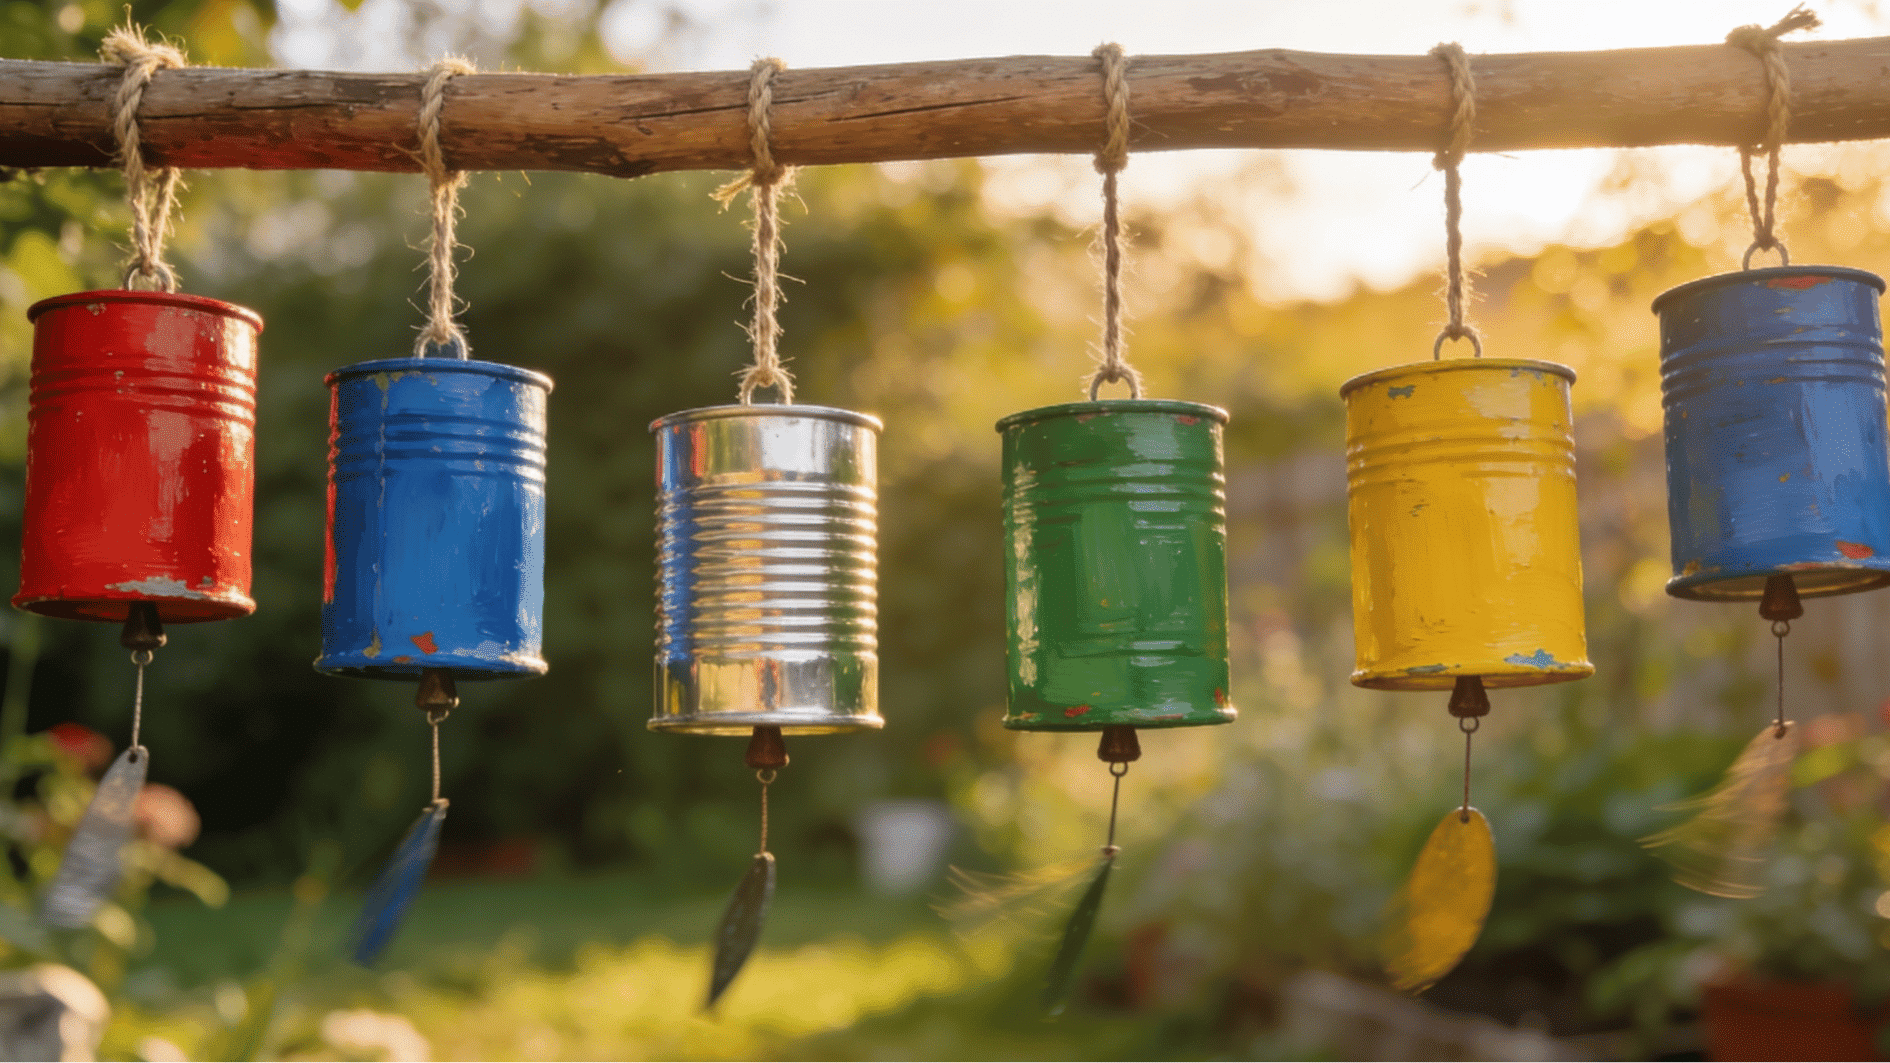
Tin cans make wonderfully musical art projects that introduce kids to sound, rhythm, and basic metalwork in a completely safe and creative way.
Materials Required:
| Material | Quantity | Source |
|---|---|---|
| Empty tin cans | 4–6 | Used food cans |
| Acrylic paint | Assorted | Craft store |
| Twine or string | 60 cm | Home |
| Wooden stick or dowel | 1 | Garden or craft store |
| Hammer and nail (adult use) | 1 set | Home |
How to Make It:
- Clean and dry all tin cans thoroughly
- Punch a hole in each can bottom with a nail
- Paint each can in a different bright color
- Let all cans dry completely before stringing
- Thread twine through each can hole
- Tie cans at varying lengths along the stick
- The hanging chime finished outdoors in the breeze
6. Newspaper Papier-Mâché Bowl
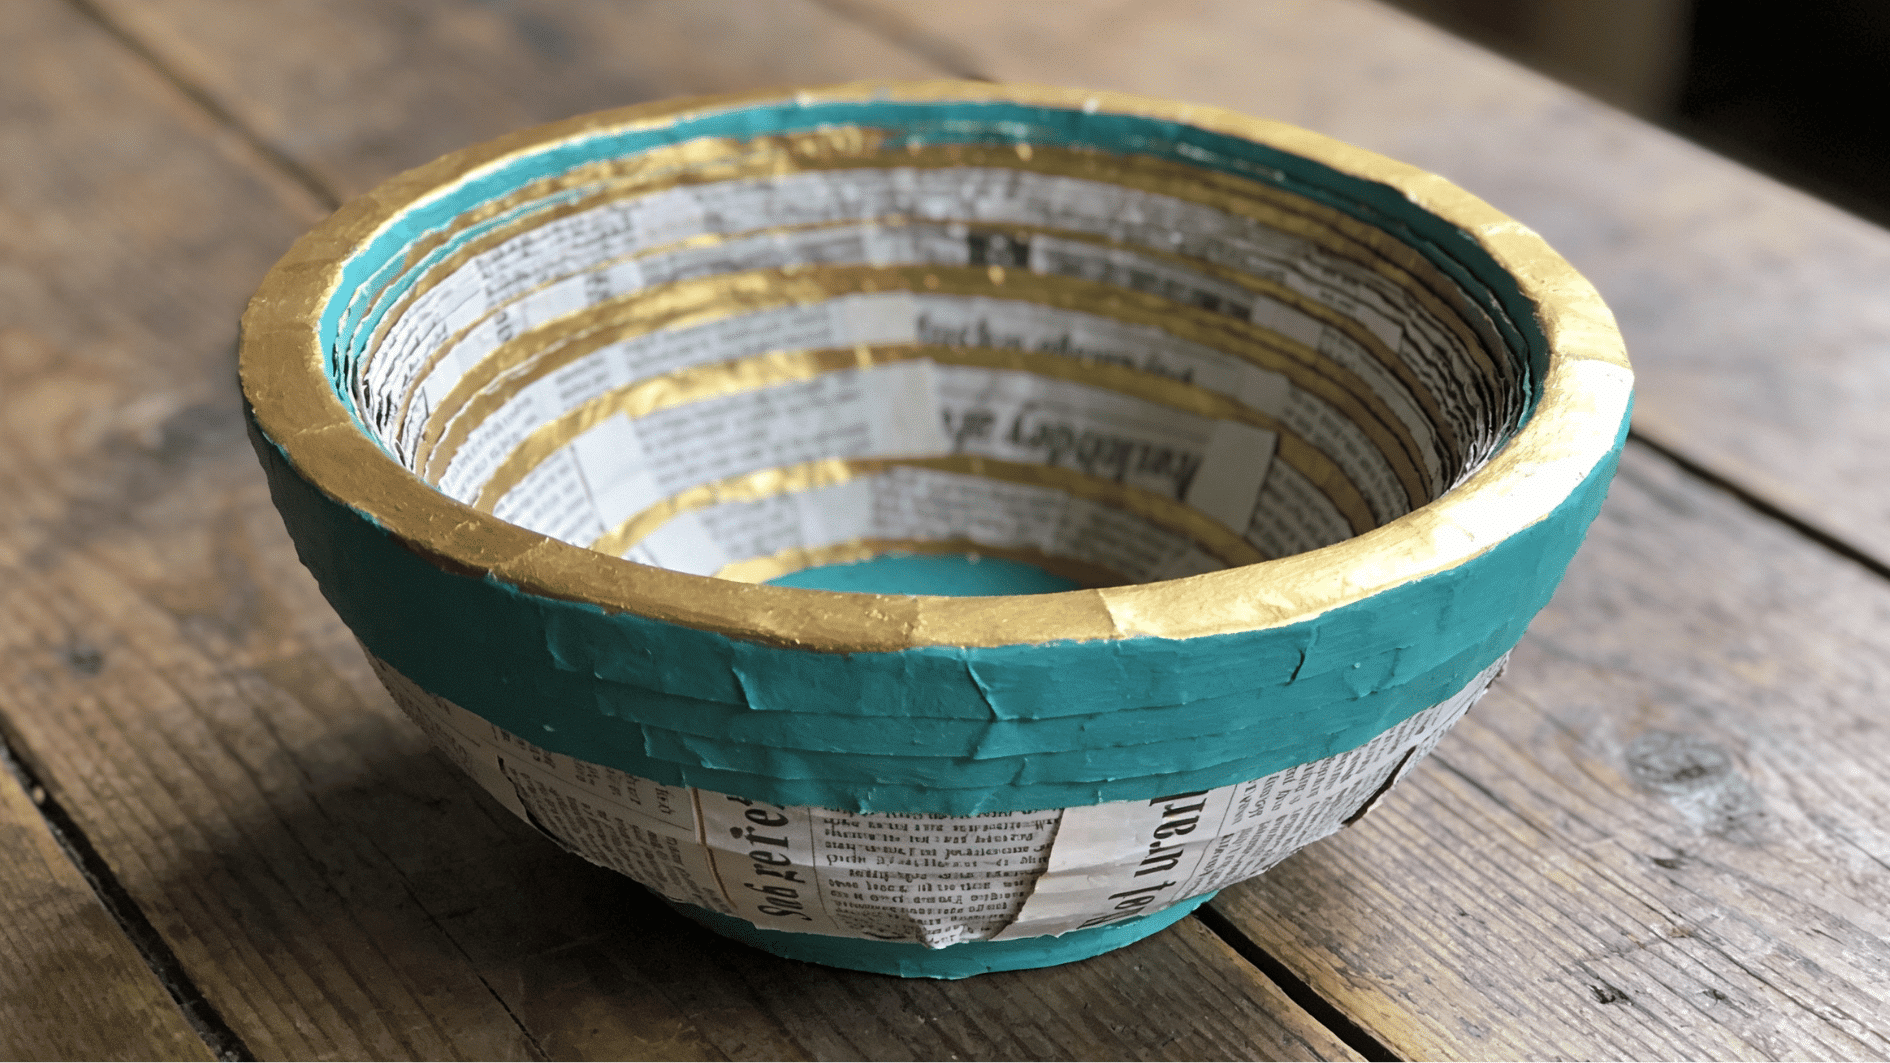
Papier-mâché bowls are classic recycled projects that teach kids patience, layering techniques, and how something as simple as newspaper strips can harden into a real usable object.
Materials Required:
| Material | Quantity | Source |
|---|---|---|
| Old newspapers | 1 full sheet stack | Home recycling |
| Flour and water paste | 1 bowl | Kitchen |
| Balloon | 1 | Party supplies |
| Acrylic paint | Assorted | Craft store |
| Varnish or Mod Podge | 1 bottle | Craft store |
How to Make It:
- Mix flour and water into a smooth paste
- Inflate the balloon to the desired bowl size
- Tear the newspaper into long thin strips
- Dip each strip fully into the paste
- Layer strips over the balloon in a crosswise pattern
- Let it dry for at least 24 hours completely
- Pop the balloon, trim the edges, and paint the bowl
7. Plastic Lid Mosaic Art
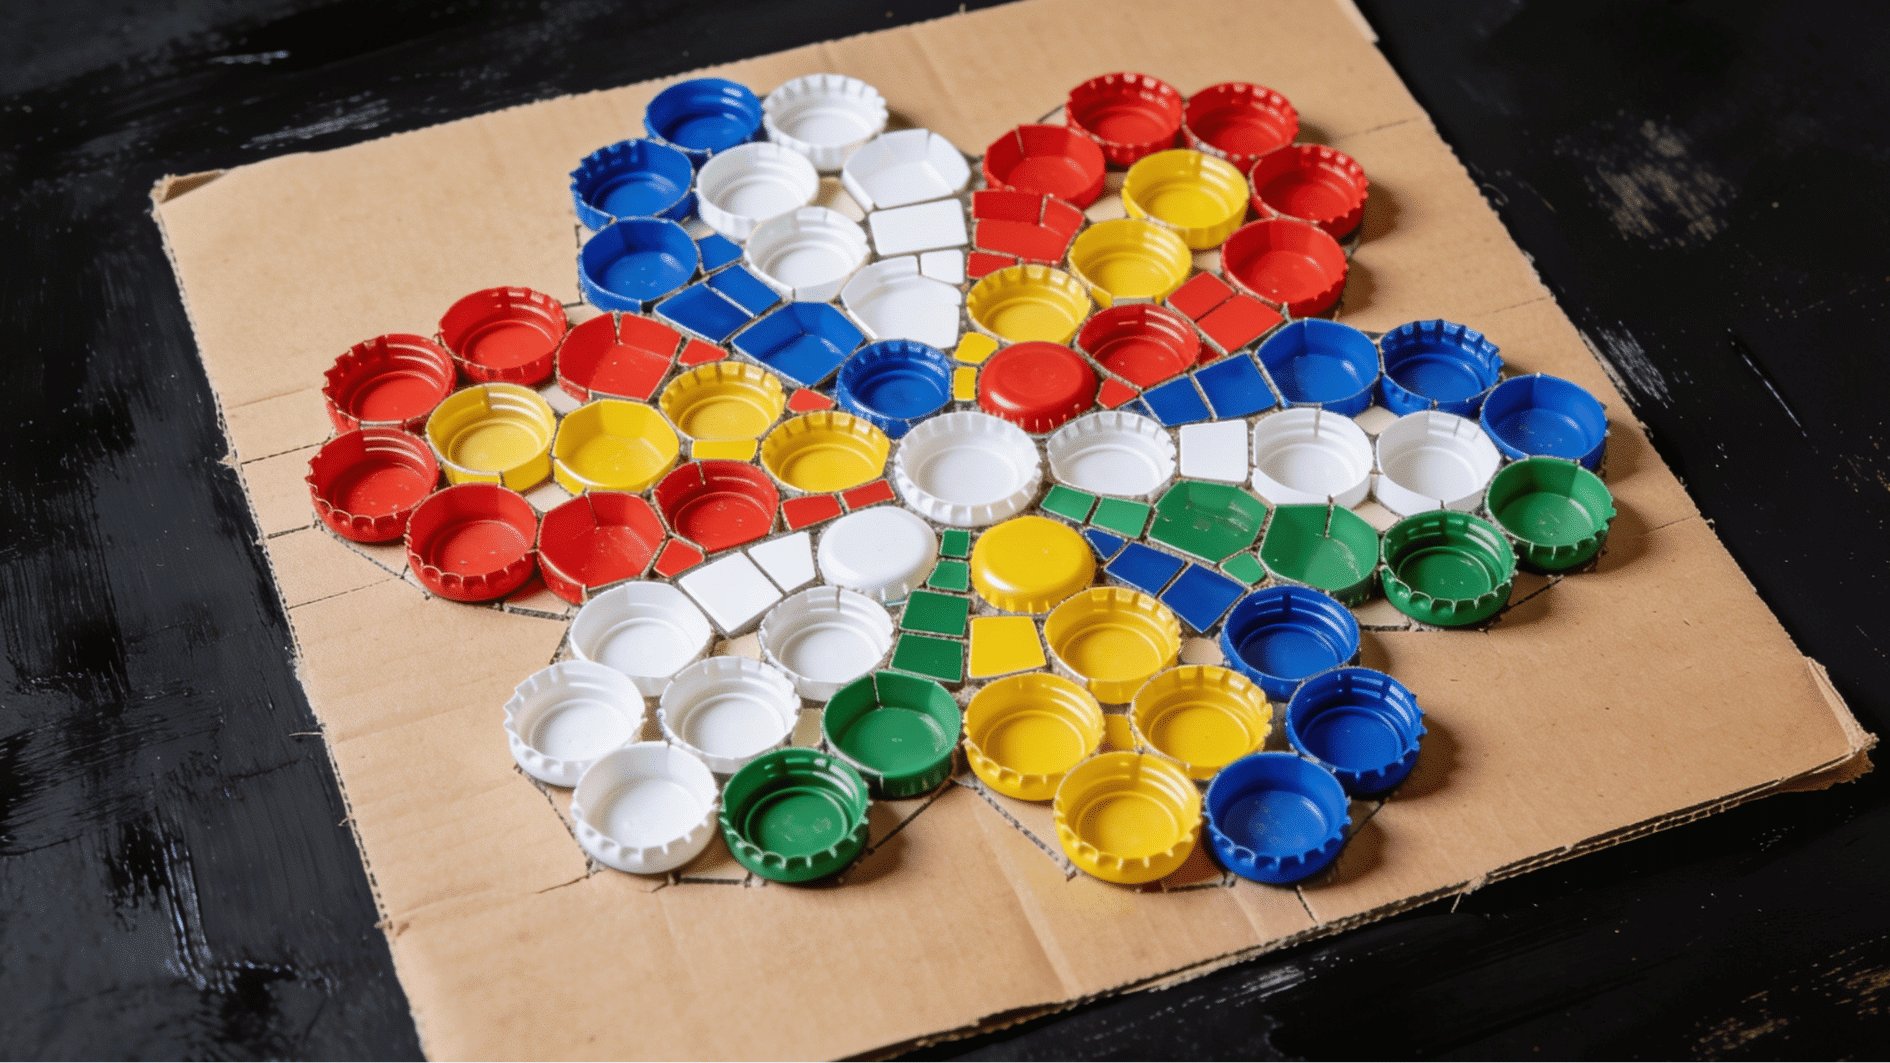
Collecting colorful plastic lids becomes one of the most visually striking projects, teaching kids about color sorting, pattern-making, and mosaic composition.
Materials Required:
| Material | Quantity | Source |
|---|---|---|
| Colorful plastic bottle lids | 30–40 | Home recycling |
| Thick cardboard base | 1 large piece | Old boxes |
| Strong craft glue | 1 bottle | Craft store |
| Pencil | 1 | Home |
| Acrylic paint (for base) | 1–2 colors | Craft store |
How to Make It:
- Draw a simple design outline on cardboard
- Sort plastic lids by color into groups
- Paint the cardboard base in one solid color
- Let the base dry fully before gluing
- Arrange lids over the drawn design first
- Glue each lid firmly onto the cardboard
- Press down and let dry for two hours
8. Cereal Box Cityscape
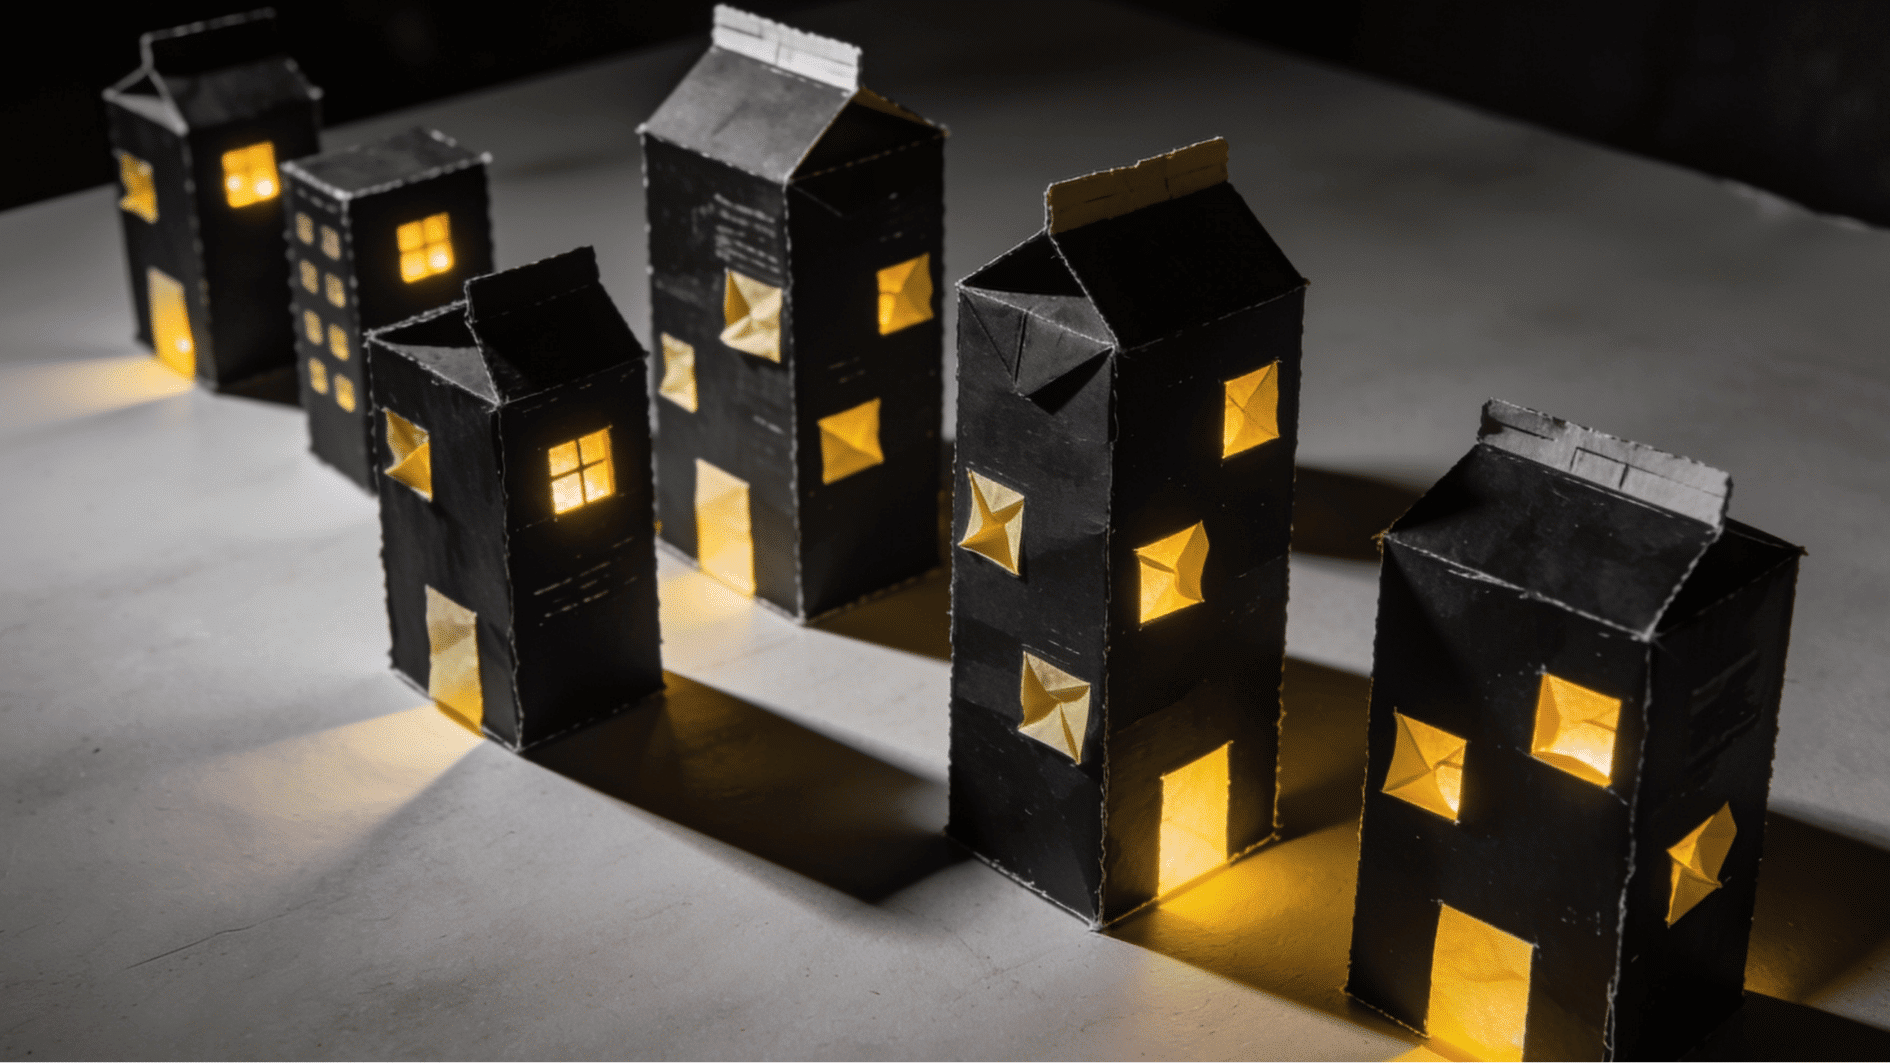
Old cereal boxes become a mini skyline in this project, getting kids thinking about architecture, city planning, and creative recycled art in a hands-on way.
Materials Required:
| Material | Quantity | Source |
|---|---|---|
| Cereal and cracker boxes | 5–8 | Home recycling |
| Black or dark paint | 1 pot | Craft store |
| Yellow tissue paper | 1 sheet | Craft store |
| Craft glue | 1 bottle | Craft store |
| Scissors | 1 pair | Home |
How to Make It:
- Cut boxes into varying building heights
- Arrange buildings on a flat surface first
- Glue all buildings onto a cardboard base
- Paint the entire cityscape in black paint
- Let the paint dry completely overnight
- Cut small rectangles from yellow tissue paper
- Glue yellow squares on as glowing windows
9. Glass Jar Lanterns
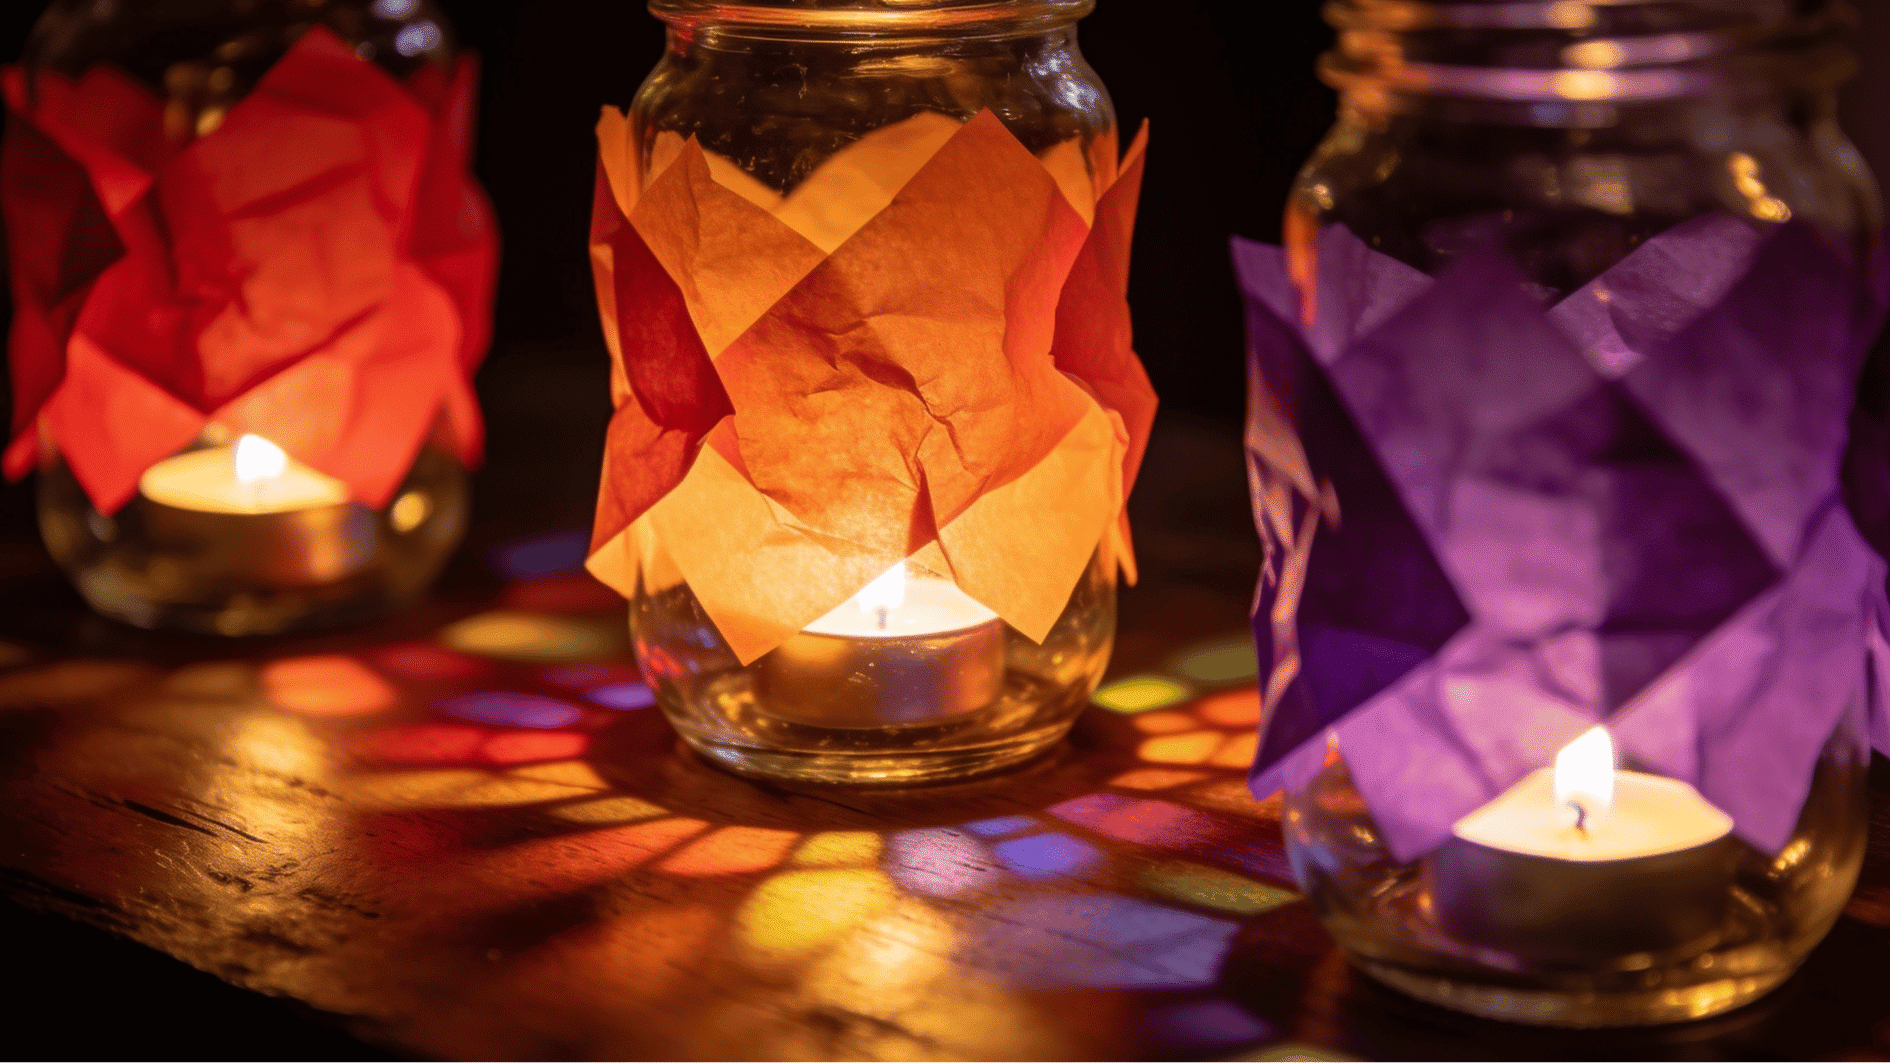
Glass jar lanterns are gorgeous art projects that teach kids about light, color, and transparency, and about upcycling everyday kitchen waste into glowing home décor.
Materials Required:
| Material | Quantity | Source |
|---|---|---|
| Empty glass jars | 2–3 | Used jam or sauce jars |
| Tissue paper (assorted colors) | 3–4 sheets | Craft store |
| Mod Podge or diluted glue | 1 bottle | Craft store |
| Flat paintbrush | 1 | Home |
| LED tea lights | 2–3 | Home or store |
How to Make It:
- Clean and dry all glass jars fully
- Tear tissue paper into small, irregular pieces
- Brush a thin Mod Podge layer onto the jar
- Press tissue paper pieces onto wet glue
- Overlap pieces for a rich color blending effect
- Brush a final sealing coat over everything
- Place the LED tea light inside the finished lantern
10. Bottle Cap Stamps
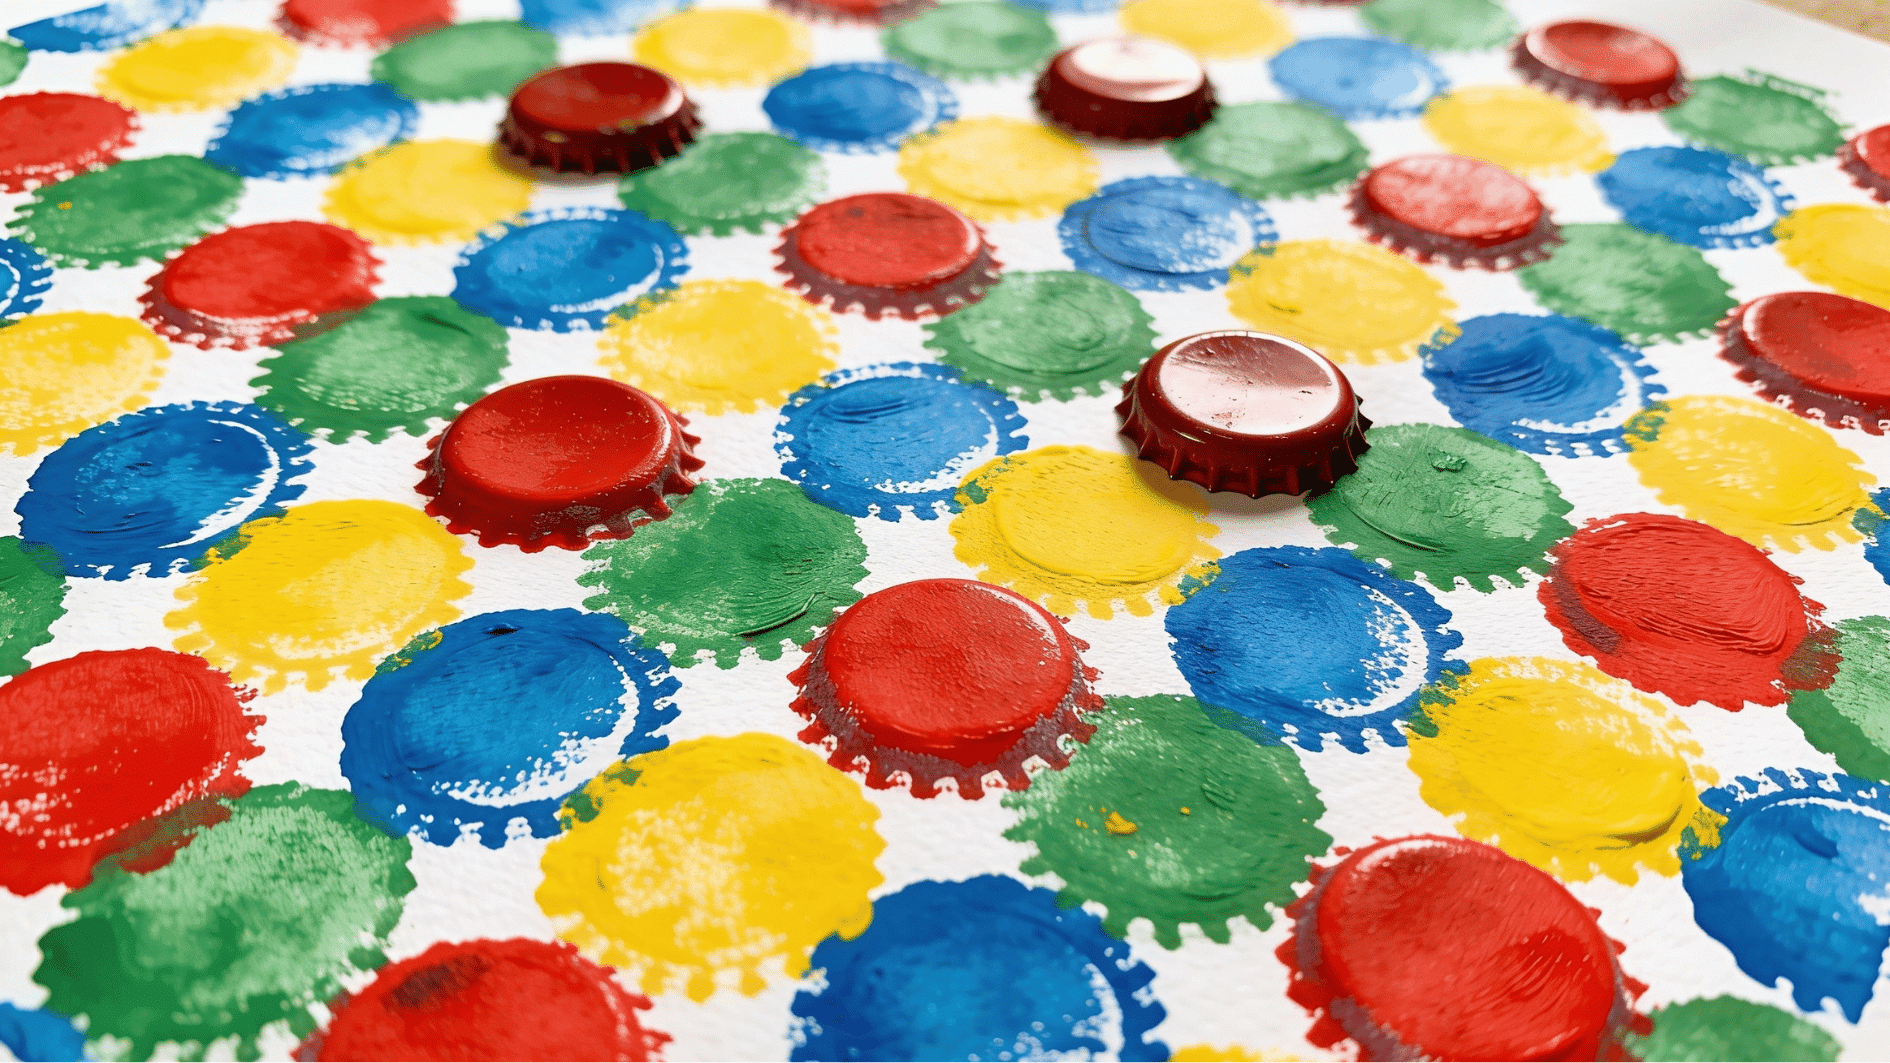
Bottle caps dipped in paint become brilliant printing tools in this recycled project that introduces kids to printmaking, repetition, and pattern design.
Materials Required:
| Material | Quantity | Source |
|---|---|---|
| Metal or plastic bottle caps | 10–15 | Home recycling |
| Tempera paint | 4–5 colors | Craft store |
| White cardstock or paper | 3–4 sheets | Home or stationery |
| Shallow paint trays | 3–4 | Home kitchen |
| Foam stickers (optional) | 1 pack | Craft store |
How to Make It:
- Press foam stickers inside select bottle caps
- Pour paint into shallow trays separately
- Dip each cap into one paint color
- Press the cap firmly onto the paper and lift
- Repeat to build patterns across the page
- Try overlapping colors for a mixed effect
- Let the finished print dry completely flat
11. Sock Puppet Characters
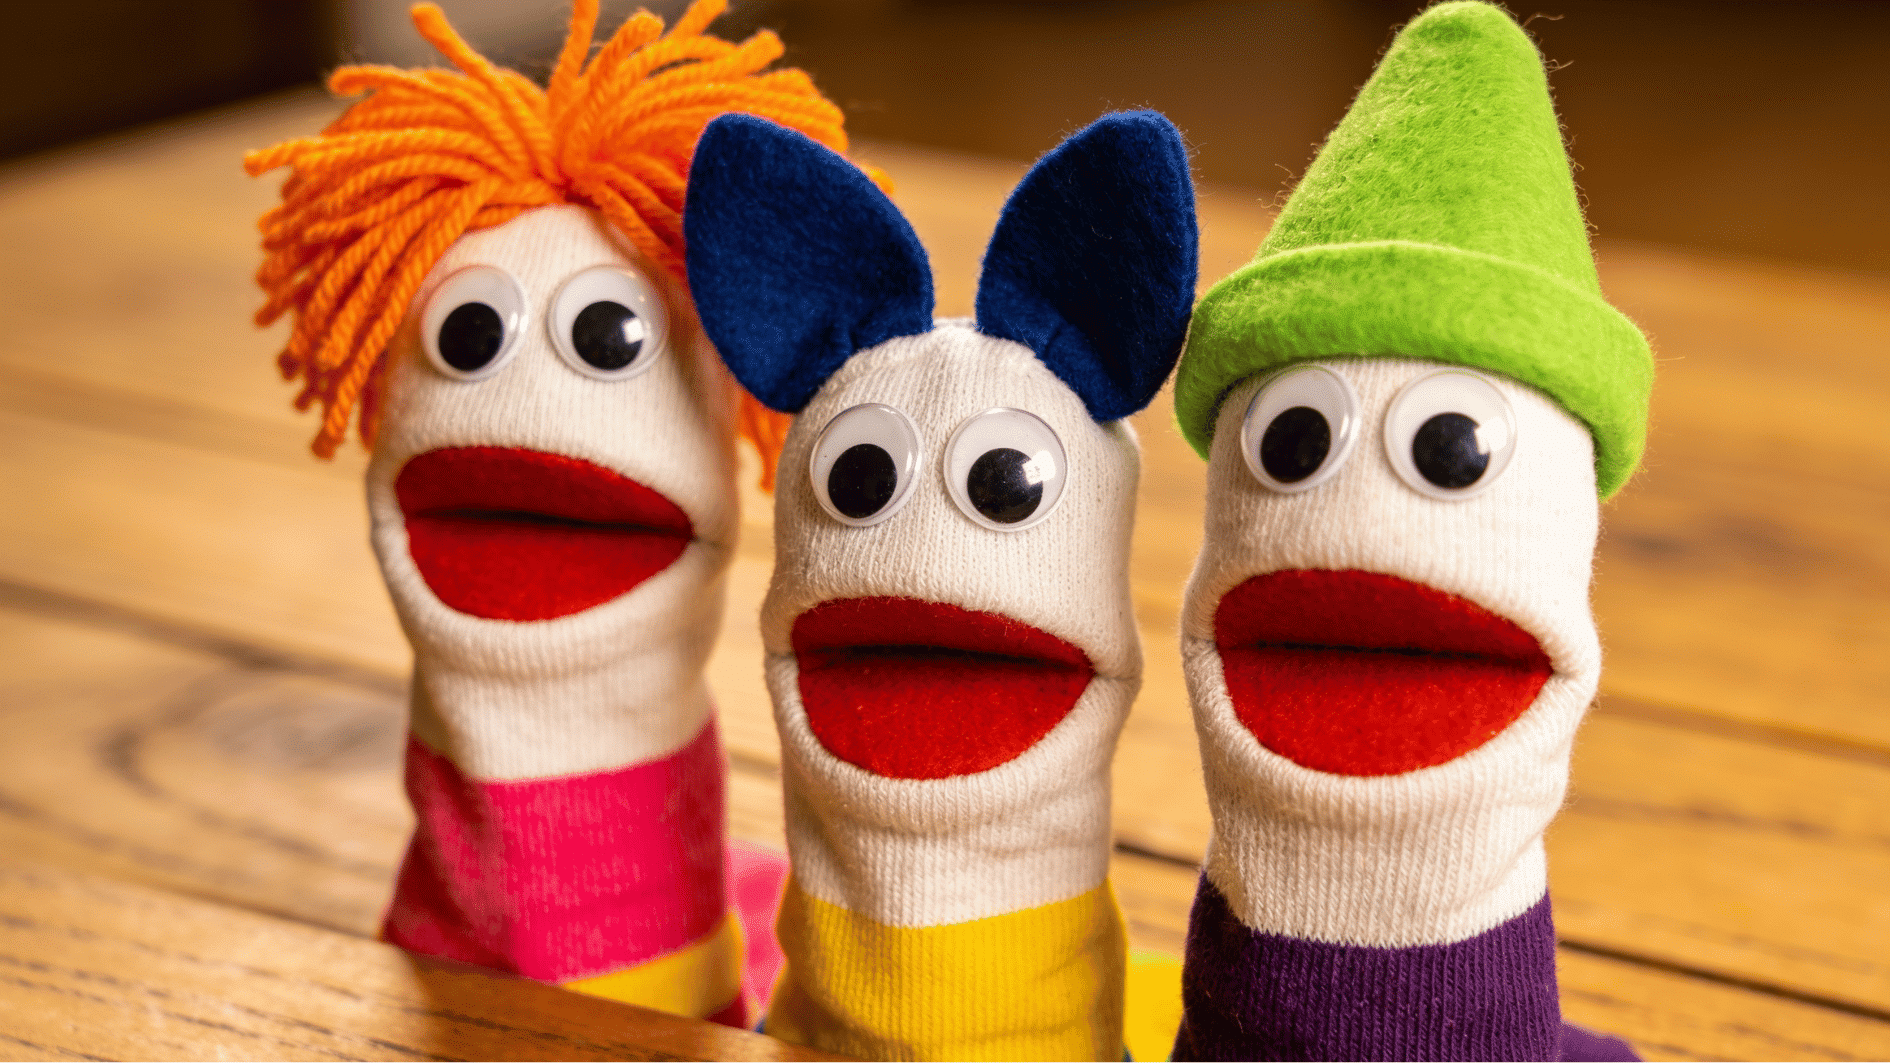
Old mismatched socks become expressive puppet characters in this project that blend storytelling, drama, and craft into one wildly fun activity for kids.
Materials Required:
| Material | Quantity | Source |
|---|---|---|
| Old socks (single or mismatched) | 3–4 | Home drawer |
| Googly eyes | 6–8 | Craft store |
| Yarn scraps | Small bundle | Leftover from home |
| Fabric glue | 1 bottle | Craft store |
| Felt scraps | Assorted pieces | Craft store or old felt |
How to Make It:
- Slip sock over hand to test fit
- Pinch the sock toe to form a mouth shape
- Glue googly eyes above the mouth area
- Cut yarn into strips for hair pieces
- Glue yarn firmly onto the sock top
- Cut felt into ears, hats, or accessories
- Glue all details and let them dry fully
12. CD Suncatcher Mosaic
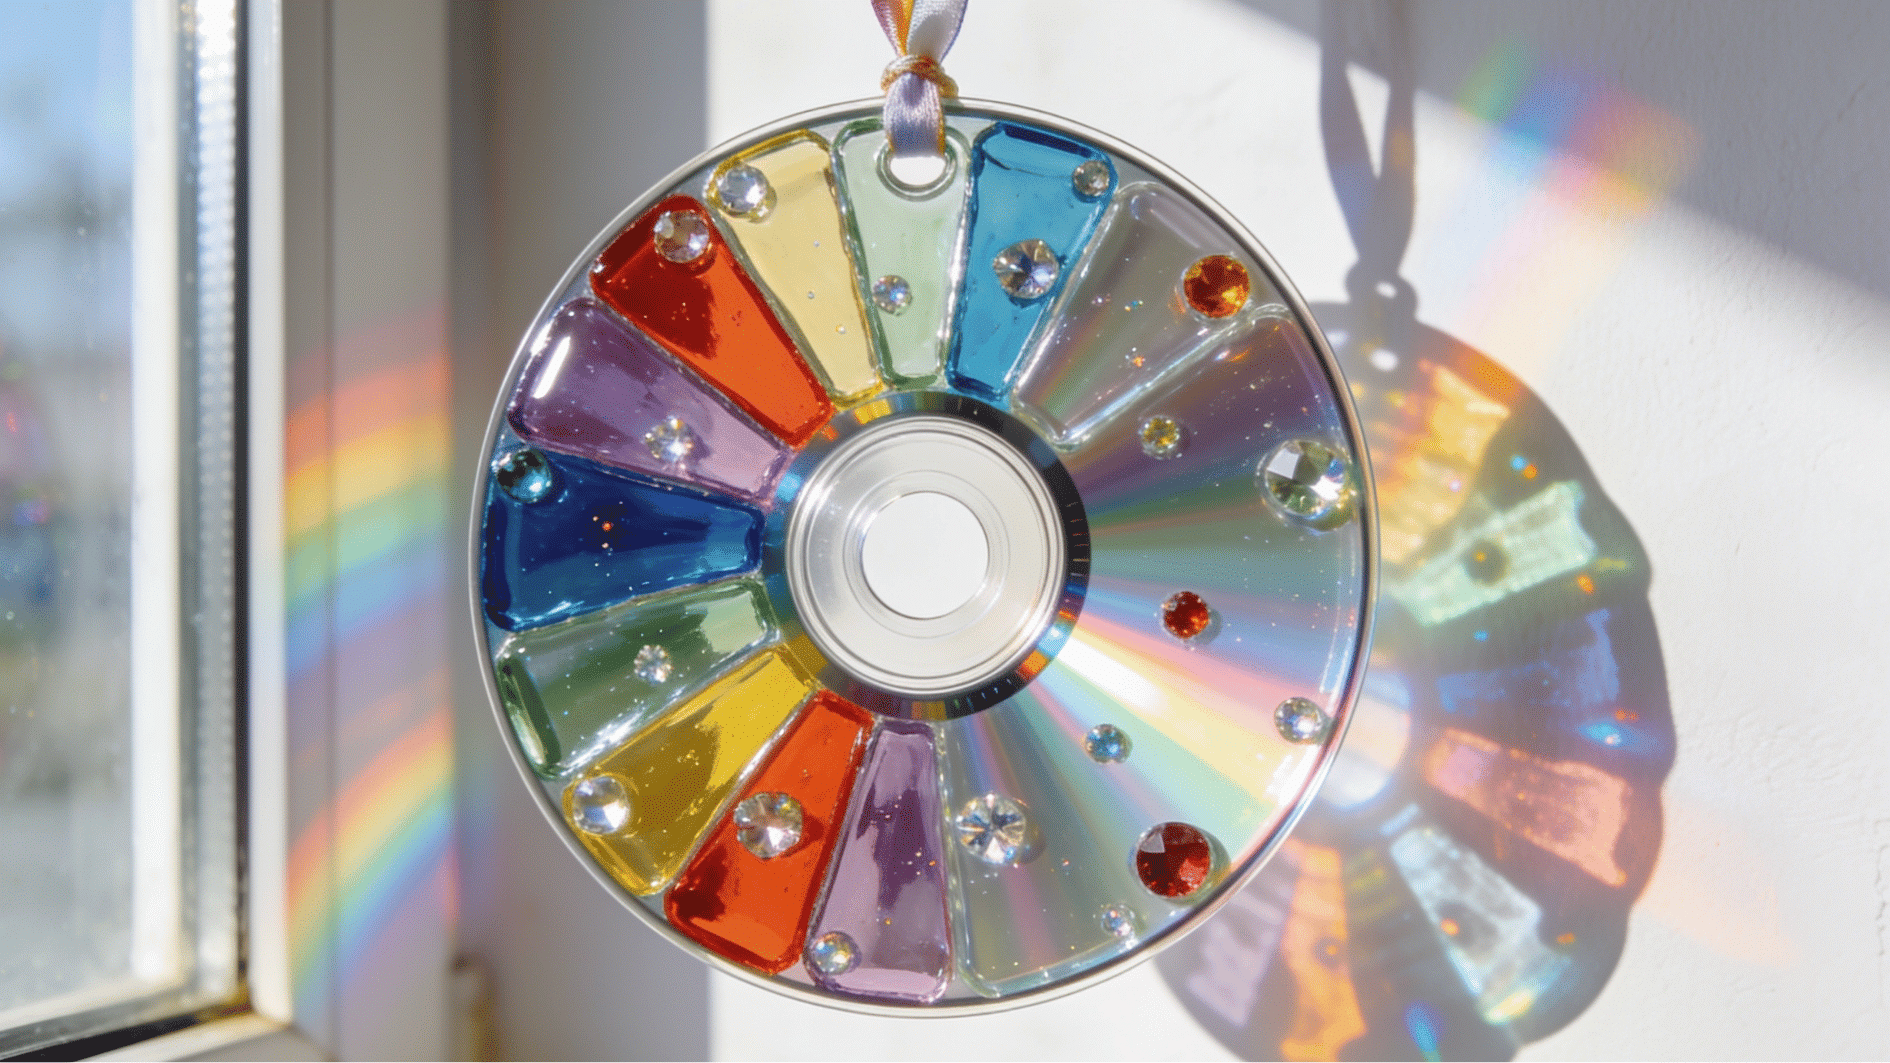
Old scratched CDs break light into rainbow patterns, making them one of the most magical projects you can hang in any window for a dazzling display.
Materials Required:
| Material | Quantity | Source |
|---|---|---|
| Old CDs or DVDs | 2–3 | Home drawer |
| Transparent glass paint | Assorted | Craft store |
| Craft gems or sequins | 1 small pack | Craft store |
| Strong glue | 1 tube | Craft store |
| Ribbon or fishing line | 30 cm | Home or craft store |
How to Make It:
- Clean each CD surface with a dry cloth
- Apply transparent glass paint in sections
- Let each color dry before adding the next
- Press gems and sequins into painted areas
- Let the glue set overnight before handling
- Thread ribbon through the CD center hole
- Hang the finished suncatcher in a sunny window
13. Cardboard Box Dollhouse

A large cardboard box transforms into a fully decorated dollhouse, one of the most imaginative recycled art projects that keeps kids engaged for hours across multiple sessions.
Materials Required:
| Material | Quantity | Source |
|---|---|---|
| Large cardboard box | 1 | Appliance or delivery box |
| Acrylic or poster paint | Assorted | Craft store |
| Fabric scraps | Small pieces | Old clothes or linen |
| Craft glue | 1 large bottle | Craft store |
| Scissors and a craft knife | 1 each | Home |
How to Make It:
- Cut the box into separate room sections
- Paint each room’s walls a different color
- Let all painted walls dry fully overnight
- Cut fabric into tiny rugs and curtains
- Glue fabric pieces into the correct room spots
- Add cardboard furniture cut from scraps
- Decorate walls with tiny paper artwork
14. Bubble Wrap Print Painting
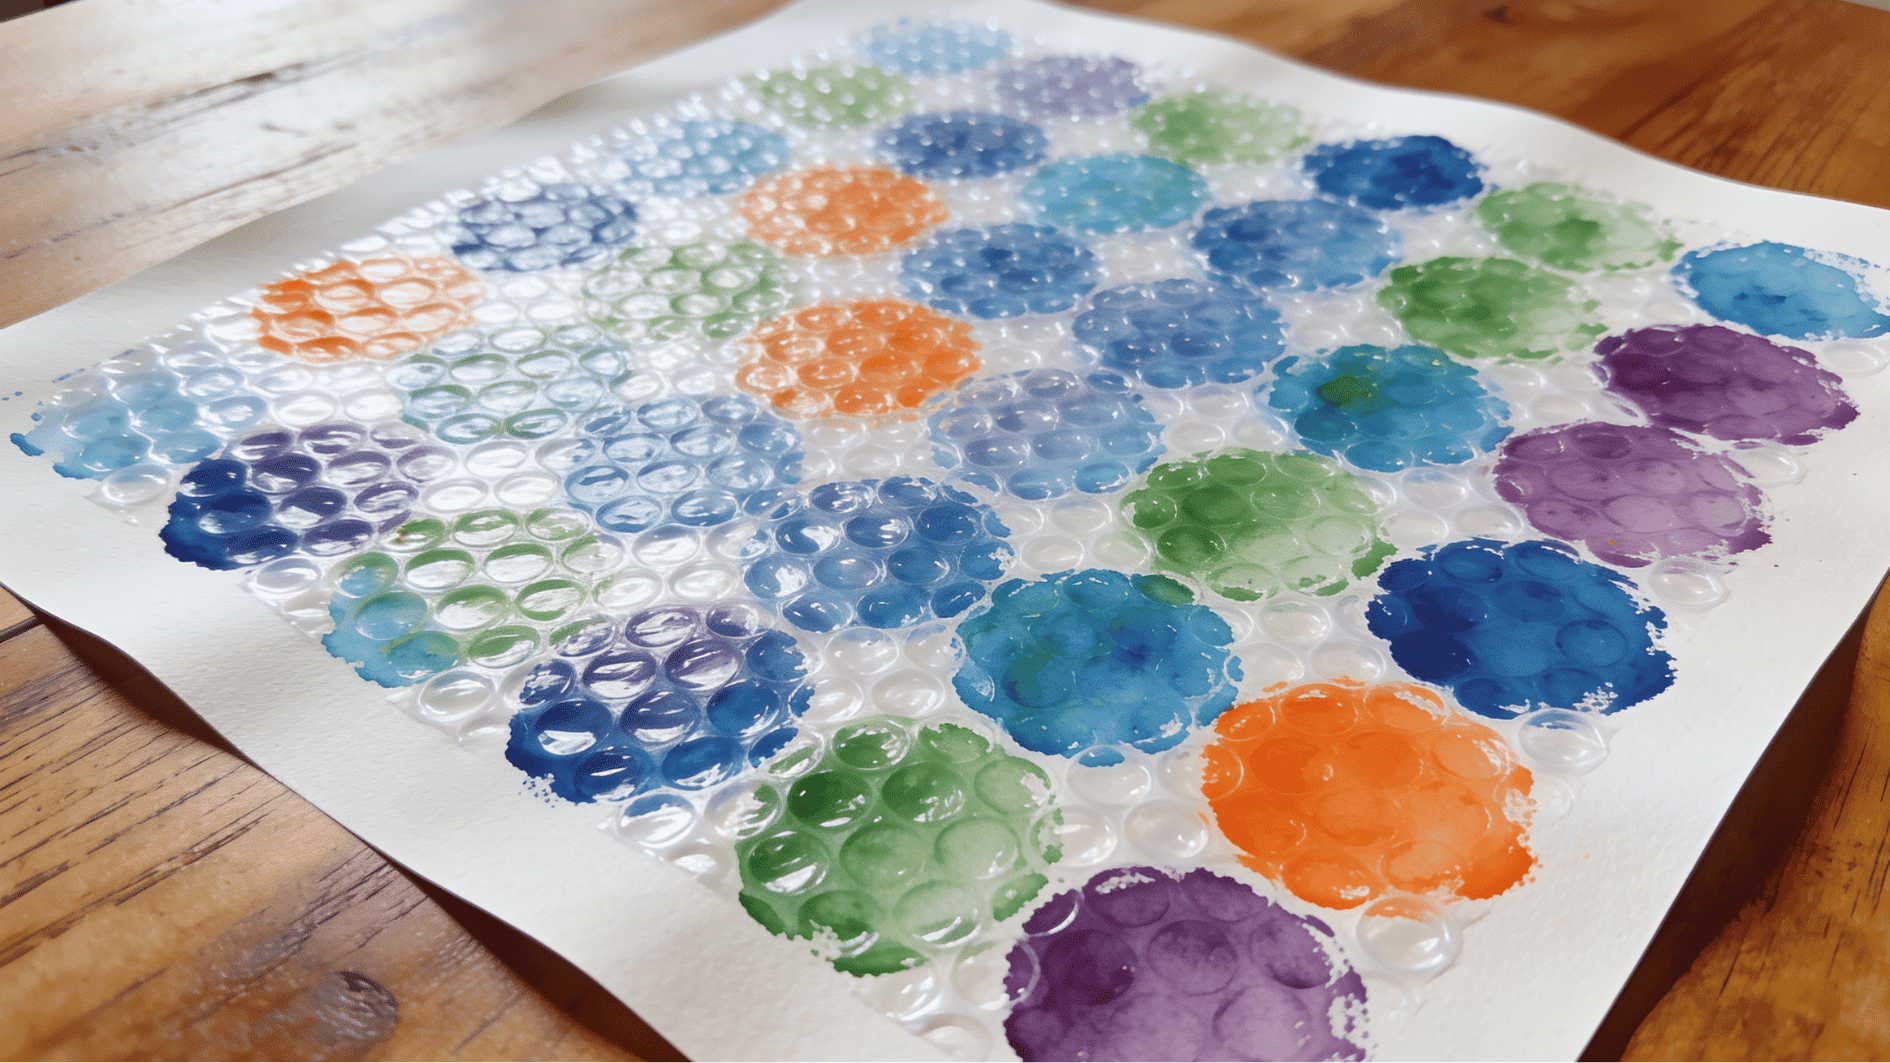
Bubble wrap dipped in paint creates the most satisfying textured prints in these projects that teach kids about texture, repetition, and abstract art.
Materials Required:
| Material | Quantity | Source |
|---|---|---|
| Bubble wrap pieces | 2–3 sheets | Packaging from deliveries |
| Tempera or acrylic paint | 3–4 colors | Craft store |
| Thick white paper or canvas | 2–3 sheets | Craft or stationery store |
| Shallow paint trays | 3 | Home kitchen |
| Tape | 1 roll | Home |
How to Make It:
- Tape bubble wrap flat onto a hard surface
- Roll or brush paint evenly over bubbles
- Press the painted side firmly onto paper
- Lift the bubble wrap slowly and carefully off
- Repeat with a different color alongside
- Overlap prints for a layered abstract effect
- Let the finished artwork dry completely flat
15. Plastic Straw Weavings
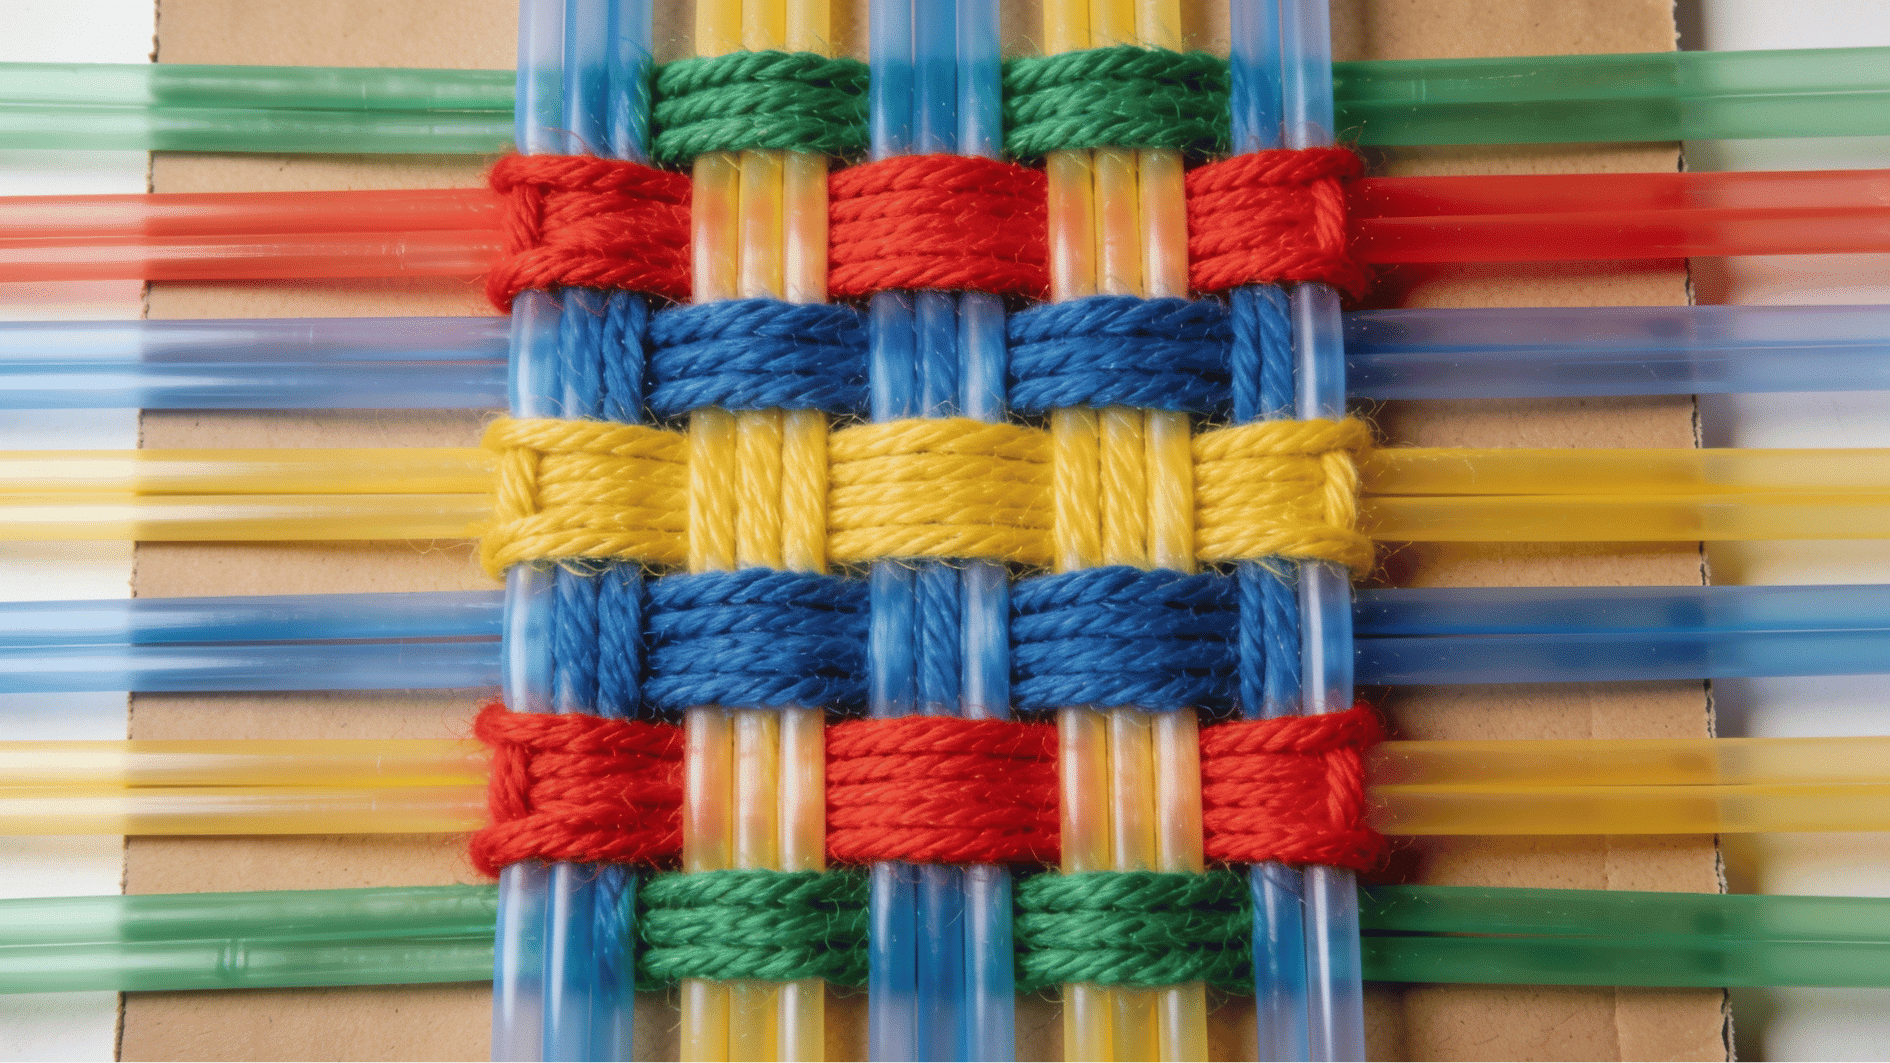
Plastic straws from takeaway bags become the loom in these recycled art projects that quietly teach kids the fundamentals of weaving, pattern repetition, and color sequencing.
Materials Required:
| Material | Quantity | Source |
|---|---|---|
| Plastic drinking straws | 6–8 | Takeaway packaging |
| Yarn or wool scraps | Assorted colors | Home or craft store |
| Scissors | 1 pair | Home |
| Tape | 1 roll | Home |
| Cardboard backing (optional) | 1 piece | Old box |
How to Make It:
- Line straws up parallel side by side
- Tape straw tops onto the cardboard backing
- Thread yarn under and over each straw
- Push each row of yarn tightly together
- Switch yarn colors to create stripe patterns
- Continue weaving until straws are covered
- Tie off the yarn ends and trim neatly
16. Tin Foil Embossed Art
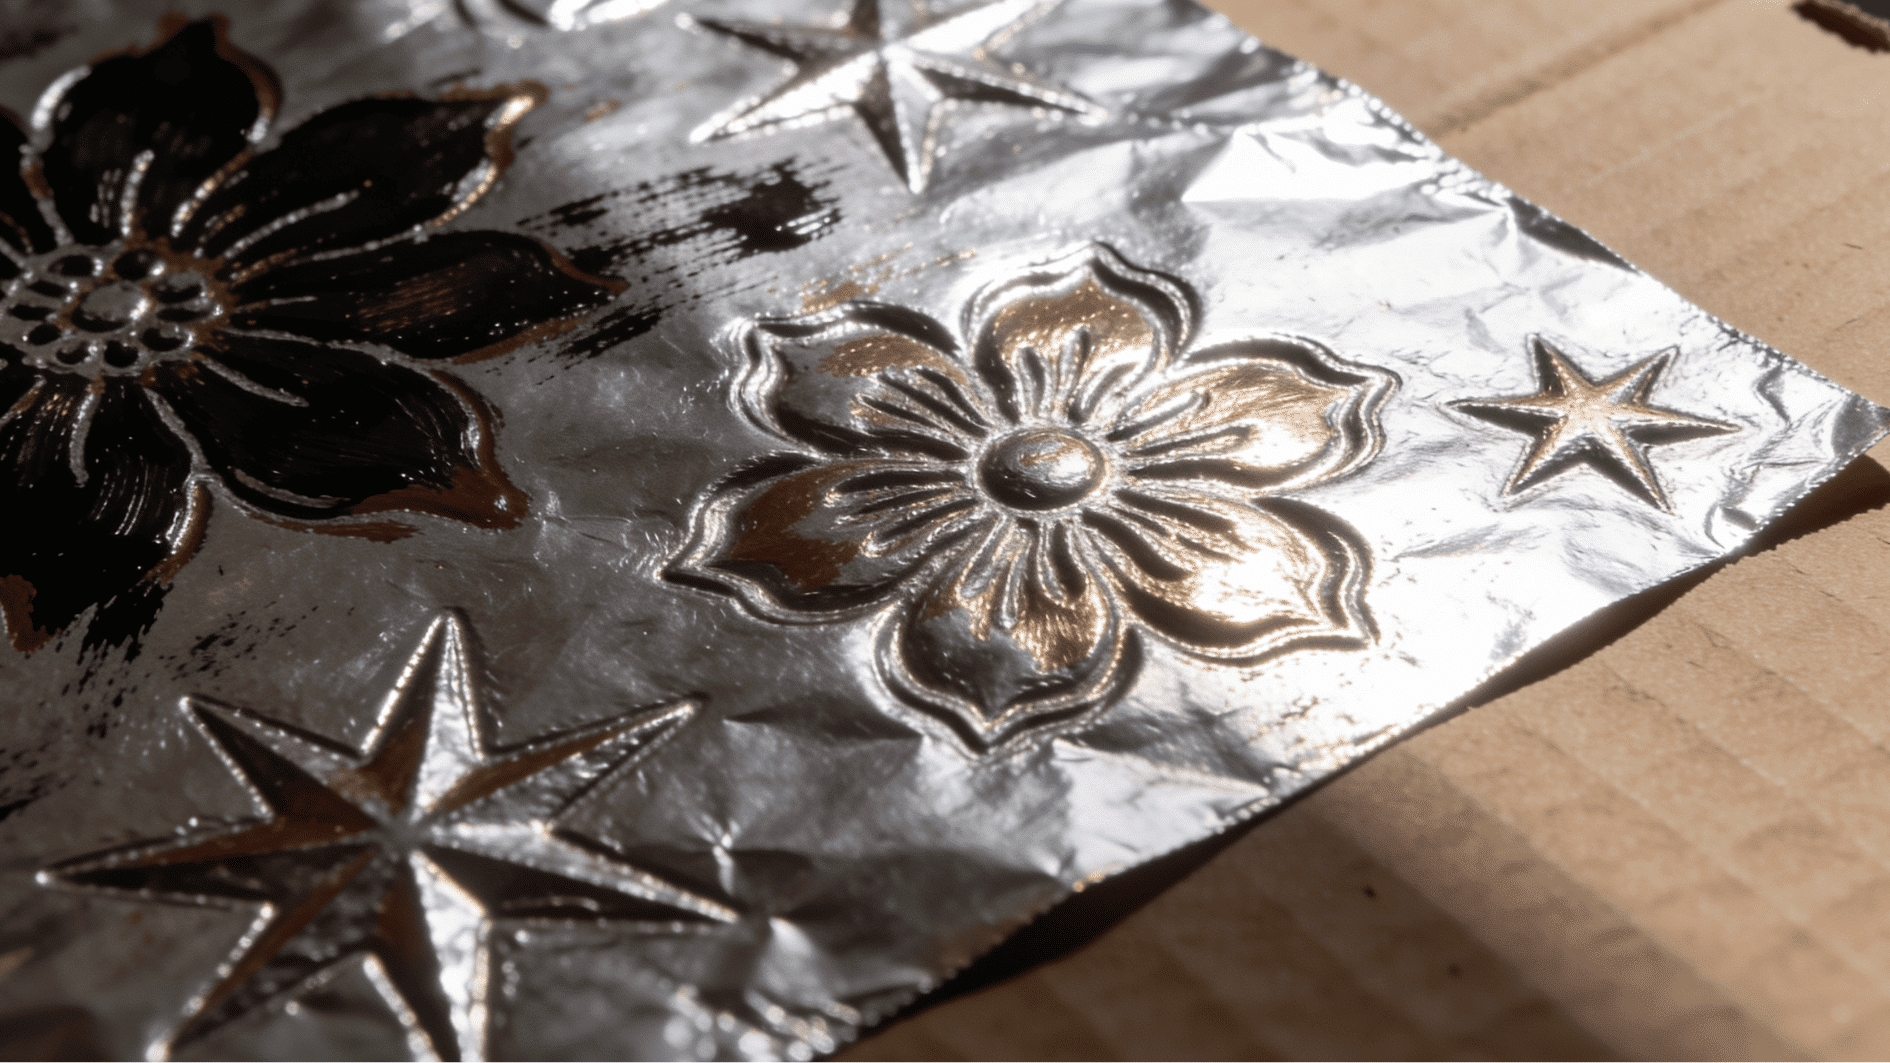
Aluminum foil from the kitchen becomes a shimmering canvas in this project that introduces kids to embossing, relief art, and metallic texture effects.
Materials Required:
| Material | Quantity | Source |
|---|---|---|
| Aluminum foil sheets | 3–4 | Kitchen drawer |
| Thick cardboard | 1 piece | Old packaging |
| Craft glue | 1 bottle | Craft store |
| Old ballpoint pen | 1 | Home |
| Acrylic paint and cloth | Assorted | Craft store |
How to Make It:
- Glue raised design shapes onto cardboard
- Let the glue-built design dry fully overnight
- Lay a foil sheet over the dried design
- Press foil gently down over all shapes
- Rub foil carefully to reveal the raised pattern
- Brush diluted paint over the foil surface
- Wipe back paint to highlight raised areas
17. Paper Roll Binoculars
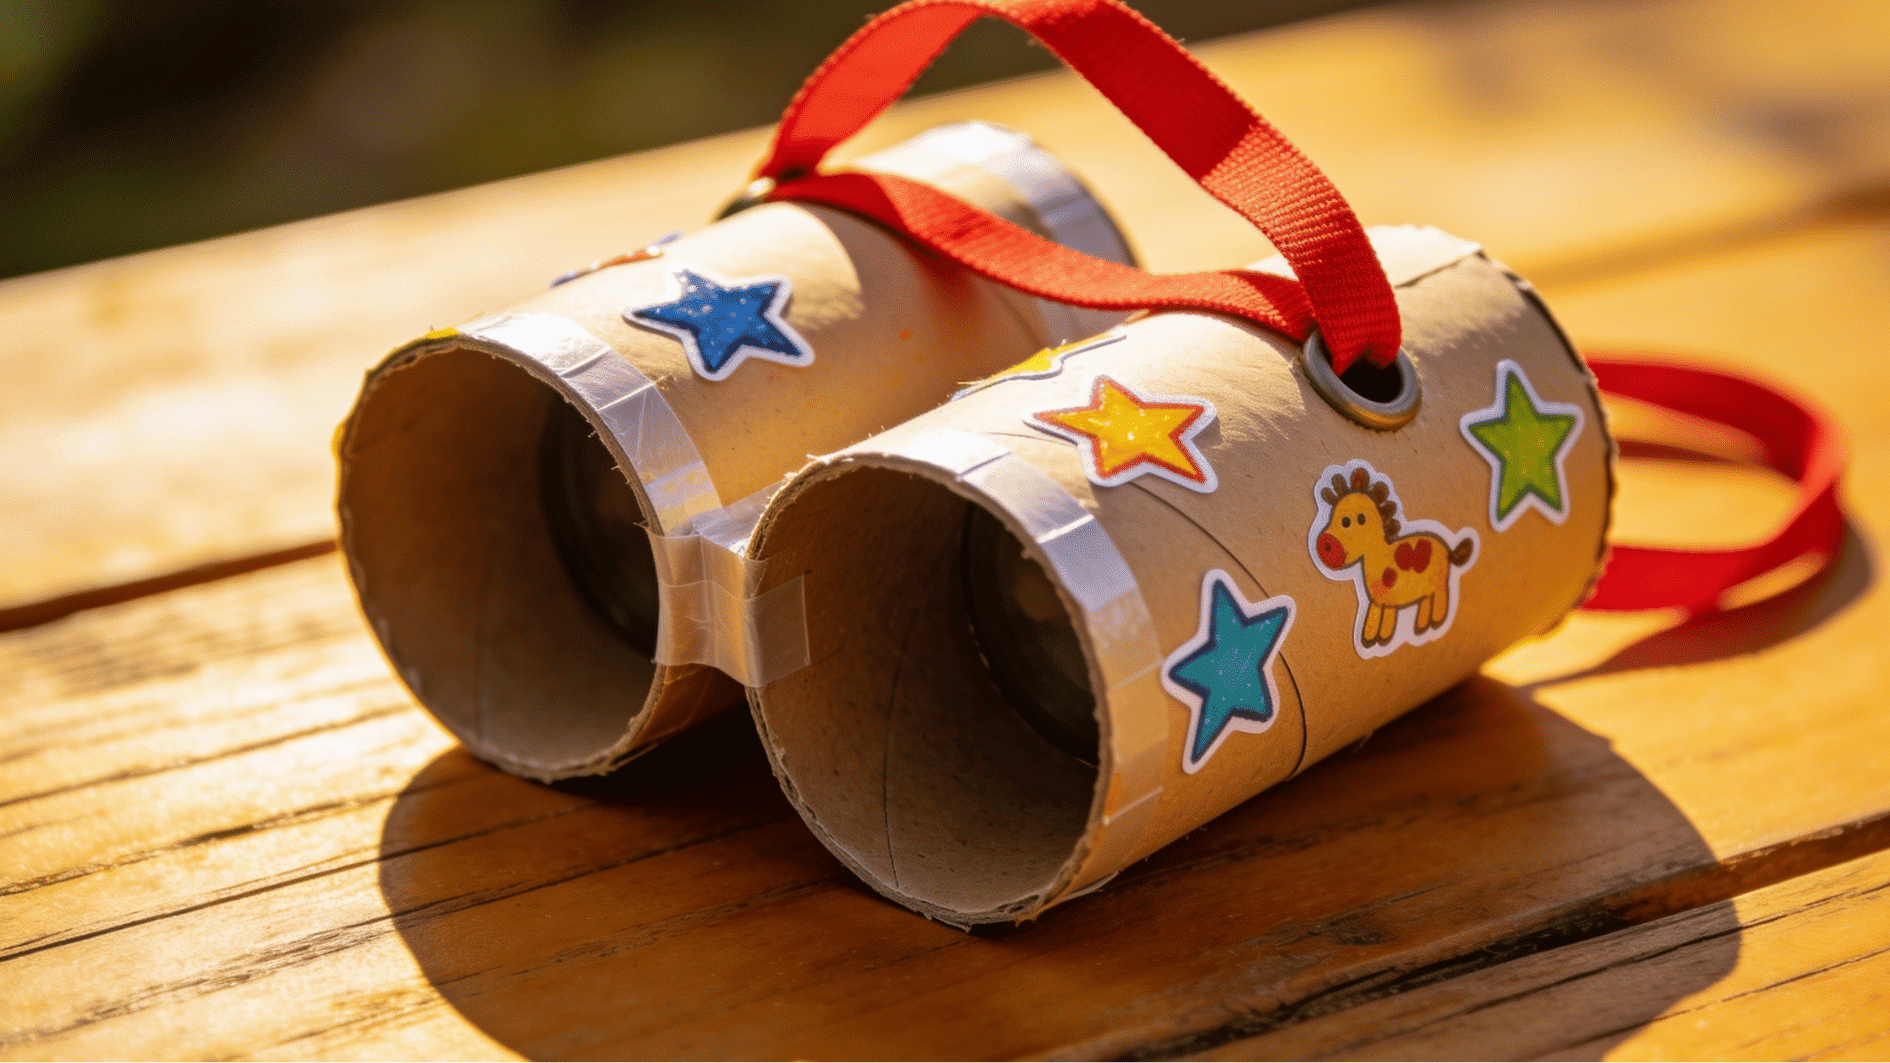
Two cardboard rolls taped together become adventure binoculars in these simple projects that spark imaginative outdoor play the moment the craft is finished.
Materials Required:
| Material | Quantity | Source |
|---|---|---|
| Cardboard tubes | 2 | Toilet paper rolls |
| Acrylic or poster paint | 2–3 colors | Craft store |
| Tape or craft glue | 1 roll/bottle | Home |
| String or ribbon | 40 cm | Home or craft store |
| Stickers or markers | Assorted | Home |
How to Make It:
- Paint both cardboard tubes in matching colors
- Let tubes dry completely before assembling
- Tape or glue both tubes firmly side by side
- Decorate tubes with stickers and markers
- Punch one hole on each outer tube side
- Thread the string through both holes evenly
- Tie the string ends to create a neck strap
18. Junk Mail Collage Landscape
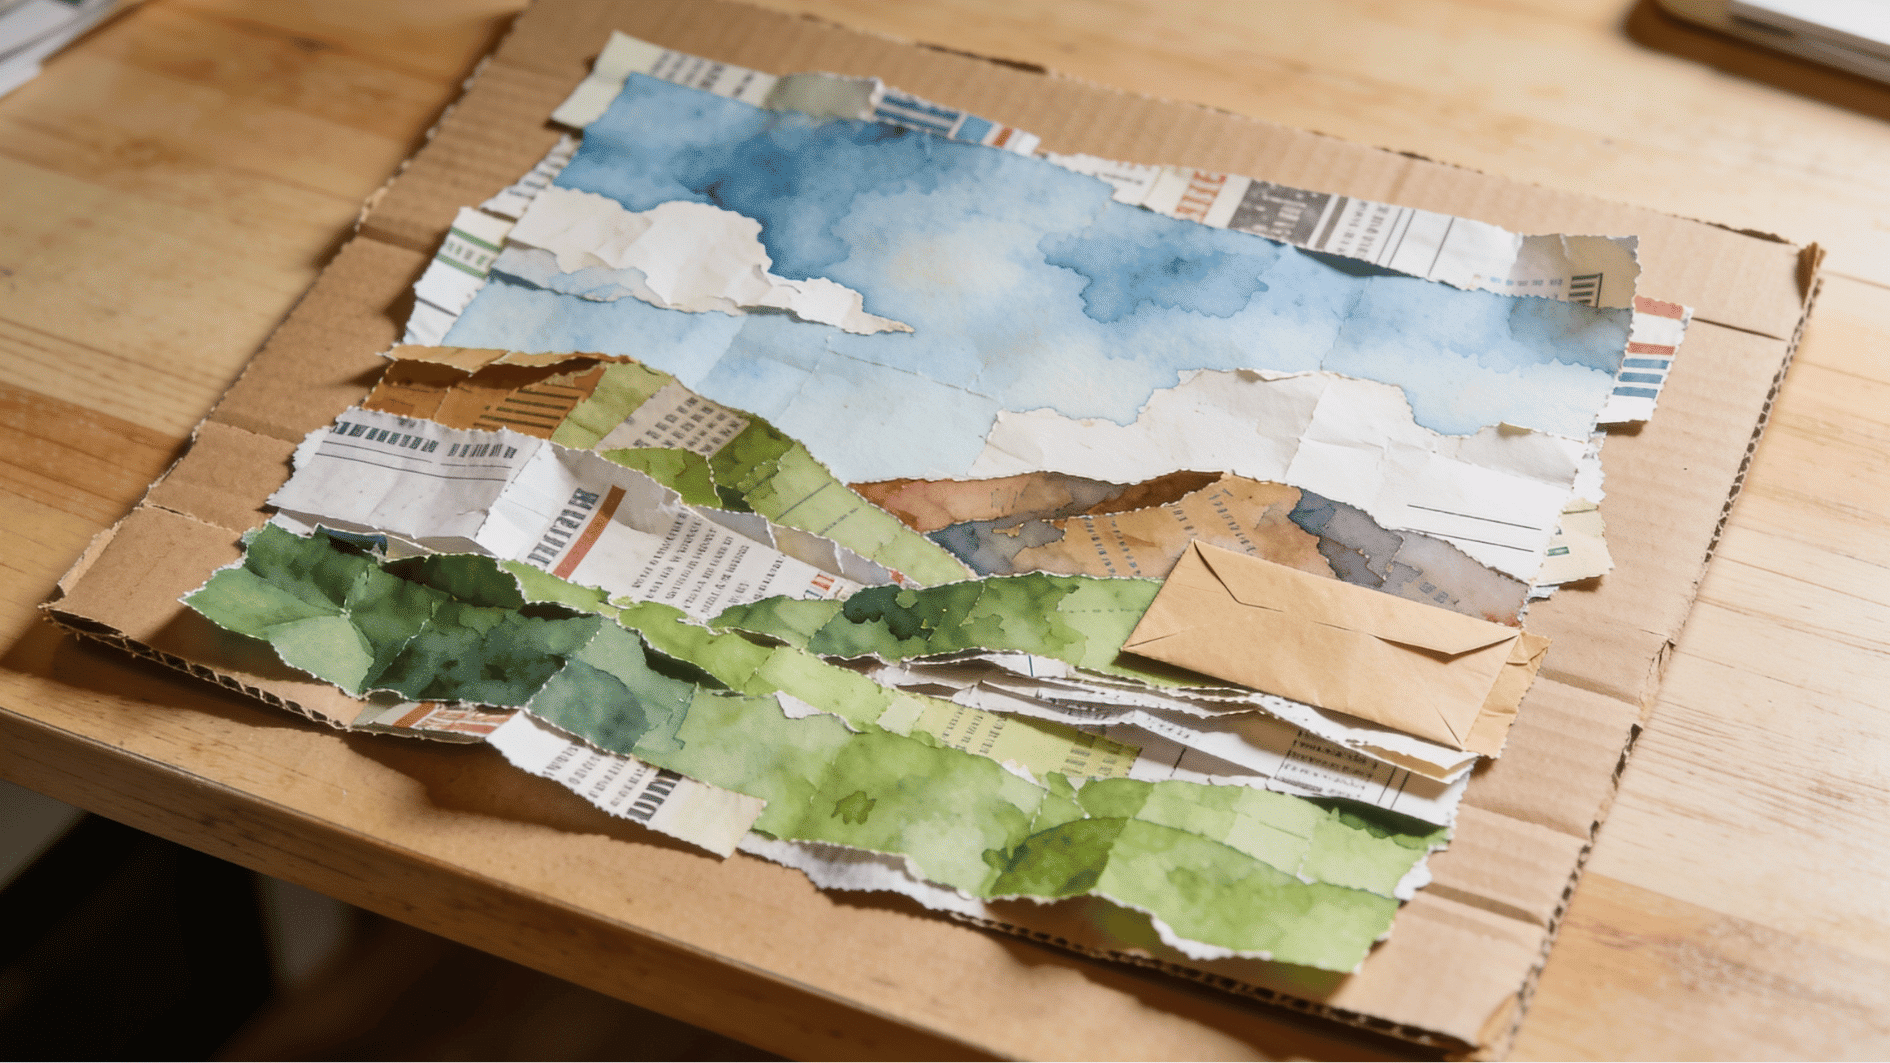
Junk mail, envelopes, and old leaflets become raw material for layered landscape scenes in it that teach kids about foreground, background, and color perspective.
Materials Required:
| Material | Quantity | Source |
|---|---|---|
| Junk mail and old envelopes | Large handful | Home letterbox pile |
| Cardboard base | 1 piece | Old cereal box |
| Craft glue or glue stick | 1 | Home |
| Scissors | 1 pair | Home |
| Watercolor paint (optional) | 1 set | Craft store |
How to Make It:
- Sort junk mail pieces by dominant color
- Cut sky, hill, and ground strip shapes
- Glue the sky strip across the top section
- Layer hill shapes below the sky strip
- Add foreground strips along the bottom
- Glue torn paper trees and the sun on top
- Add watercolor washes for extra depth
19. Fabric Scrap Bookmark
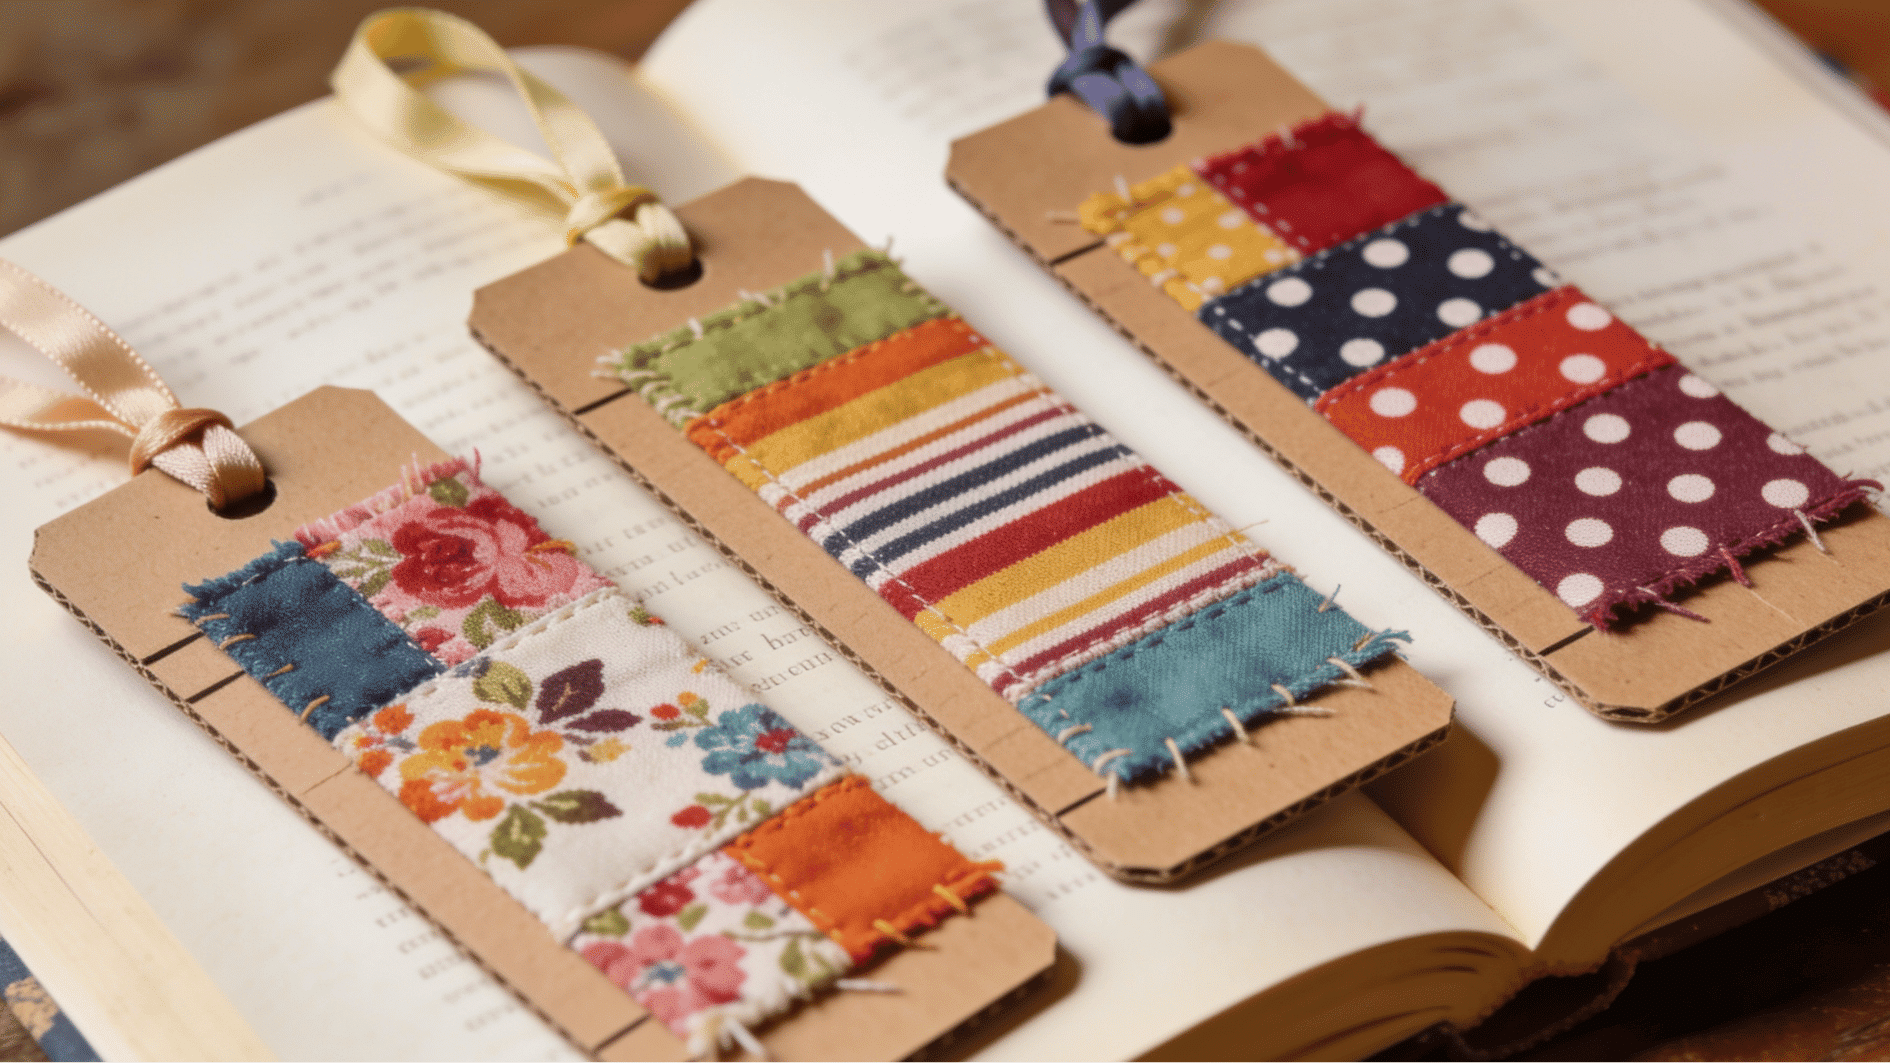
Leftover fabric from old clothes makes the most colorful and tactile bookmarks in these recycled art projects that are quick enough to complete in a single short sitting.
Materials Required:
| Material | Quantity | Source |
|---|---|---|
| Fabric scraps | Small assorted pieces | Old clothes or linen |
| Thick card strip | 1 per bookmark | Cereal or cracker box |
| Fabric glue | 1 bottle | Craft store |
| Scissors | 1 pair | Home |
| Ribbon | 10 cm per bookmark | Old gift wrapping |
How to Make It:
- Cut cardboard into long bookmark-sized strips
- Cut fabric scraps into small, varied pieces
- Brush fabric glue over the entire card strip
- Press fabric pieces onto the glued strip
- Overlap fabrics to cover all card edges
- Let the glue dry completely before handling
- Punch a hole at the top and thread the ribbon through
20. Egg Carton Caterpillar

Egg carton segments joined in a line make the most adorable caterpillars in these, which are ideal as a first craft project for very young children.
Materials Required:
| Material | Quantity | Source |
|---|---|---|
| Egg carton | 1 full tray | Used grocery packaging |
| Tempera paint | 4–5 colors | Craft store |
| Pipe cleaners | 3–4 | Craft store |
| Googly eyes | 2 | Craft store |
| Craft glue | 1 bottle | Craft store |
How to Make It:
- Cut the egg carton into one long connected strip
- Paint each segment a different bright color
- Let all segments dry completely before decorating
- Glue two googly eyes on the first segment
- Poke pipe cleaners through the top as antennae
- Bend pipe cleaner ends into small curls
- Add pipe cleaner legs along the body sides
21. Cardboard Roll Rocket
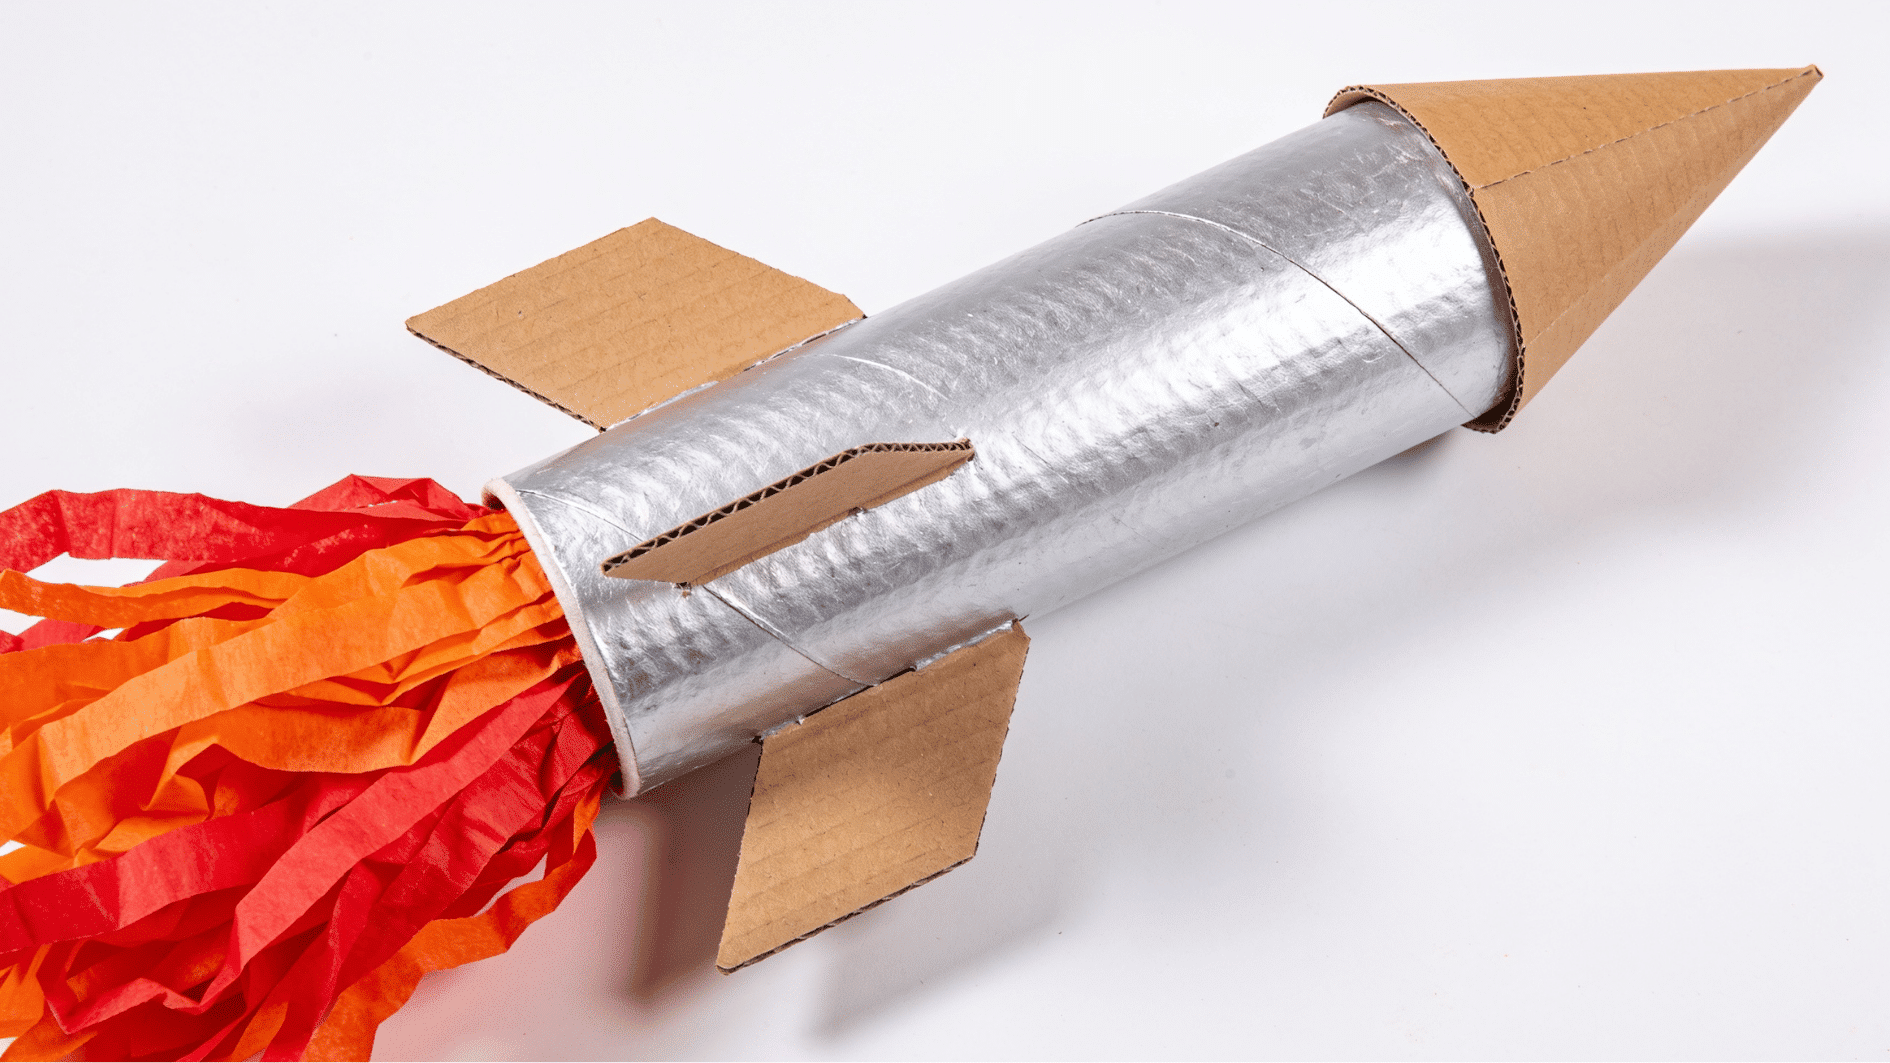
Cardboard tubes and cones come together in these space-themed art projects that fire up kids’ imagination about science, space exploration, and engineering in a truly hands-on way.
Materials Required:
| Material | Quantity | Source |
|---|---|---|
| Cardboard tubes (large) | 1–2 | Paper towel rolls |
| Cone-shaped card | 1 | Rolled from scrap card |
| Red and orange tissue paper | 2 sheets | Craft store |
| Acrylic paint | 3–4 colors | Craft store |
| Craft glue | 1 bottle | Craft store |
How to Make It:
- Paint the main cardboard tube your rocket color
- Roll scrap card into a pointed cone shape
- Glue the cone firmly onto the tube top
- Cut fin shapes from spare flat cardboard
- Glue three fins evenly around the tube bottom
- Scrunch tissue paper into flame shapes
- Glue tissue flames inside the rocket base
It’s a Wrap
Who knew a plastic bottle could become a bird feeder or an old sock could turn into a whole puppet show cast?
These recycled art projects do something pretty special: they teach kids that ordinary things aren’t really ordinary at all. Every tin can, every cereal box, every scrap of fabric has a second life just waiting to happen.
And the craziest part is that your kids figured that out themselves, with their own hands.
So next time something’s headed for the bin, maybe pause for a second. There might just be a rocket ship, a lantern, or a caterpillar in there.
Frequently Asked Questions
At What Age Can Kids Start Doing Recycled Art Projects?
Most projects work well for kids aged 4 and above, with simpler ones suitable for children as young as 3.
Do Kids Need Adult Supervision for All These Projects?
Only projects involving craft knives, hammers, or nails strictly require a grown-up present.
How Long Does a Typical Project Take to Complete?
Most wrap up in 30 to 60 minutes, though papier-mâché projects may need an overnight drying break.